Note
Hello, welcome to the SunFounder Raspberry Pi & Arduino & ESP32 Enthusiasts Community on Facebook! Dive deeper into Raspberry Pi, Arduino, and ESP32 with fellow enthusiasts.
Why Join?
Expert Support: Solve post-sale issues and technical challenges with help from our community and team.
Learn & Share: Exchange tips and tutorials to enhance your skills.
Exclusive Previews: Get early access to new product announcements and sneak peeks.
Special Discounts: Enjoy exclusive discounts on our newest products.
Festive Promotions and Giveaways: Take part in giveaways and holiday promotions.
👉 Ready to explore and create with us? Click [here] and join today!
8.7 ESP Camera with Telegram Bot
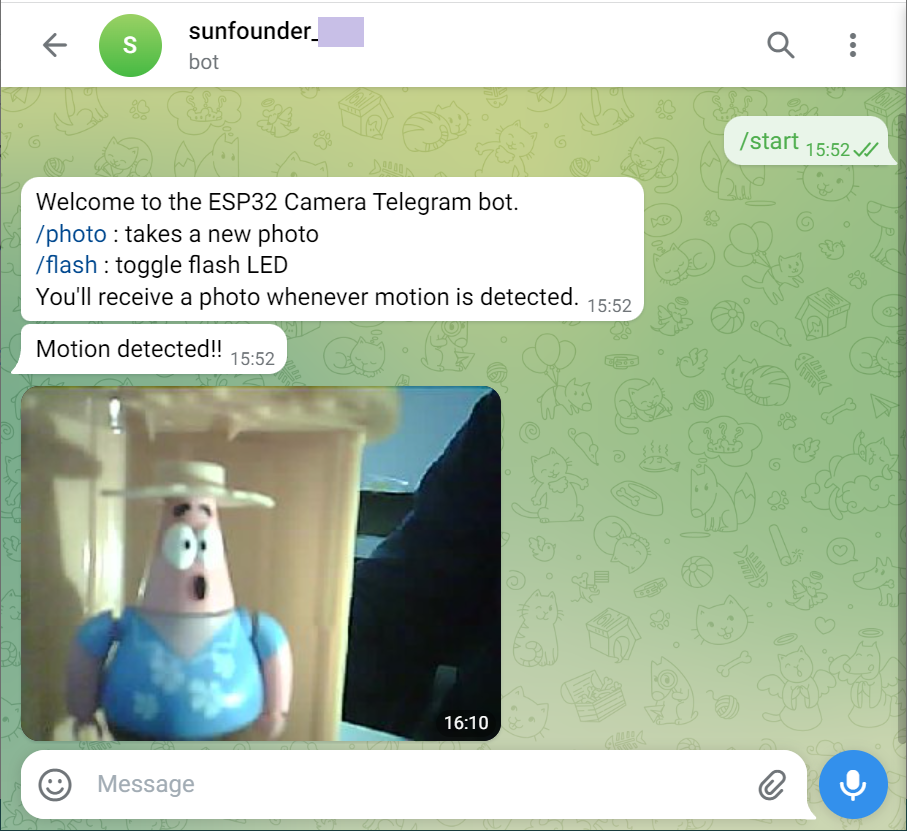
In this project, we’ll demonstrate how to integrate the ESP32 with your favorite messaging application. For this demonstration, we’re using Telegram.
Create a Telegram Bot, allowing you to control your circuit from anywhere, capture photos, and manage the flash. Moreover, whenever someone passes by your device, it will snap a new photo and send a notification to your Telegram account.
Required Components
In this project, we need the following components.
It’s definitely convenient to buy a whole kit, here’s the link:
Name |
ITEMS IN THIS KIT |
LINK |
|---|---|---|
ESP32 Starter Kit |
320+ |
You can also buy them separately from the links below.
COMPONENT INTRODUCTION |
PURCHASE LINK |
|---|---|
Creating a Telegram Bot
Head to Google Play or the App Store and download and install Telegram.
Search for
botfatherin the Telegram app, and once it appears, click on it to open. or you can directly access this link: t.me/botfather.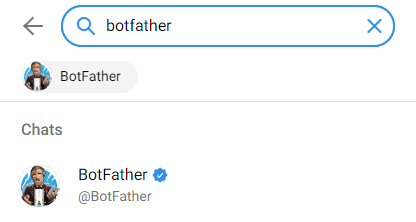
Upon opening, you’ll be presented with a chat window. Send the command
/start.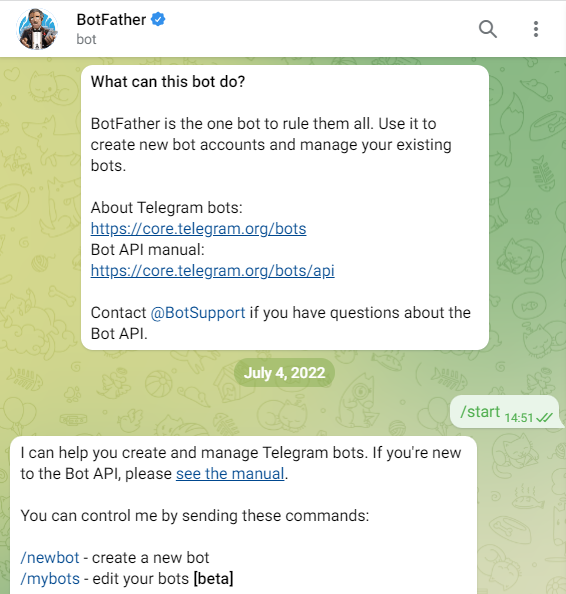
Enter
/newbotand follow the provided instructions to create your bot. Once successful, the BotFather will provide you with the access link and API for your new bot.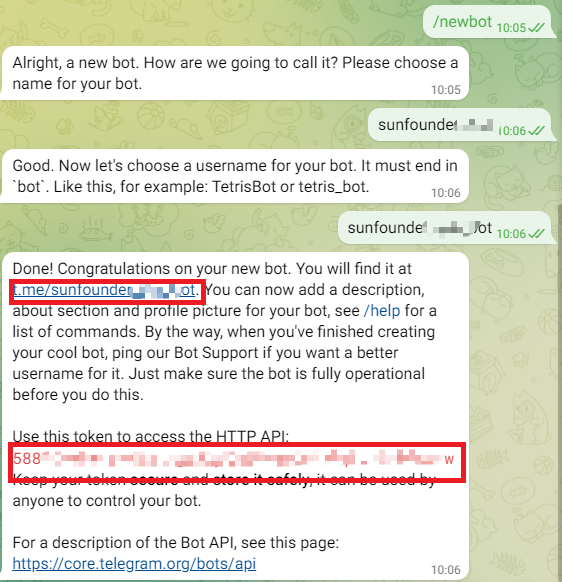
Authorizing Telegram Users
As anyone can interact with the bot you’ve created, there’s a risk of information leakage. To address this, we want the bot to only respond to authorized users.
In your Telegram account, search for
IDBotor open the link: t.me/myidbot.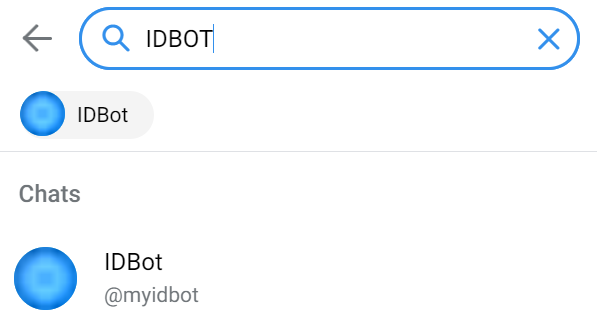
Send the command
/getid. Save the provided ID for later use in our program.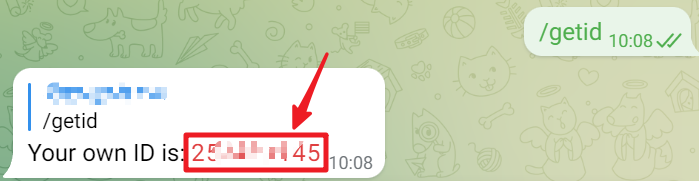
Upload the Code
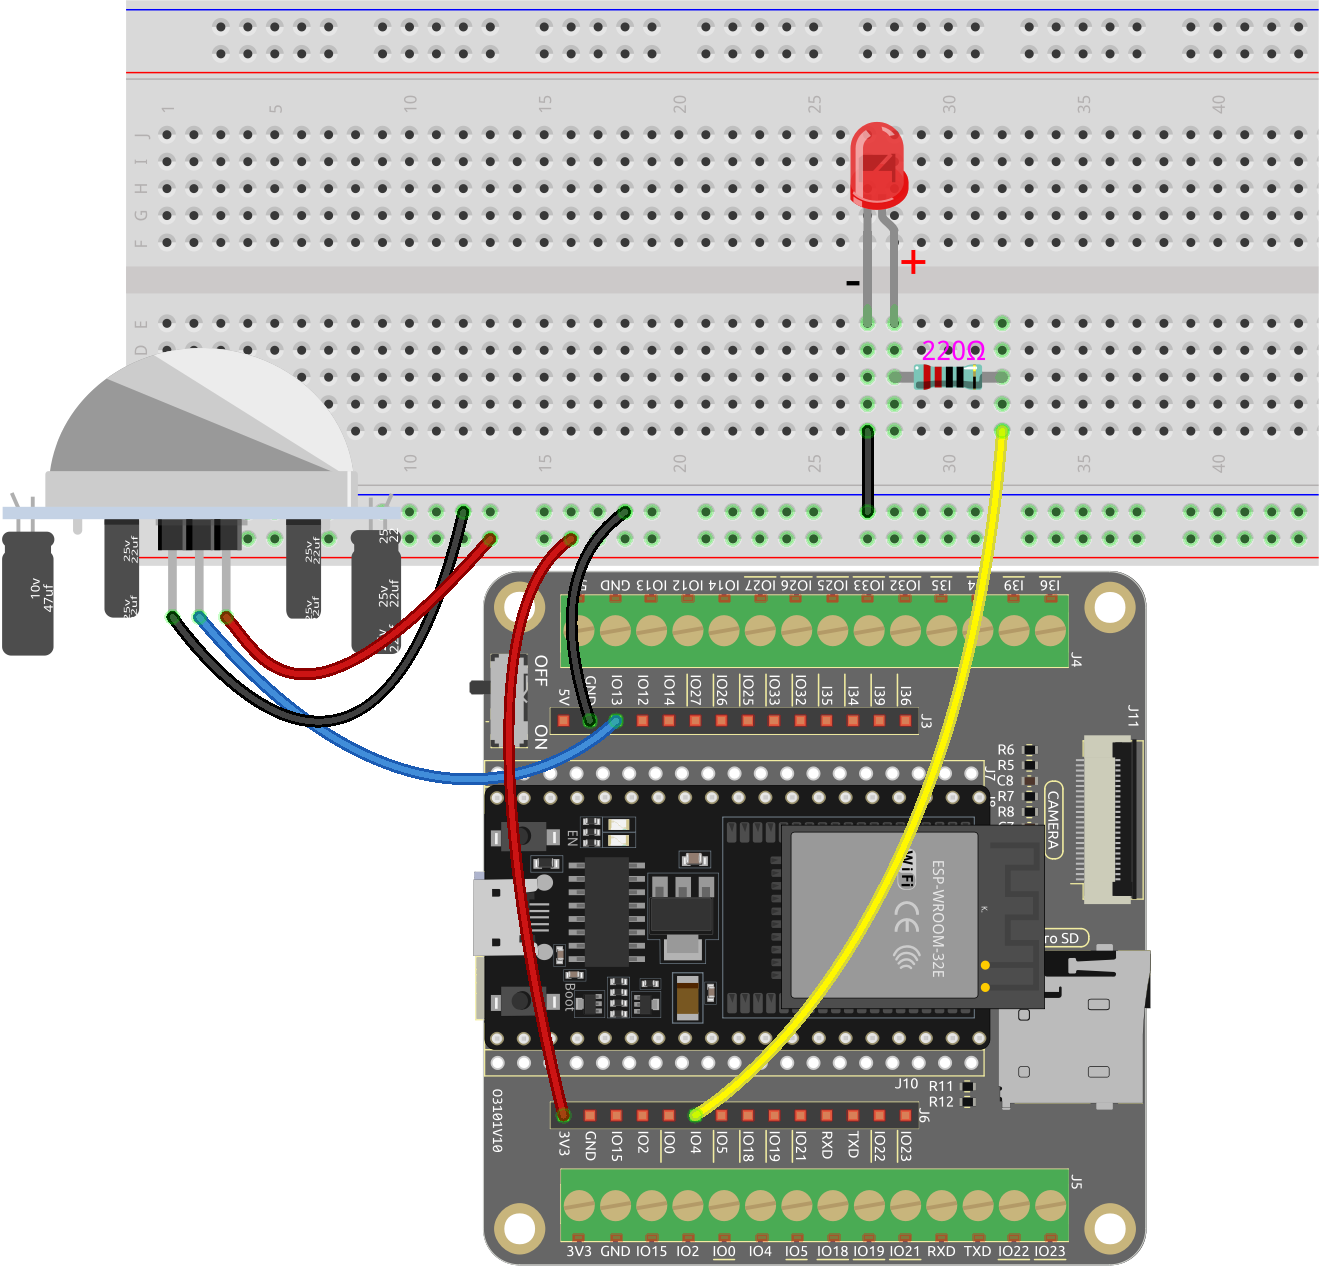
First plug in the camera.
Build the circuit.
Open the code.
Open the
iot_7_cam_telegram.inofile located in theesp32-starter-kit-main\c\codes\iot_7_cam_telegramdirectory, or copy the code into the Arduino IDE.After selecting the board (ESP32 Dev Module) and the appropriate port, click the Upload button.
The
UniversalTelegramBotandArduinoJsonlibraries are used here, you can install them from the Library Manager.
Locate and modify the following lines with your WiFi details, replacing
SSIDandPASSWORD:// Replace the next variables with your SSID/Password combination const char* ssid = "SSID"; const char* password = "PASSWORD";
Update the next line, replacing
CHATIDwith your Telegram ID, which you obtained from @IDBot.// Use @myidbot to find out the chat ID of an individual or a group // Also note that you need to click "start" on a bot before it can // message you String chatId = "CHATID";
Update the next line, substituting
BOTTOKENwith the token of your Telegram BOT, which was provided by @BotFather.// Initialize Telegram BOT String BOTtoken = "BOTTOKEN";
After selecting the correct board (ESP32 Dev Module) and port, click the Upload button.
Open the Serial Monitor. If an IP address is printed, this indicates successful execution.
Connecting to xxxx
ESP32-CAM IP Address: 192.168.18.76
Init Done!
Now, you can interact with your ESP32 via Telegram.