Note
Hello, welcome to the SunFounder Raspberry Pi & Arduino & ESP32 Enthusiasts Community on Facebook! Dive deeper into Raspberry Pi, Arduino, and ESP32 with fellow enthusiasts.
Why Join?
Expert Support: Solve post-sale issues and technical challenges with help from our community and team.
Learn & Share: Exchange tips and tutorials to enhance your skills.
Exclusive Previews: Get early access to new product announcements and sneak peeks.
Special Discounts: Enjoy exclusive discounts on our newest products.
Festive Promotions and Giveaways: Take part in giveaways and holiday promotions.
👉 Ready to explore and create with us? Click [here] and join today!
8.4 IoT Communication with MQTT
This project focuses on utilizing MQTT, a popular communication protocol in the Internet of Things (IoT) domain. MQTT enables IoT devices to exchange data using a publish/subscribe model, where devices communicate through topics.
In this project, we explore the implementation of MQTT by building a circuit that includes an LED, a button, and a thermistor. The ESP32 board microcontroller is used to establish a connection to WiFi and communicate with an MQTT broker. The code allows the microcontroller to subscribe to specific topics, receive messages, and control the LED based on the received information. Additionally, the project demonstrates publishing temperature data from the thermistor to a designated topic when the button is pressed.
Required Components
In this project, we need the following components.
It’s definitely convenient to buy a whole kit, here’s the link:
Name |
ITEMS IN THIS KIT |
LINK |
|---|---|---|
ESP32 Starter Kit |
320+ |
You can also buy them separately from the links below.
COMPONENT INTRODUCTION |
PURCHASE LINK |
|---|---|
Code Upload
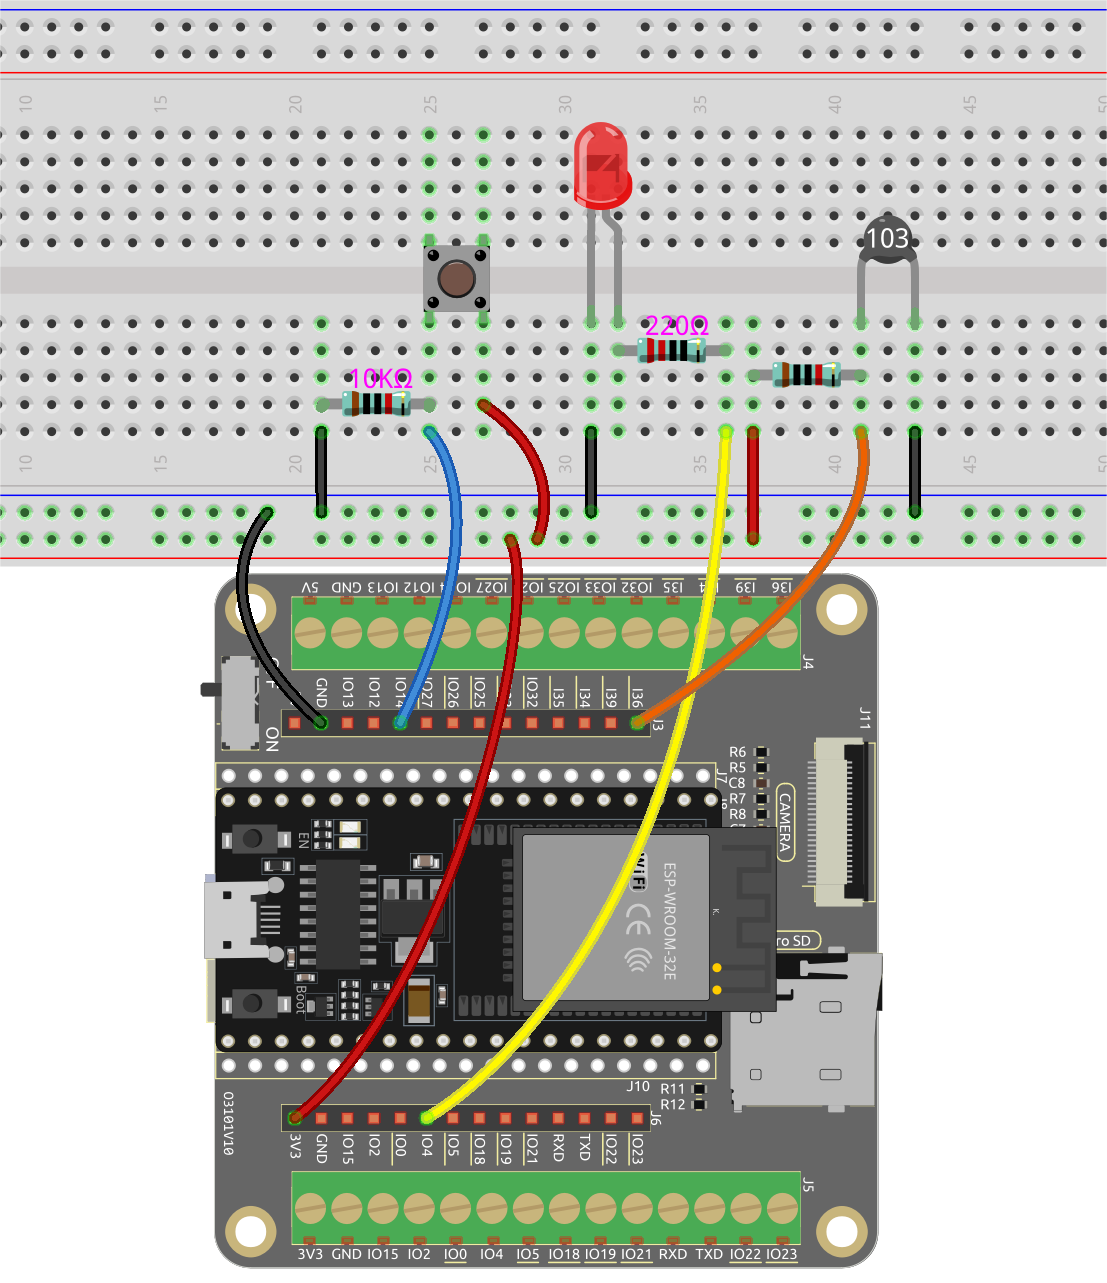
Build the circuit.
Note
When establishing a connection to WiFi, only the 36, 39, 34, 35, 32, 33 pins can be employed for analog reading. Please ensure the thermistor is connected to these designated pins.
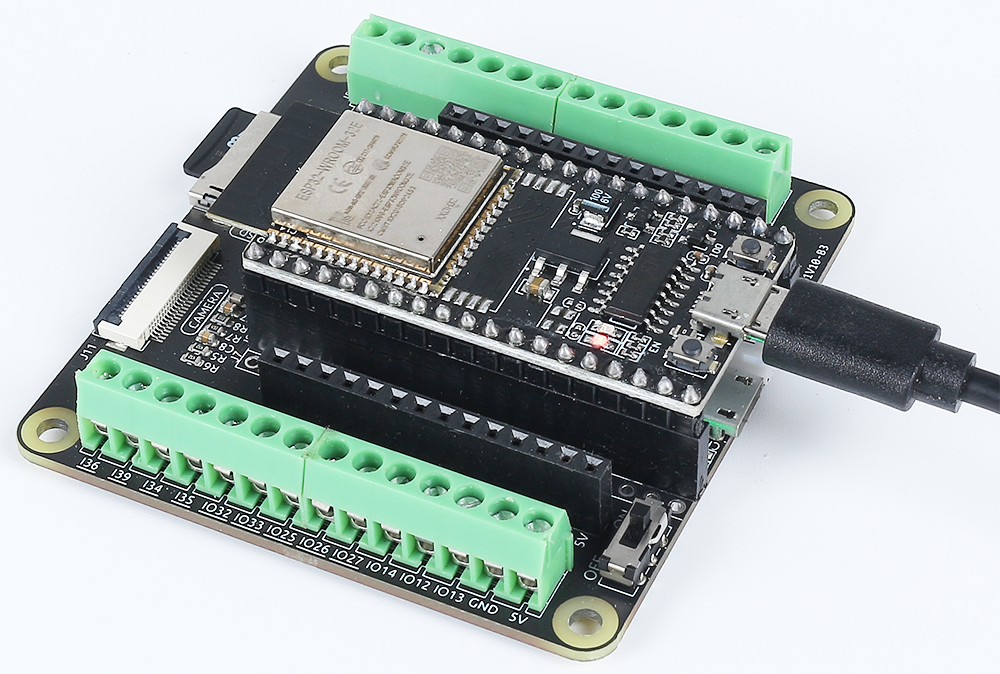
Then, connect ESP32 board to the computer using the USB cable.
Open the code.
Open the
iot_4_mqtt.inofile located in theesp32-starter-kit-main\c\codes\iot_4_mqttdirectory, or copy the code into the Arduino IDE.After selecting the board (ESP32 Dev Module) and the appropriate port, click the Upload button.
The
PubSubClientlibrary is used here, you can install it from the Library Manager.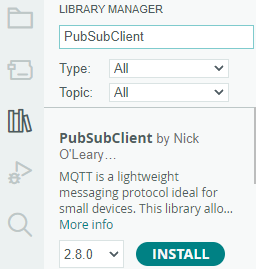
Locate the following lines and modify them with your
SSIDandPASSWORD.// Replace the next variables with your SSID/Password combination const char* ssid = "SSID"; const char* password = "PASSWORD";
Find the next line and modify your
unique_identifier. Guarantee that yourunique_identifieris truly unique as any IDs that are identical trying to log in to the same MQTT Broker may result in a login failure.// Add your MQTT Broker address, example: const char* mqtt_server = "broker.hivemq.com"; const char* unique_identifier = "sunfounder-client-sdgvsda";
Topic Subscription
To avoid interference from messages sent by other participants, you can set it as an obscure or uncommon string. Simply replace the current topic
SF/LEDwith your desired topic name.Note
You have the freedom to set the Topic as any character you desire. Any MQTT device that has subscribed to the identical Topic will be able to receive the same message. You can also simultaneously subscribe to multiple Topics.
void reconnect() {
    // Loop until we're reconnected
    while (!client.connected()) {
        Serial.print("Attempting MQTT connection...");
        // Attempt to connect
        if (client.connect(unique_identifier)) {
            Serial.println("connected");
            // Subscribe
            client.subscribe("SF/LED");
        } else {
            Serial.print("failed, rc=");
            Serial.print(client.state());
            Serial.println(" try again in 5 seconds");
            // Wait 5 seconds before retrying
            delay(5000);
        }
    }
}
Modify the functionality to respond to the subscribed topic. In the provided code, if a message is received on the topic
SF/LED, it checks whether the message isonoroff. Depending on the received message, it changes the output state to control the LED’s on or off status.Note
You can modify it for any topic you are subscribed to, and you can write multiple if statements to respond to multiple topics.
void callback(char* topic, byte* message, unsigned int length) {
    Serial.print("Message arrived on topic: ");
    Serial.print(topic);
    Serial.print(". Message: ");
    String messageTemp;

    for (int i = 0; i < length; i++) {
        Serial.print((char)message[i]);
        messageTemp += (char)message[i];
    }
    Serial.println();

    // If a message is received on the topic "SF/LED", you check if the message is either "on" or "off".
    // Changes the output state according to the message
    if (String(topic) == "SF/LED") {
        Serial.print("Changing state to ");
        if (messageTemp == "on") {
            Serial.println("on");
            digitalWrite(ledPin, HIGH);
        } else if (messageTemp == "off") {
            Serial.println("off");
            digitalWrite(ledPin, LOW);
        }
    }
}
After selecting the correct board (ESP32 Dev Module) and port, click the Upload button.
Open the serial monitor and if the following information is printed, it indicates a successful connection to the MQTT server.
WiFi connected
IP address:
192.168.18.77
Attempting MQTT connection...connected
Message Publication via HiveMQ
HiveMQ is a messaging platform that functions as an MQTT broker, facilitating fast, efficient, and reliable data transfer to IoT devices.
Our code specifically utilizes the MQTT broker provided by HiveMQ. We have included the address of the HiveMQ MQTT broker in the code as follows:
// Add your MQTT Broker address, example:
const char* mqtt_server = "broker.hivemq.com";
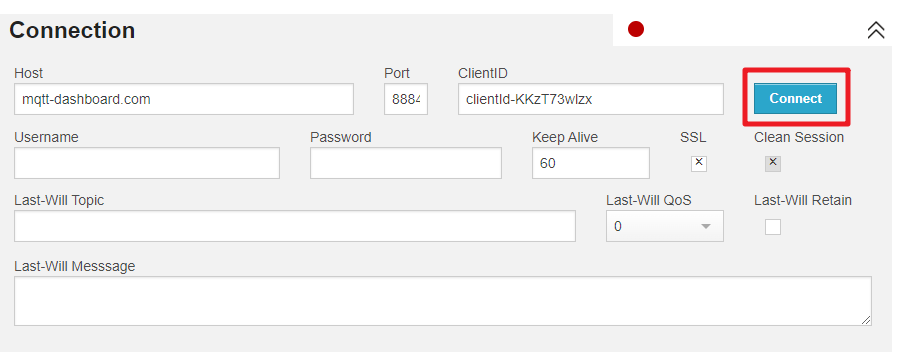
At present, open the HiveMQ Web Client in your web browser.
Connect the client to the default public proxy.
Publish a message in the Topic you have subscribed to. In this project, you can publish
onoroffto control your LED.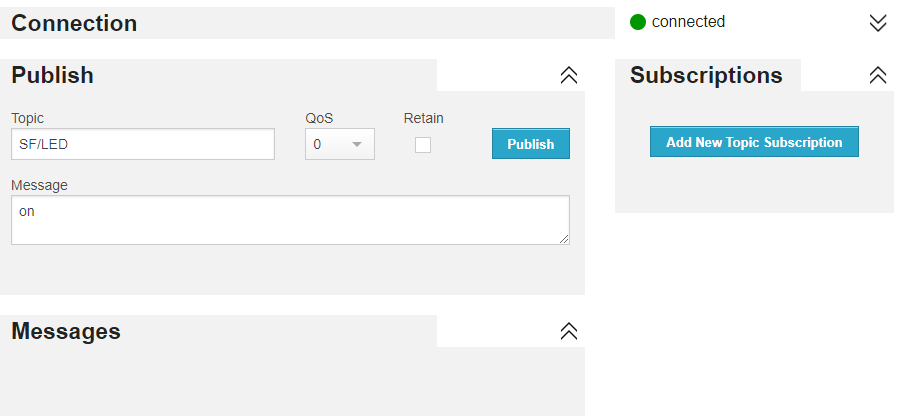
Message Publication to MQTT
We can also utilize the code to publish information to the Topic. In this demonstration, we have coded a feature that sends the temperature measured by the thermistor to the Topic when you press the button.
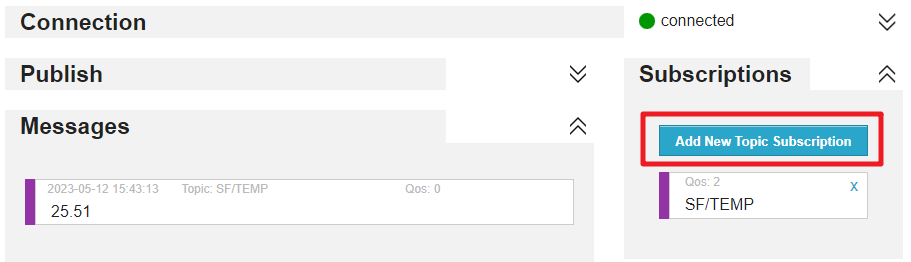
Click on Add New Topic Subscription.

Fill in the topics you desire to follow and click Subscribe. In the code, we send temperature information to the topic
SF/TEMP.void loop() { if (!client.connected()) { reconnect(); } client.loop(); // if the button pressed, publish the temperature to topic "SF/TEMP" if (digitalRead(buttonPin)) { long now = millis(); if (now - lastMsg > 5000) { lastMsg = now; char tempString[8]; dtostrf(thermistor(), 1, 2, tempString); client.publish("SF/TEMP", tempString); } } }
Hence, we can monitor this Topic on HiveMQ, allowing us to view the information you have published.