Note
Hello, welcome to the SunFounder Raspberry Pi & Arduino & ESP32 Enthusiasts Community on Facebook! Dive deeper into Raspberry Pi, Arduino, and ESP32 with fellow enthusiasts.
Why Join?
Expert Support: Solve post-sale issues and technical challenges with help from our community and team.
Learn & Share: Exchange tips and tutorials to enhance your skills.
Exclusive Previews: Get early access to new product announcements and sneak peeks.
Special Discounts: Enjoy exclusive discounts on our newest products.
Festive Promotions and Giveaways: Take part in giveaways and holiday promotions.
👉 Ready to explore and create with us? Click [here] and join today!
8.3 Custom Video Streaming Web Server
The Custom Video Streaming Web Server project offers an opportunity to learn how to create a web page from scratch and customize it to play video streams. Additionally, you can incorporate interactive buttons, such as ON and OFF, to control the LED’s brightness.
By building this project, you will gain hands-on experience in web development, HTML, CSS, and JavaScript. You will learn how to create a responsive web page that can display video streams in real-time. Moreover, you will discover how to integrate interactive buttons to control the LED’s state, providing a dynamic user experience.
Required Components
In this project, we need the following components.
It’s definitely convenient to buy a whole kit, here’s the link:
Name |
ITEMS IN THIS KIT |
LINK |
|---|---|---|
ESP32 Starter Kit |
320+ |
You can also buy them separately from the links below.
COMPONENT INTRODUCTION |
PURCHASE LINK |
|---|---|
How to do?
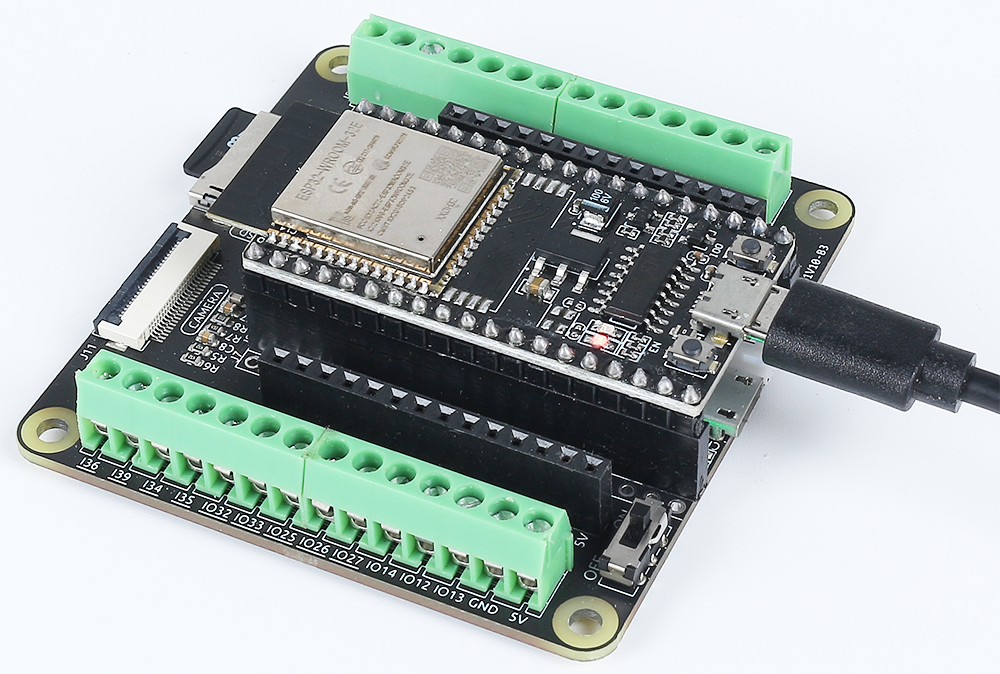
First plug in the camera.
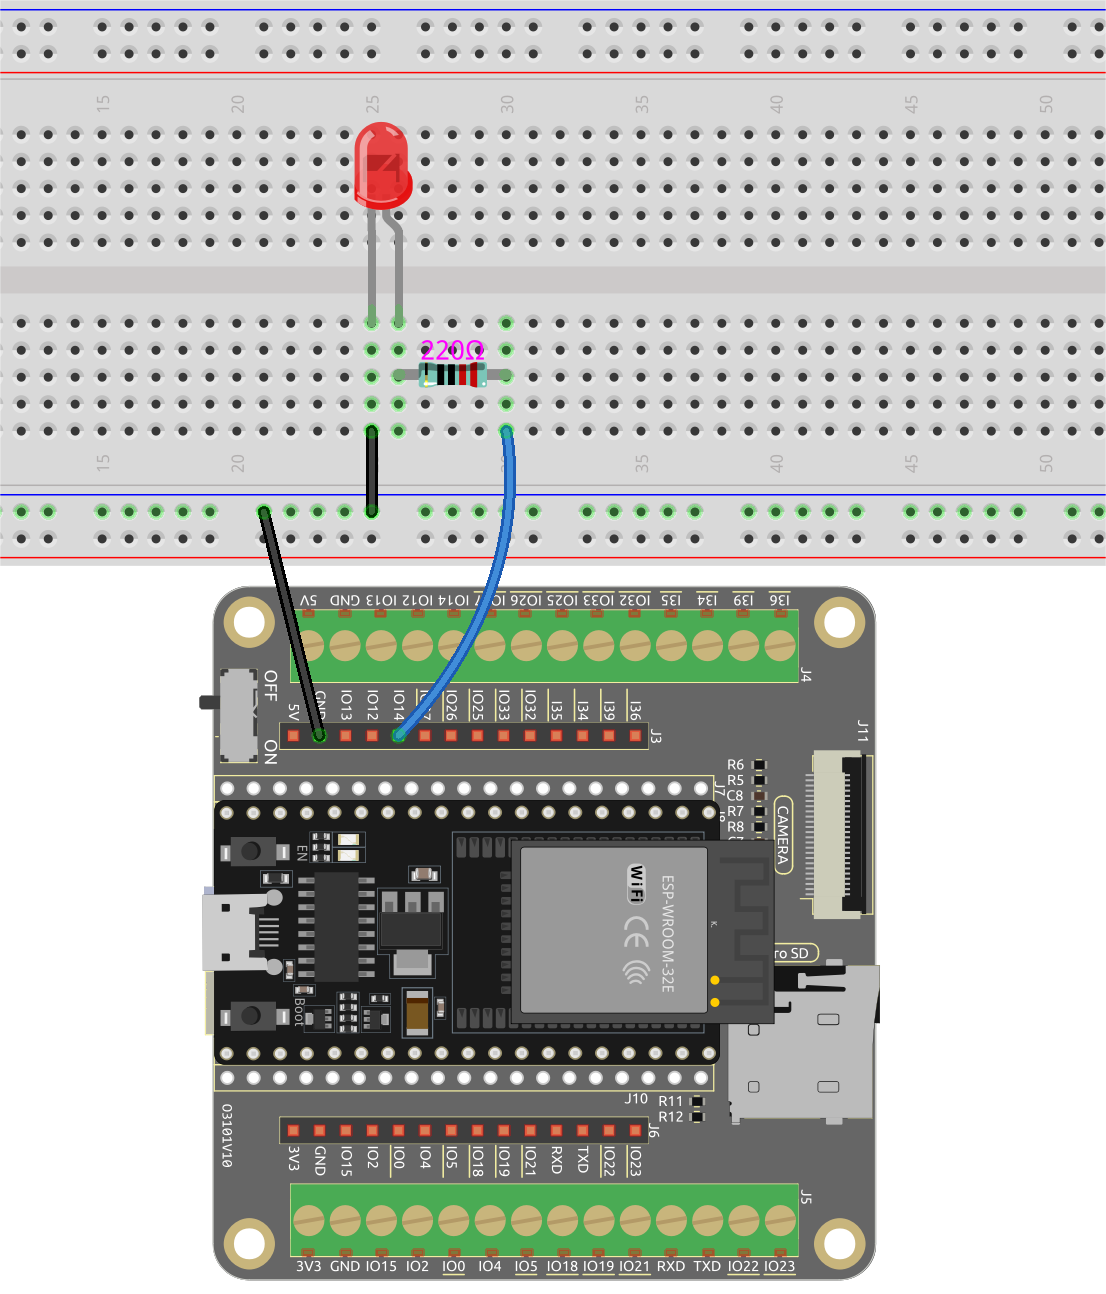
Build the circuit.
Then, connect ESP32 board to the computer using the USB cable.
Open the code.
Open the
iot_3_html_cam_led.inofile located in theesp32-starter-kit-main\c\codes\iot_3_html_cam_leddirectory, or copy the code into the Arduino IDE.After selecting the board (ESP32 Dev Module) and the appropriate port, click the Upload button.
Locate the following lines and modify them with your
SSIDandPASSWORD.// Replace the next variables with your SSID/Password combination const char* ssid = "SSID"; const char* password = "PASSWORD";
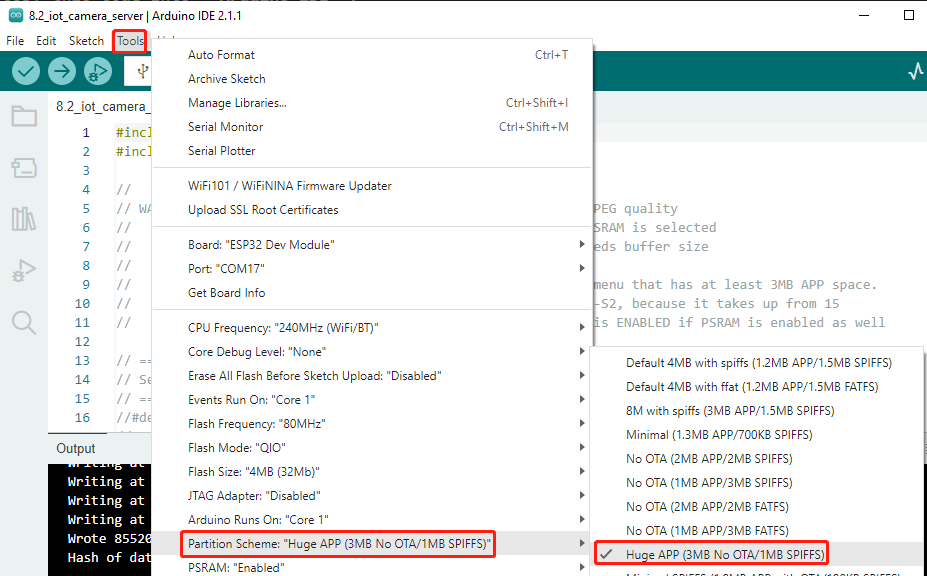
Now, enable PSRAM.
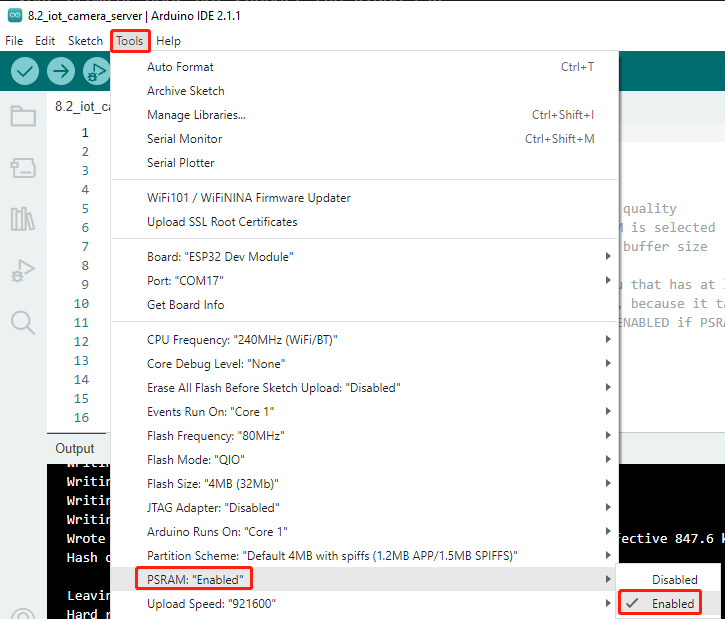
Set the partition scheme to Huge APP (3MB No OTA/1MB SPIFFS).
After selecting the correct board (ESP32 Dev Module) and port, click the Upload button.
You will see a successful WiFi connection message and the assigned IP address in the Serial Monitor.
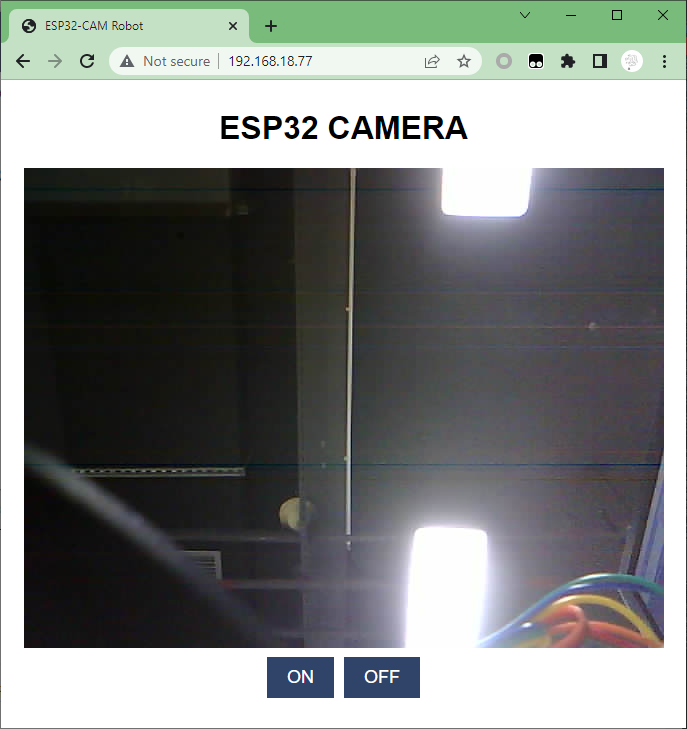
WiFi connected
Camera Stream Ready! Go to: http://192.168.18.77
Enter the IP address in your web browser. You will be directed to the web page shown below, where you can use the customized ON and OFF buttons to control the LED.
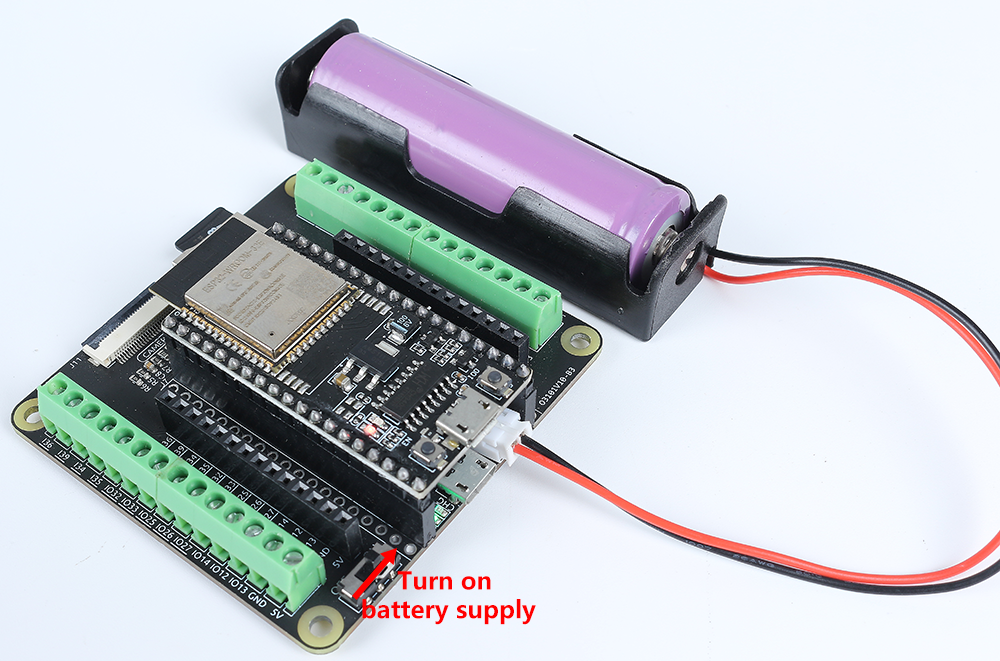
Insert a Power Pack into the expansion board and remove the USB cable. Now you can place the device anywhere you desire within the Wi-Fi range.