8.2 Camera Web Server
This project combines the ESP32 board with a camera module to stream high-quality video over a local network. Set up your own camera system effortlessly and monitor any location in real-time.
With the project’s web interface, you can access and control the camera feed from any device connected to the network. Customize camera settings to optimize the streaming experience and easily adjust settings with the user-friendly interface.
Enhance your surveillance or live streaming capabilities with the versatile ESP32 Camera Streaming project. Monitor your home, office, or any desired location with ease and reliability.
Required Components
In this project, we need the following components.
It’s definitely convenient to buy a whole kit, here’s the link:
Name |
ITEMS IN THIS KIT |
LINK |
|---|---|---|
ESP32 Starter Kit |
320+ |
You can also buy them separately from the links below.
COMPONENT INTRODUCTION |
PURCHASE LINK |
|---|---|
- |
How to do?
First plug in the camera.
Then, connect ESP32-WROOM-32E to the computer using the USB cable.
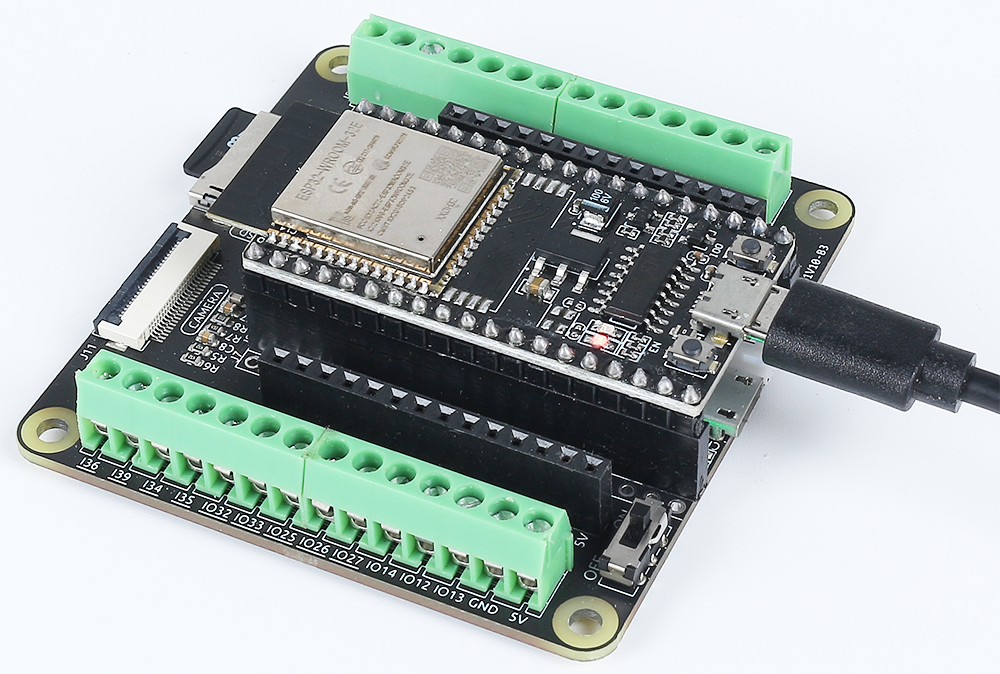
Open the code.
Open the
iot_2_camera_server.inofile located in theesp32-starter-kit-main\c\codes\iot_2_camera_serverdirectory, or copy the code into the Arduino IDE.After selecting the board (ESP32 Dev Module) and the appropriate port, click the Upload button.
Locate the following lines and modify them with your
<SSID>and<PASSWORD>.// Replace the next variables with your SSID/Password combination const char* ssid = "<SSID>"; const char* password = "<PASSWORD>";
Now, enable PSRAM.
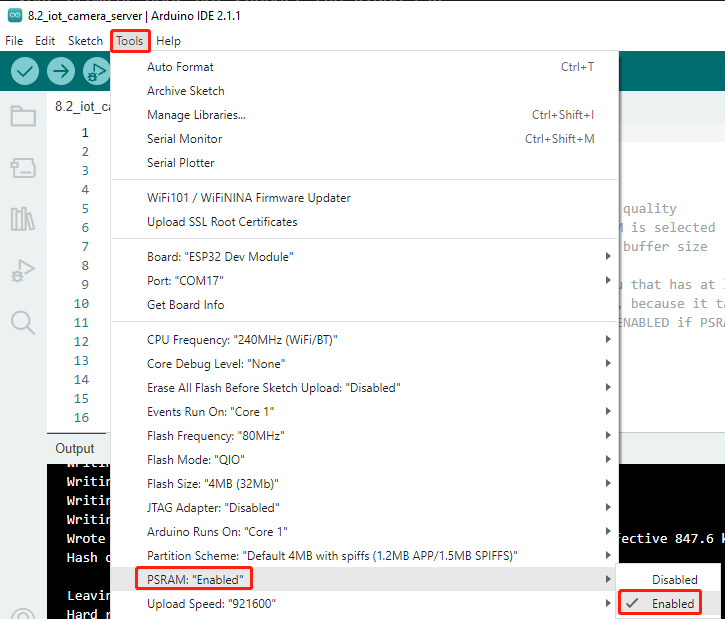
Set the partition scheme to Huge APP (3MB No OTA/1MB SPIFFS).
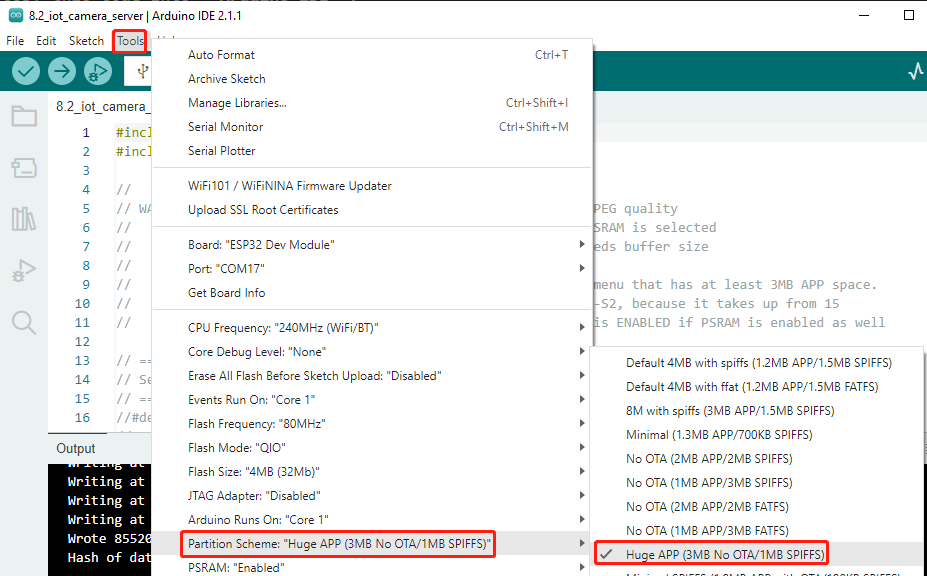
After selecting the correct board (ESP32 Dev Module) and port, click the “Upload” button.
You will see a successful WiFi connection message and the assigned IP address in the Serial Monitor.
.....
WiFi connected
Starting web server on port: '80'
Starting stream server on port: '81'
Camera Ready! Use 'http://192.168.18.77' to connect
Enter the IP address in your web browser. You will see a web interface where you can click Start Stream to view the camera feed.
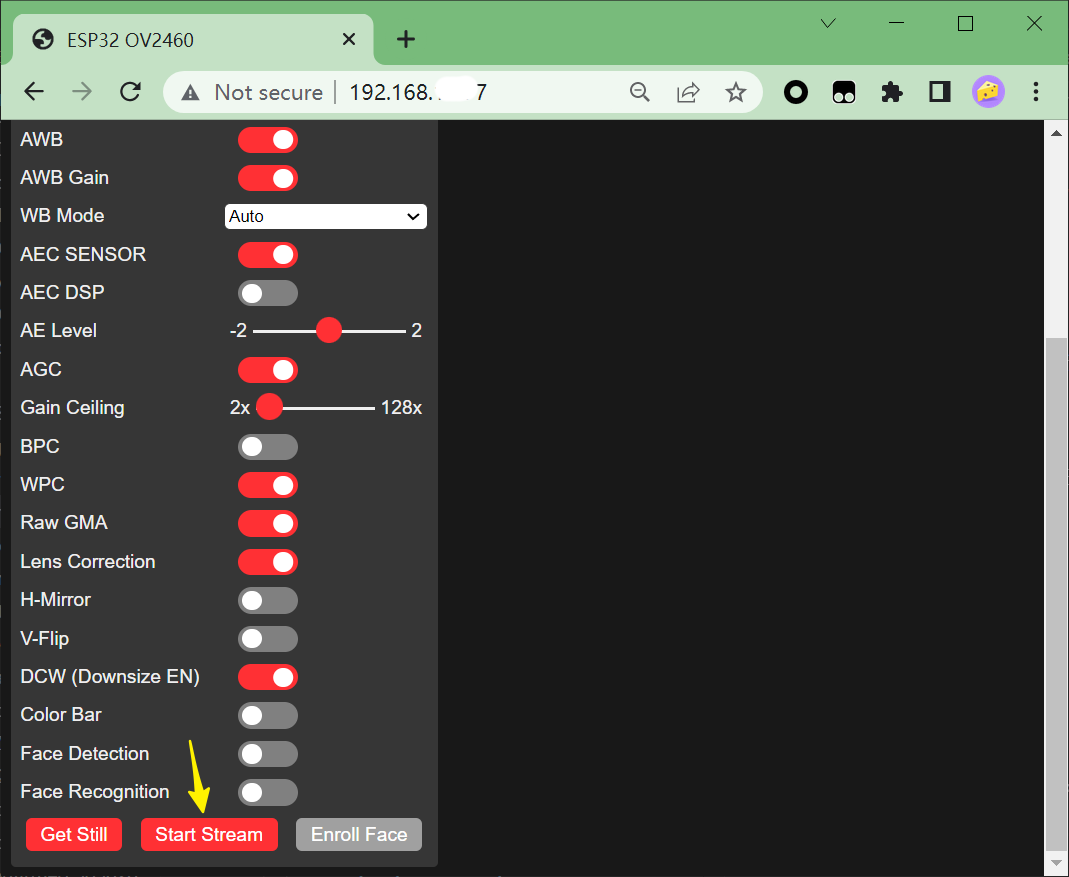
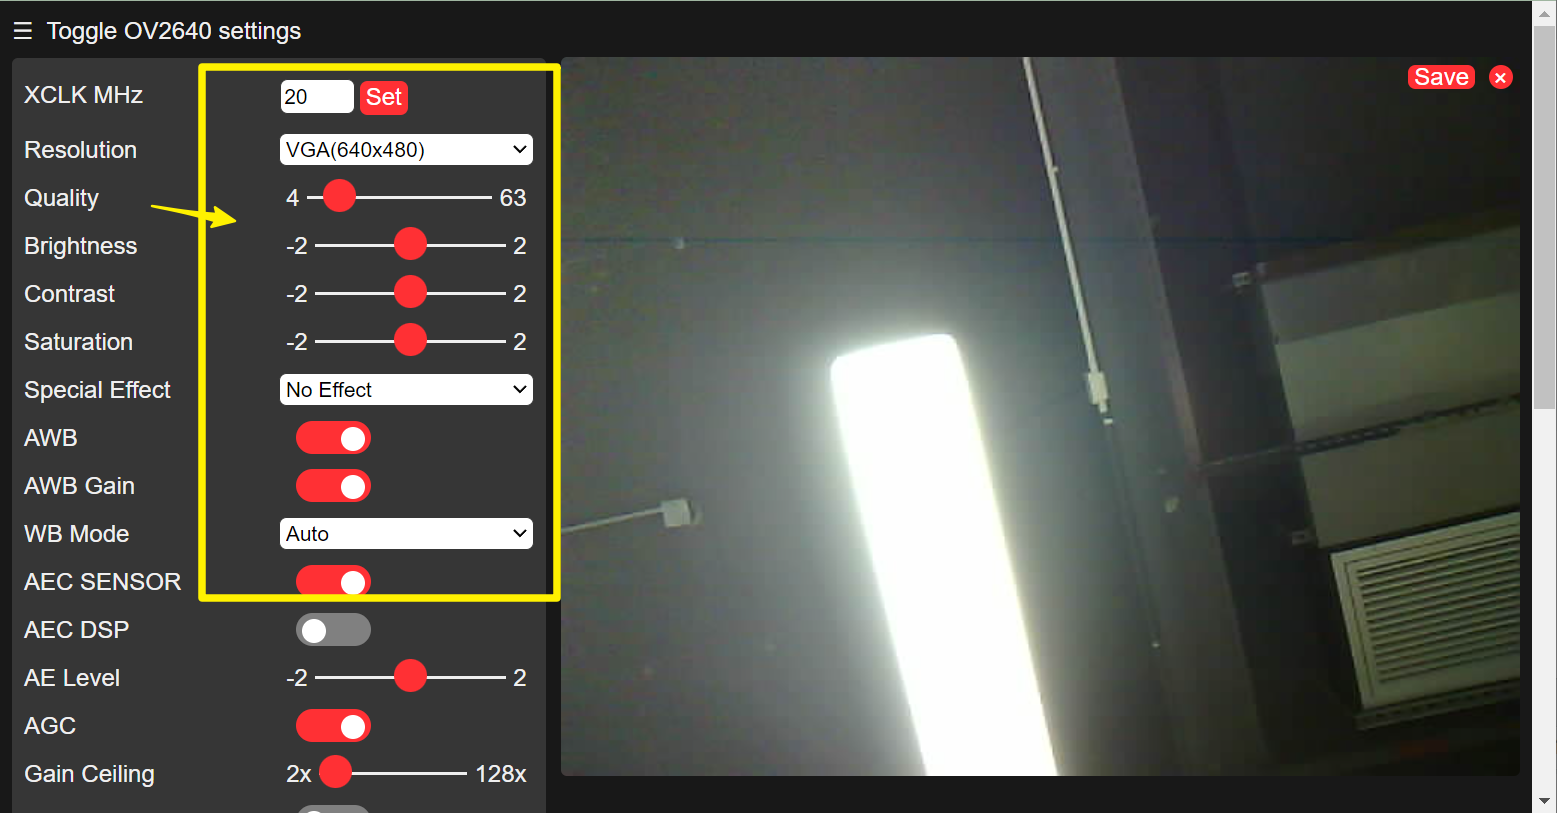
Scroll back to the top of the page, where you will see the live camera feed. You can adjust the settings on the left side of the interface.
Note
This ESP32 module supports Face Detection. To enable it, set the resolution to 240x240 and toggle the Face Detection option at the bottom of the interface.
This ESP32 module does not support Face Recognition.