Note
Hello, welcome to the SunFounder Raspberry Pi & Arduino & ESP32 Enthusiasts Community on Facebook! Dive deeper into Raspberry Pi, Arduino, and ESP32 with fellow enthusiasts.
Why Join?
Expert Support: Solve post-sale issues and technical challenges with help from our community and team.
Learn & Share: Exchange tips and tutorials to enhance your skills.
Exclusive Previews: Get early access to new product announcements and sneak peeks.
Special Discounts: Enjoy exclusive discounts on our newest products.
Festive Promotions and Giveaways: Take part in giveaways and holiday promotions.
👉 Ready to explore and create with us? Click [here] and join today!
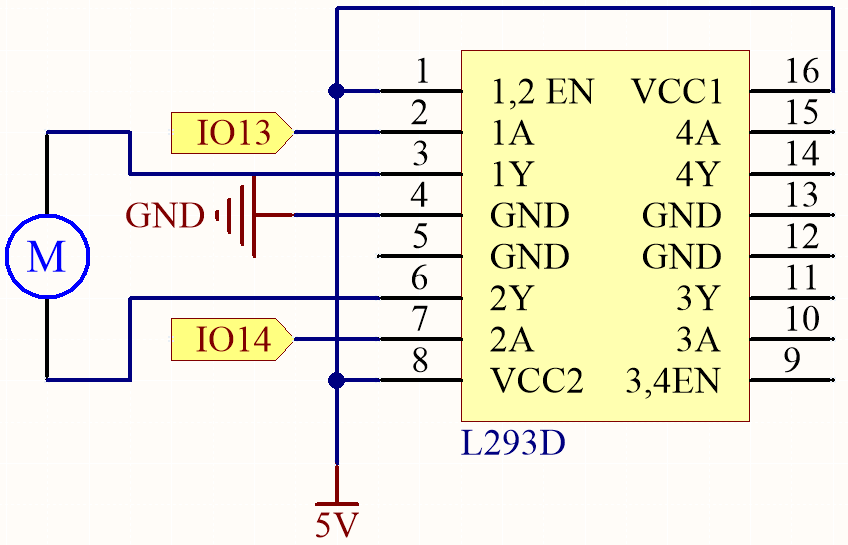
4.2 Pumping
In this intriguing project, we will delve into controlling a water pump using the L293D.
In the realm of water pump control, things are a bit simpler compared to controlling other motors. The beauty of this project lies in its simplicity - there’s no need to worry about the direction of rotation. Our primary goal is to successfully activate the water pump and keep it running.
Required Components
In this project, we need the following components.
It’s definitely convenient to buy a whole kit, here’s the link:
Name |
ITEMS IN THIS KIT |
LINK |
|---|---|---|
ESP32 Starter Kit |
320+ |
You can also buy them separately from the links below.
COMPONENT INTRODUCTION |
PURCHASE LINK |
|---|---|
- |
|
- |
Available Pins
Here is a list of available pins on the ESP32 board for this project.
Available Pins |
IO13, IO14, IO27, IO26, IO25, IO33, IO32, IO15, IO2, IO0, IO4, IO5, IO18, IO19, IO21, IO22, IO23 |
Schematic
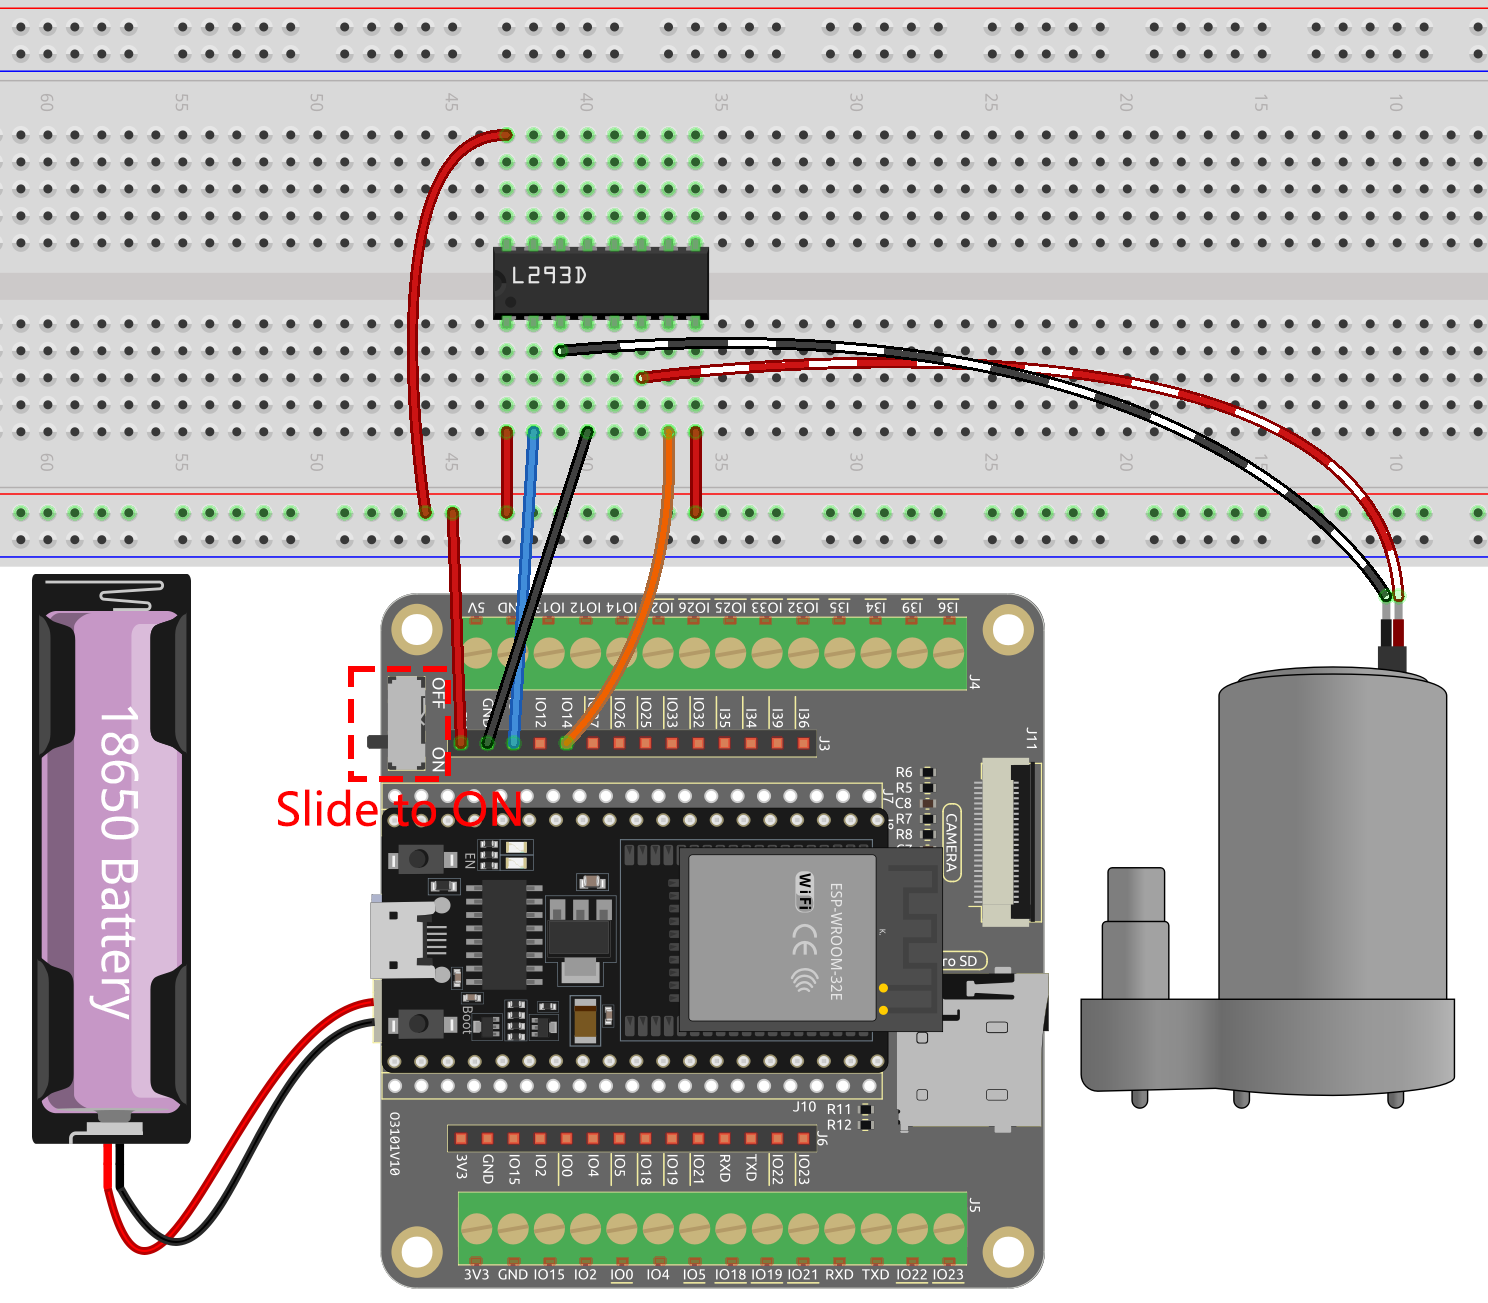
Wiring
Note
It is recommended here to insert the Power Pack and then slide the switch on the expansion board to the ON position to activate the power supply.
Code
Note
You can open the file
4.2_pump.inounder the path ofesp32-starter-kit-main\c\codes\4.2_pump.After selecting the board (ESP32 Dev Module) and the appropriate port, click the Upload button.
Connect the tubing to the pump and place it inside the water-filled container. Once the code has been successfully uploaded, you will observe the water in the container gradually being drained. During this experiment, please ensure that the electrical circuit is kept away from water to prevent short-circuiting!