Note
Hello, welcome to the SunFounder Raspberry Pi & Arduino & ESP32 Enthusiasts Community on Facebook! Dive deeper into Raspberry Pi, Arduino, and ESP32 with fellow enthusiasts.
Why Join?
Expert Support: Solve post-sale issues and technical challenges with help from our community and team.
Learn & Share: Exchange tips and tutorials to enhance your skills.
Exclusive Previews: Get early access to new product announcements and sneak peeks.
Special Discounts: Enjoy exclusive discounts on our newest products.
Festive Promotions and Giveaways: Take part in giveaways and holiday promotions.
👉 Ready to explore and create with us? Click [here] and join today!
8.1 Real-time Weather From @OpenWeatherMap
The IoT Open Weather Display project utilizes the ESP32 board and an I2C LCD1602 module to create a weather information display that retrieves data from the OpenWeatherMap API.
This project serves as an excellent introduction to working with APIs, Wi-Fi connectivity, and data display on an LCD module using the ESP32 board. With the IoT Open Weather Display, you can conveniently access real-time weather updates at a glance, making it an ideal solution for home or office environments.
Required Components
In this project, we need the following components.
It’s definitely convenient to buy a whole kit, here’s the link:
Name |
ITEMS IN THIS KIT |
LINK |
|---|---|---|
ESP32 Starter Kit |
320+ |
You can also buy them separately from the links below.
COMPONENT INTRODUCTION |
PURCHASE LINK |
|---|---|
Get OpenWeather API keys
OpenWeather is an online service, owned by OpenWeather Ltd, that provides global weather data via API, including current weather data, forecasts, nowcasts and historical weather data for any geographical location.
Visit OpenWeather to log in/create an account.
Click into the API page from the navigation bar.

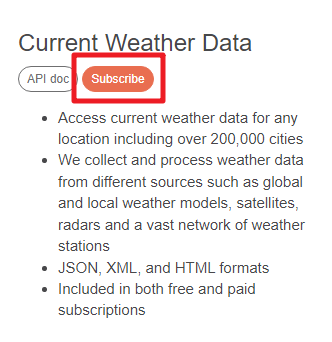
Find Current Weather Data and click Subscribe.
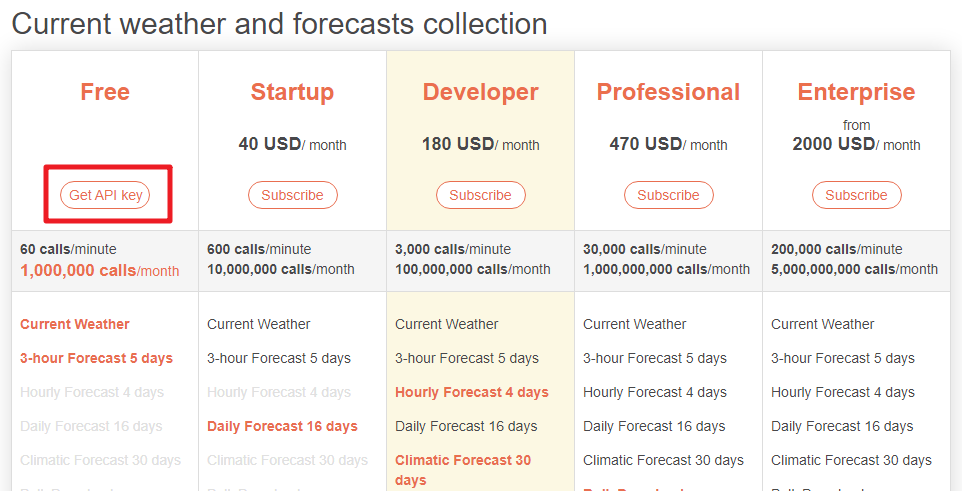
Under Current weather and forecasts collection , subscribe to the appropriate service. In our project, Free is good enough.
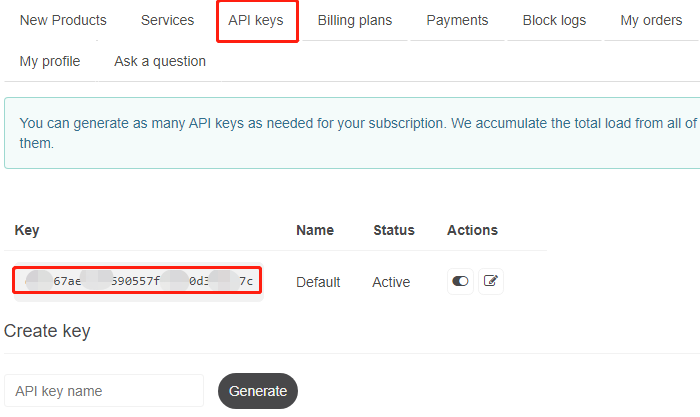
Copy the Key from the API keys page.
Complete Your Device
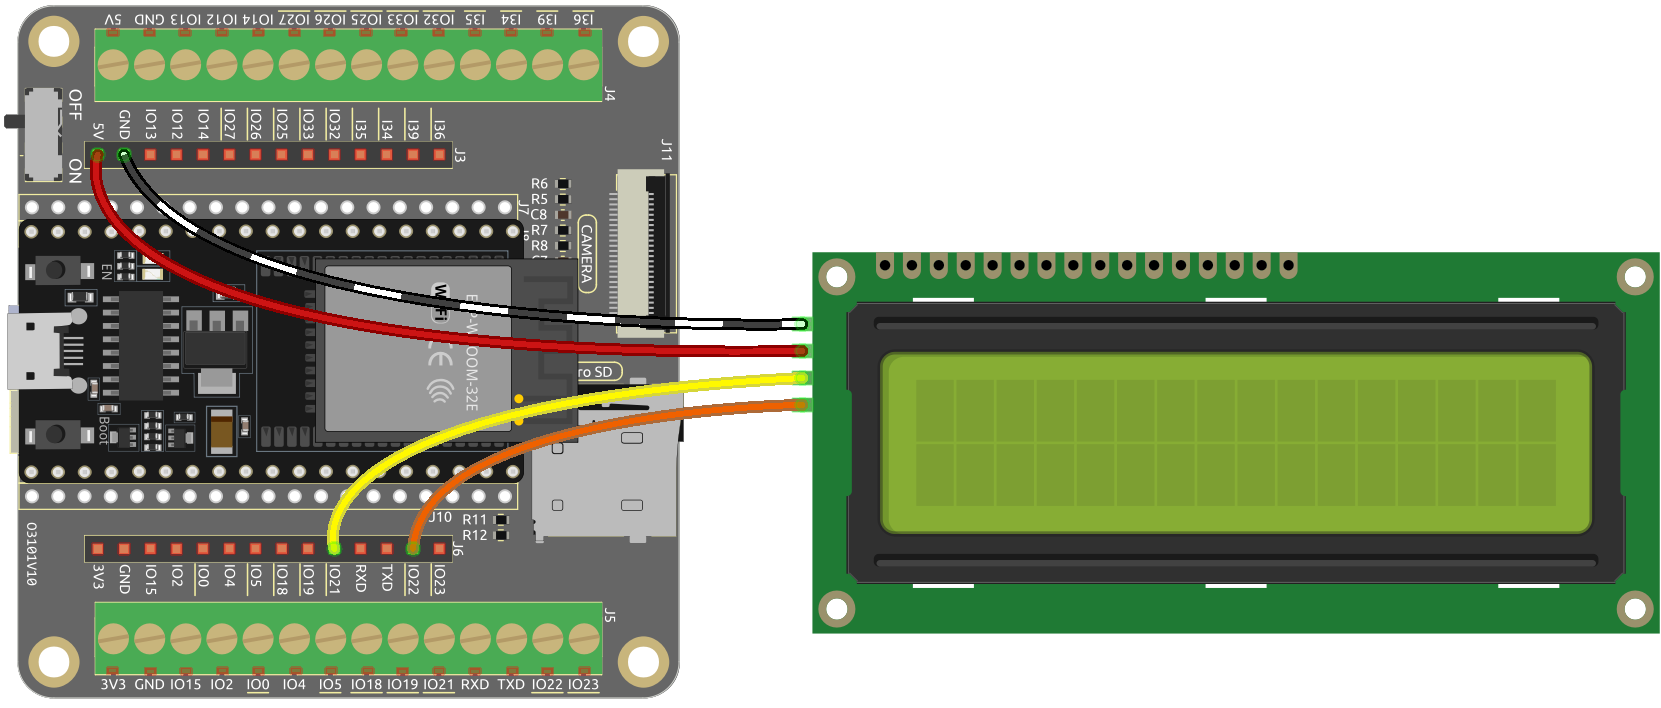
Build the circuit.
Open the code.
Open the
iot_1_open_weather.inofile located in theesp32-starter-kit-main\c\codes\iot_1_open_weatherdirectory, or copy the code into the Arduino IDE.After selecting the board (ESP32 Dev Module) and the appropriate port, click the Upload button.
The
LiquidCrystal I2CandArduino_JSONlibraries are used here, you can install them from the Library Manager.
Locate the following lines and modify them with your
SSIDandPASSWORD.// Replace the next variables with your SSID/Password combination const char* ssid = "SSID"; const char* password = "PASSWORD";
Fill in the API keys you copied earlier into
openWeatherMapApiKey.// Your Domain name with URL path or IP address with path String openWeatherMapApiKey = "<openWeatherMapApiKey>";
Replace with your country code and city.
// Replace with your country code and city
// Fine the country code by https://openweathermap.org/find
String city = "CITY";
String countryCode = "COUNTRY CODE";
After the code runs, you will see the time and weather information of your location on the I2C LCD1602.
Note
When the code is running, if the screen is blank, you can turn the potentiometer on the back of the module to increase the contrast.