Note
Hello, welcome to the SunFounder Raspberry Pi & Arduino & ESP32 Enthusiasts Community on Facebook! Dive deeper into Raspberry Pi, Arduino, and ESP32 with fellow enthusiasts.
Why Join?
Expert Support: Solve post-sale issues and technical challenges with help from our community and team.
Learn & Share: Exchange tips and tutorials to enhance your skills.
Exclusive Previews: Get early access to new product announcements and sneak peeks.
Special Discounts: Enjoy exclusive discounts on our newest products.
Festive Promotions and Giveaways: Take part in giveaways and holiday promotions.
👉 Ready to explore and create with us? Click [here] and join today!
5.14 IR Receiver
An infrared receiver is a component that receives infrared signals and can independently detect and output signals compatible with TTL level. It is similar in size to a regular plastic-packaged transistor and is commonly used in various applications such as infrared remote control and infrared transmission.
In this project, we will use an infrared receiver to detect signals from a remote control. When a button on the remote control is pressed and the infrared receiver receives the corresponding signal, it can decode the signal to determine which button was pressed. By decoding the received signal, we can identify the specific key or command associated with it.
The infrared receiver allows us to incorporate remote control functionality into our project, enabling us to interact with and control devices using infrared signals.
Required Components
In this project, we need the following components.
It’s definitely convenient to buy a whole kit, here’s the link:
Name |
ITEMS IN THIS KIT |
LINK |
|---|---|---|
ESP32 Starter Kit |
320+ |
You can also buy them separately from the links below.
COMPONENT INTRODUCTION |
PURCHASE LINK |
|---|---|
Available Pins
Here is a list of available pins on the ESP32 board for this project.
Available Pins
IO13, IO12, IO14, IO27, IO26, IO25, IO15, IO0, IO5, IO18, IO19, IO21, IO22, IO23
Schematic
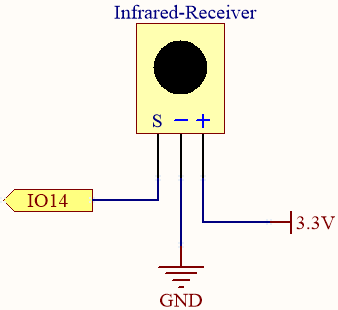
When you press a button on the remote control, the infrared receiver detects the signal, and you can use an infrared library to decode it. This decoding process allows you to obtain the key value associated with the button press.
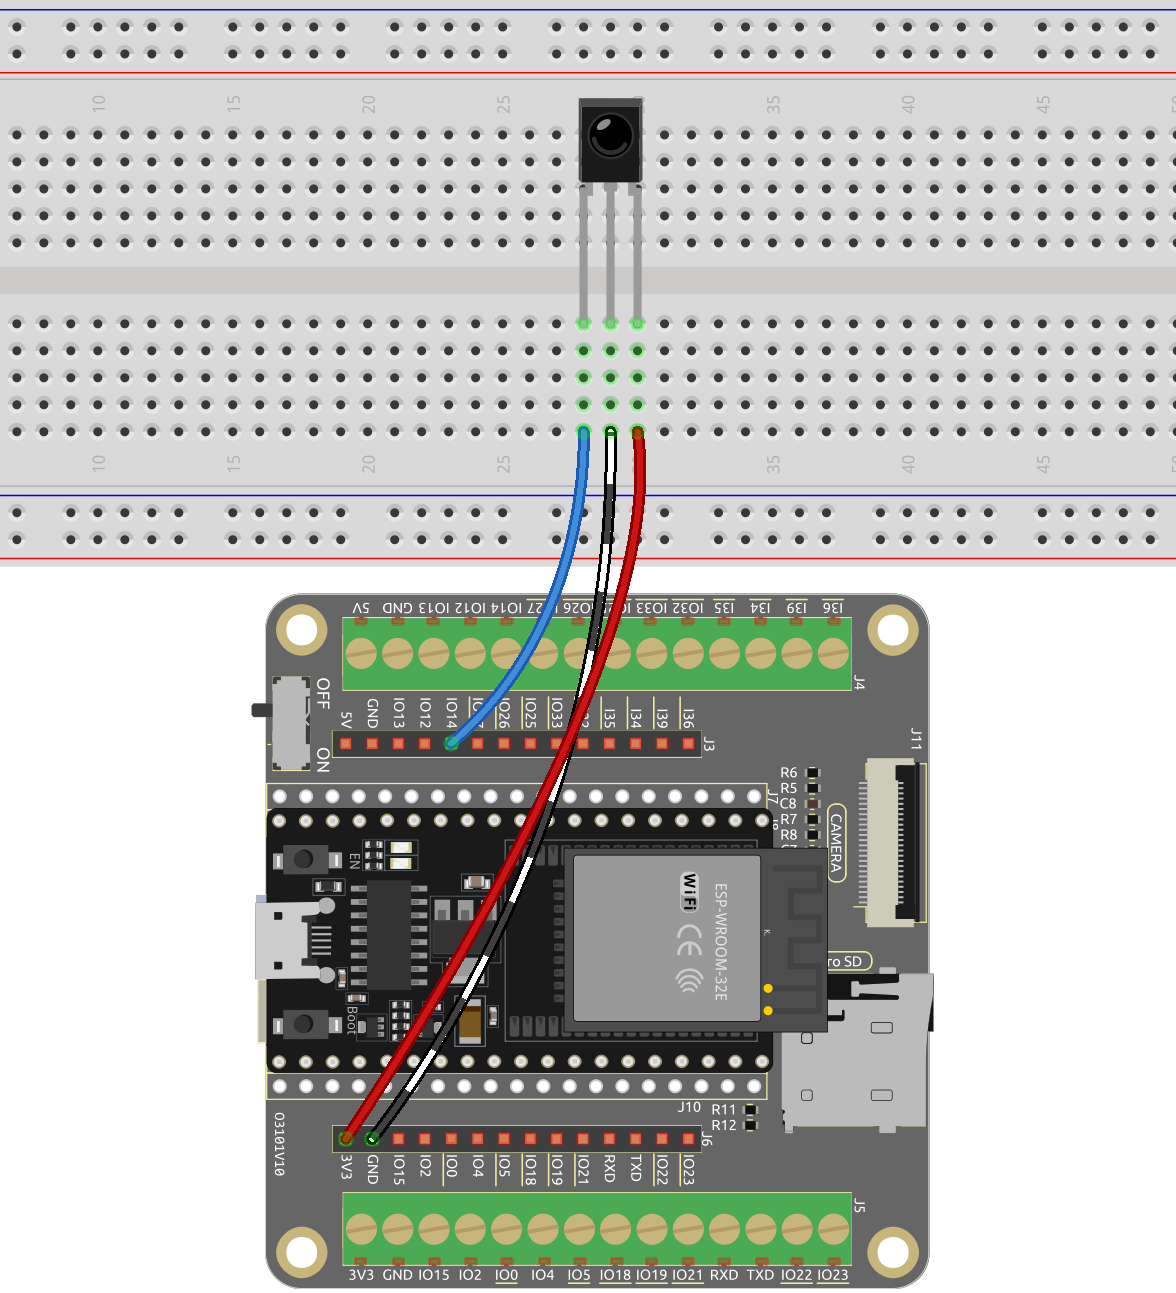
Wiring
Code
Note
Open the
5.14_ir_receiver.inofile under the path ofesp32-starter-kit-main\c\codes\5.14_ir_receiver.After selecting the board (ESP32 Dev Module) and the appropriate port, click the Upload button.
The
IRremoteESP8266library is used here, you can install it from the Library Manager.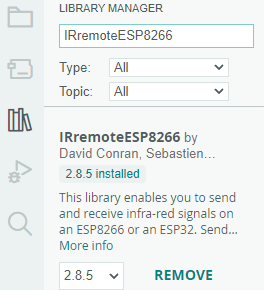
Warning
If you are using an ESP32 development board version 3.0.0 or higher, you may encounter errors during the compilation process.
This issue is usually because the newer versions of the board no longer support the IRremoteESP8266 library.
To properly run this example, it is recommended to downgrade your ESP32 board’s firmware version to 2.0.17.
After completing this example, upgrade back to the latest version.

Remember to Set the serial communication baud rate to 115200.
After the code is uploaded successfully, press the different keys on the remote control and you will see the names of these keys appear in the serial monitor.
Note
The
IRremoteESP8266library includes implementations for many different infrared protocols and devices, so the size of the library is relatively large. When the compiler has to process more code, the compilation time will also increase accordingly. Please be patient and wait for the compilation to finish.The new remote control features a plastic tab at the end to insulate the battery inside. To power up the remote when using it, simply remove this plastic piece.
How it works?
This code uses the
IRremoteESP8266library to receive infrared (IR) signals using an IR receiver module.#include <IRremoteESP8266.h> #include <IRrecv.h> // Define the IR receiver pin const uint16_t IR_RECEIVE_PIN = 14; // Create an IRrecv object IRrecv irrecv(IR_RECEIVE_PIN); // Create a decode_results object decode_results results;
In the
setup()function, serial communication is started at a baud rate of 115200, and the IR receiver is enabled usingirrecv.enableIRIn().void setup() { // Start serial communication Serial.begin(115200); // Start the IR receiver irrecv.enableIRIn(); }
When you press a key on the remote control, the serial monitor will print the key name if it is received by the IR receiver.
void loop() {
    // If an IR signal is received
    if (irrecv.decode(&results)) {
        String key = decodeKeyValue(results.value);
        if (key != "ERROR") {
            // Print the value of the signal to the serial monitor
            Serial.println(key);
        }
        irrecv.resume(); // Continue to receive the next signal
    }
}
Firstly, check if an IR signal is received using the
irrecv.decode()function.If a signal is received, then call the
decodeKeyValue()function to decode the value of the signal.If the signal is successfully decoded, the decoded value is printed to the serial monitor using
Serial.println().Finally,
irrecv.resume()is called to continue to receive the next signal.
The
decodeKeyValue()function takes the decoded value of the IR signal as an argument and returns a string representing the key pressed on the remote control.String decodeKeyValue(long result) { switch(result){ case 0xFF6897: return "0"; case 0xFF30CF: return "1"; case 0xFF18E7: return "2"; case 0xFF7A85: ...
The function uses a switch statement to match the decoded value with the corresponding key and returns the string representation of the key.
If the decoded value does not match any known key, the function returns the string “ERROR”.