Note
Hello, welcome to the SunFounder Raspberry Pi & Arduino & ESP32 Enthusiasts Community on Facebook! Dive deeper into Raspberry Pi, Arduino, and ESP32 with fellow enthusiasts.
Why Join?
Expert Support: Solve post-sale issues and technical challenges with help from our community and team.
Learn & Share: Exchange tips and tutorials to enhance your skills.
Exclusive Previews: Get early access to new product announcements and sneak peeks.
Special Discounts: Enjoy exclusive discounts on our newest products.
Festive Promotions and Giveaways: Take part in giveaways and holiday promotions.
👉 Ready to explore and create with us? Click [here] and join today!
6.6 Plant Monitor
Welcome to the Plant Monitor project!
In this project, we will be using an ESP32 board to create a system that helps us take care of our plants. With this system, we can monitor the temperature, humidity, soil moisture, and light levels of our plants, and ensure that they are getting the care and attention they need to thrive.
Required Components
In this project, we need the following components.
It’s definitely convenient to buy a whole kit, here’s the link:
Name |
ITEMS IN THIS KIT |
LINK |
|---|---|---|
ESP32 Starter Kit |
320+ |
You can also buy them separately from the links below.
COMPONENT INTRODUCTION |
PURCHASE LINK |
|---|---|
- |
|
- |
|
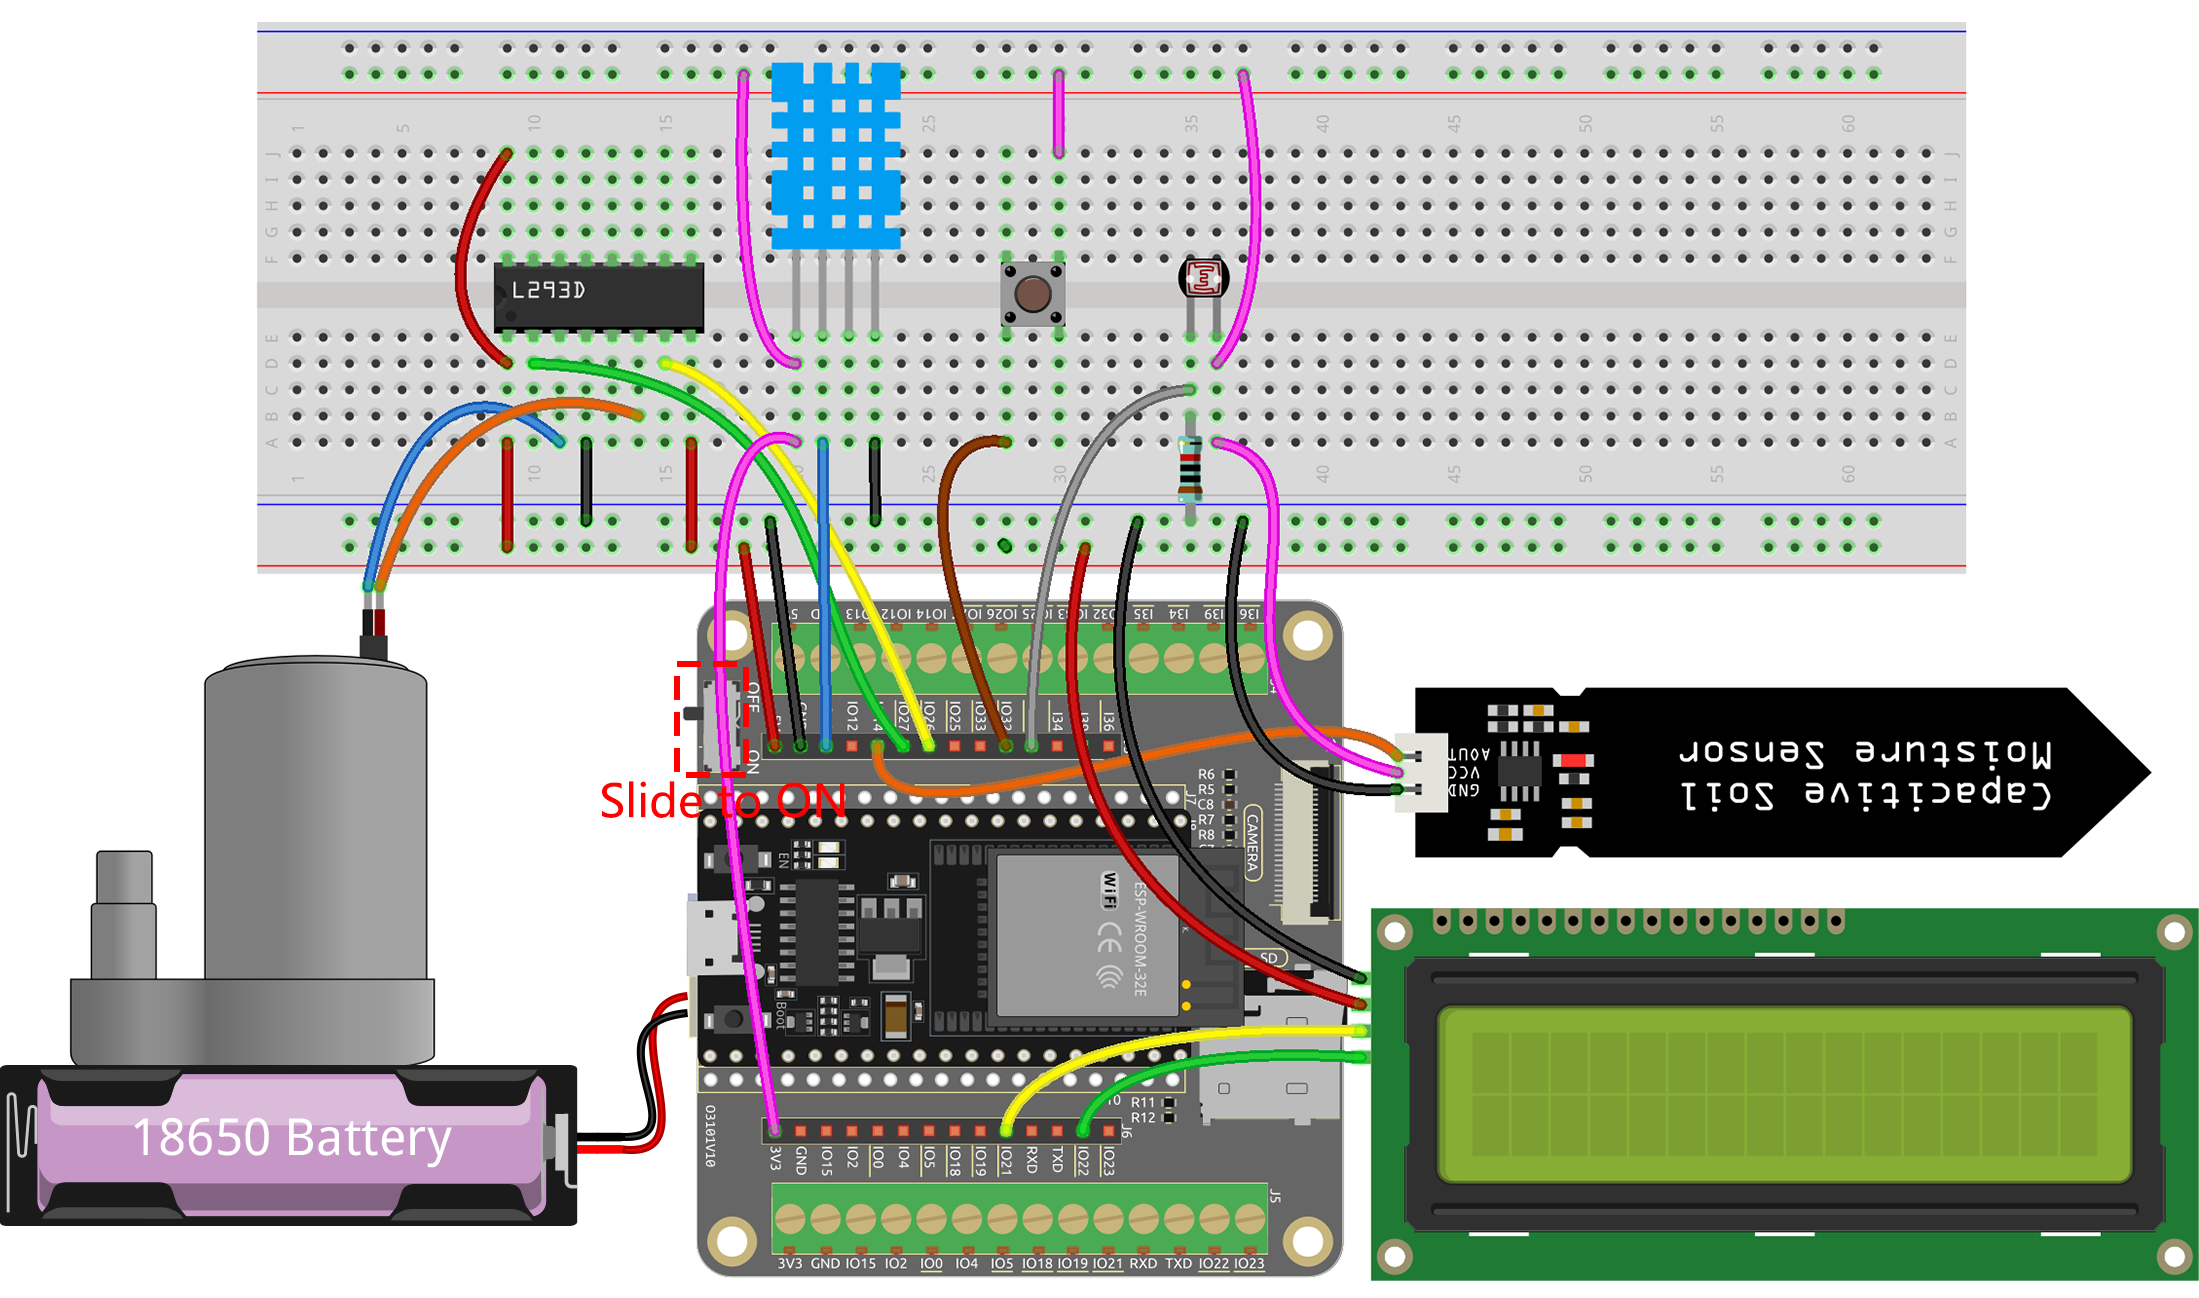
Schematic

The system uses a DHT11 sensor to measure the temperature and humidity levels of the surrounding environment. Meanwhile, a soil moisture module is used to measure the moisture level of the soil and a photoresistor is used to measure the light level. The readings from these sensors are displayed on an LCD screen, and a water pump can be controlled using a button to water the plant when needed.
IO32 has an internal pull-down resistor of 1K, and by default, it is at a low logic level. When the button is pressed, it establishes a connection to VCC (high voltage), resulting in a high logic level on IO32.
Wiring
Note
It is recommended here to insert the Power Pack and then slide the switch on the expansion board to the ON position to activate the power supply.
Code
Note
You can open the file
6.6_plant_monitor.inounder the path ofesp32-starter-kit-main\c\codes\6.6_plant_monitor.After selecting the board (ESP32 Dev Module) and the appropriate port, click the Upload button.
The
LiquidCrystal_I2CandDHT sensor librarylibraries are used here, you can install them from the Library Manager.
After uploading the code, the I2C LCD1602 alternately displays temperature and humidity, as well as soil moisture and light intensity analog values, with a 2-second interval.
The water pump is controlled using a button press. To water the plants, hold down the button, and release it to stop watering.
Note
If the code and wiring are correct, but the LCD still fails to display any content, you can adjust the potentiometer on the back to increase the contrast.