Note
Hello, welcome to the SunFounder Raspberry Pi & Arduino & ESP32 Enthusiasts Community on Facebook! Dive deeper into Raspberry Pi, Arduino, and ESP32 with fellow enthusiasts.
Why Join?
Expert Support: Solve post-sale issues and technical challenges with help from our community and team.
Learn & Share: Exchange tips and tutorials to enhance your skills.
Exclusive Previews: Get early access to new product announcements and sneak peeks.
Special Discounts: Enjoy exclusive discounts on our newest products.
Festive Promotions and Giveaways: Take part in giveaways and holiday promotions.
👉 Ready to explore and create with us? Click [here] and join today!
7.5 MP3 Player with SD Card Support
Welcome to the exciting world of music with your ESP32! This project brings the power of audio processing to your fingertips, making your ESP32 not just an amazing microcontroller for computing but also your personalized music player. Imagine walking into your room and having your favorite track playing right from this tiny device. That’s the power we’re bringing to your hands today.
Required Components
In this project, we need the following components.
It’s definitely convenient to buy a whole kit, here’s the link:
Name |
ITEMS IN THIS KIT |
LINK |
|---|---|---|
ESP32 Starter Kit |
320+ |
You can also buy them separately from the links below.
COMPONENT INTRODUCTION |
PURCHASE LINK |
|---|---|
- |
Operating Steps
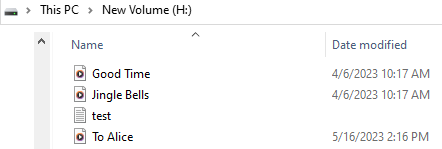
Insert your SD card into the computer using a card reader, and then format it. You can refer to the tutorial at How to format the SD card?.
Copy your favorite MP3 file to your SD card.
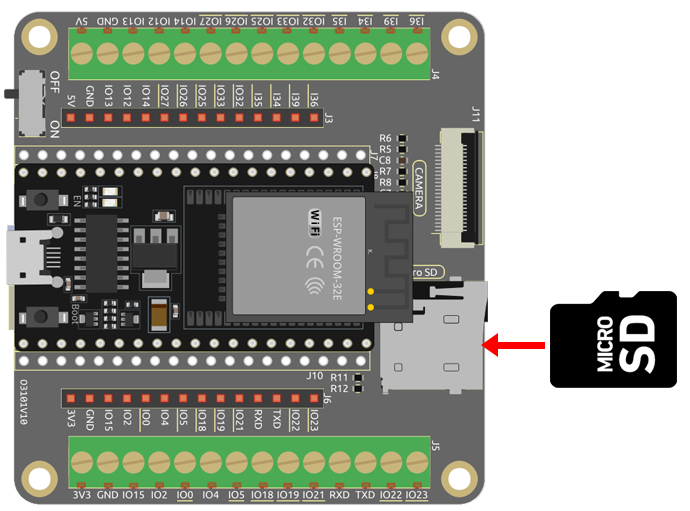
Insert the SD card into the SD card slot of the extension board.
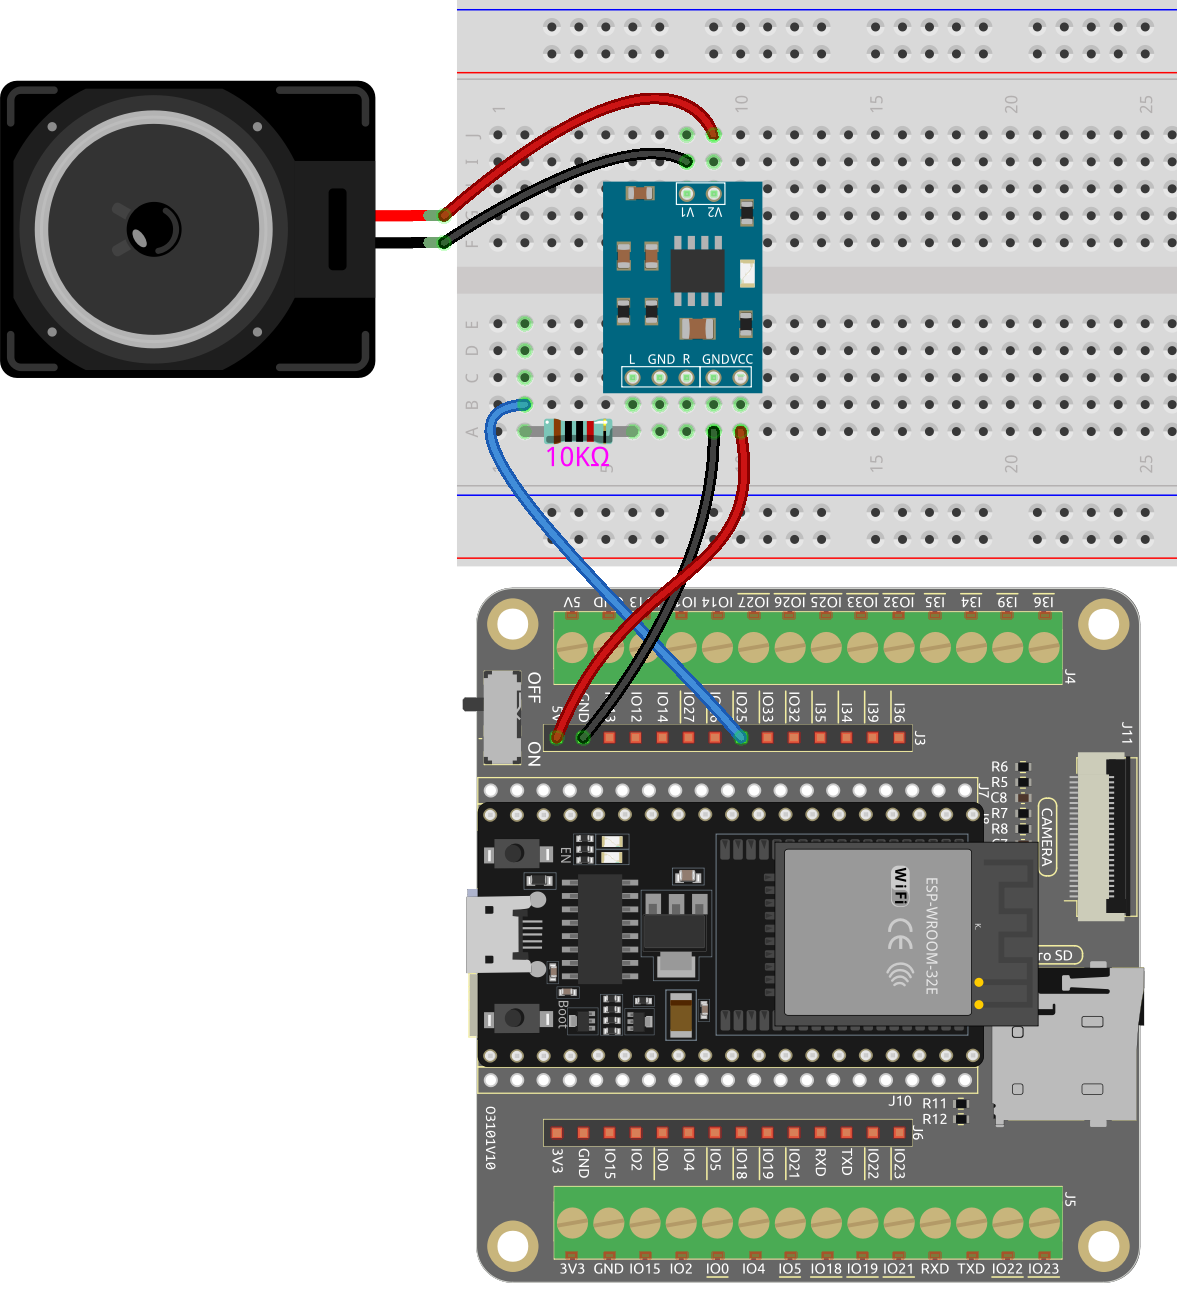
Build the circuit.
As this is a mono amplifier, you can connect IO25 to the L or R pin of the audio amplifier module.
The 10K resistor is used to reduce high-frequency noise and lower the audio volume. It forms an RC low-pass filter with the parasitic capacitance of the DAC and audio amplifier. This filter decreases the amplitude of high-frequency signals, effectively reducing high-frequency noise. So, adding the 10K resistor makes the music sound softer and eliminates unwanted high-frequency noise.
If your SD card’s music is already soft, you can remove or replace the resistor with a smaller value.
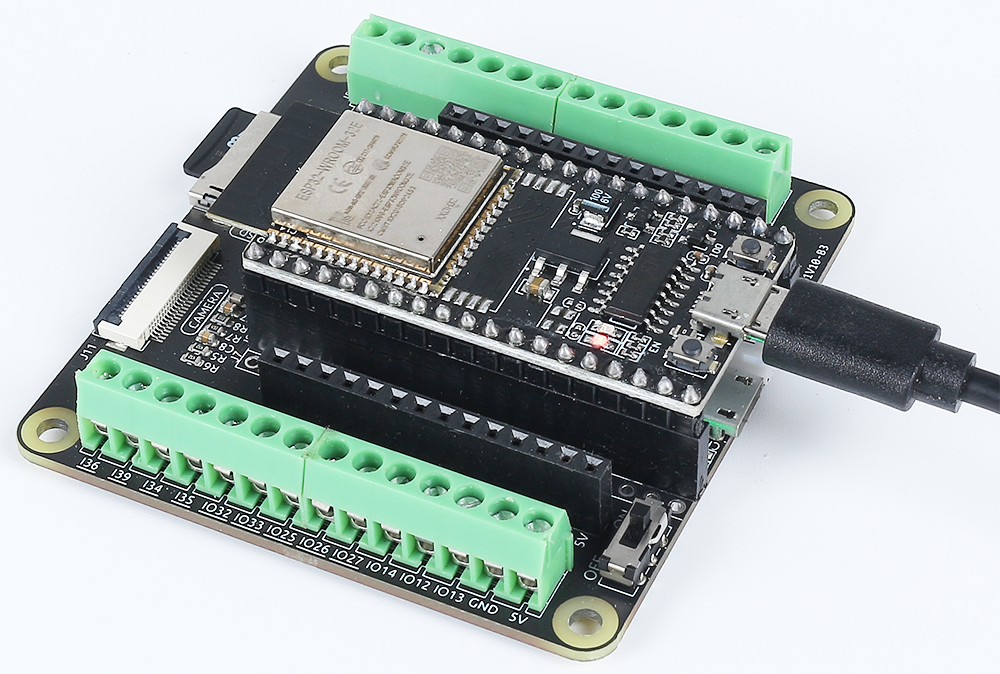
Connect ESP32 board to the computer using the USB cable.
Modify the code.
Modify the line of code
file = new AudioFileSourceSD_MMC("/To Alice.mp3"); to reflect your file’s name and path.Note
Open the
7.5_mp3_player_sd.inofile under the path ofesp32-starter-kit-main\c\codes\7.5_mp3_player_sd. Or copy this code into Arduino IDE.After selecting the board (ESP32 Dev Module) and the appropriate port, click the Upload button.
The
ESP8266Audiolibrary is used here, refer to Manual Installation for a tutorial to install.
Warning
If you are using an ESP32 development board version 3.0.0 or higher, you may encounter errors during the compilation process. This issue is usually because the newer versions of the board no longer support the
ESP8266Audiolibrary. To properly run this example, it is recommended to downgrade your ESP32 board’s firmware version to 2.0.17. After completing this example, upgrade back to the latest version.
Select the appropriate port and board in the Arduino IDE and upload the code to your ESP32.
After successfully uploading the code, you will hear your favorite music playing.
How it works?
The code uses several classes from the
ESP8266Audiolibrary to play an MP3 file from an SD card through I2S:#include "AudioFileSourceSD_MMC.h" #include "AudioOutputI2S.h" #include "AudioGeneratorMP3.h" #include "SD_MMC.h" #include "FS.h"
AudioGeneratorMP3is a class that decodes MP3 audio.AudioFileSourceSD_MMCis a class that reads audio data from an SD card.AudioOutputI2Sis a class that sends audio data to the I2S interface.
In the
setup()function, we initialize the SD card, open the MP3 file from the SD card, set up the I2S output on the ESP32’s internal DAC, set the output to mono, and start the MP3 generator.void setup() { // Start the serial communication. Serial.begin(115200); delay(1000); // Initialize the SD card. If it fails, print an error message. if (!SD_MMC.begin()) { Serial.println("SD card mount failed!"); } // Open the MP3 file from the SD card. Replace "/To Alice.mp3" with your own MP3 file name. file = new AudioFileSourceSD_MMC("/To Alice.mp3"); // Set up the I2S output on ESP32's internal DAC. out = new AudioOutputI2S(0, 1); // Set the output to mono. out->SetOutputModeMono(true); // Initialize the MP3 generator with the file and output. mp3 = new AudioGeneratorMP3(); mp3->begin(file, out); }
In the
loop()function, we check if the MP3 generator is running. If it is, we continue looping it; otherwise, we stop it and print “MP3 done” to the serial monitor.void loop() { // If the MP3 is running, loop it. Otherwise, stop it. if (mp3->isRunning()) { if (!mp3->loop()) mp3->stop(); } // If the MP3 is not running, print a message and wait for 1 second. else { Serial.println("MP3 done"); delay(1000); } }