Note
Hello, welcome to the SunFounder Raspberry Pi & Arduino & ESP32 Enthusiasts Community on Facebook! Dive deeper into Raspberry Pi, Arduino, and ESP32 with fellow enthusiasts.
Why Join?
Expert Support: Solve post-sale issues and technical challenges with help from our community and team.
Learn & Share: Exchange tips and tutorials to enhance your skills.
Exclusive Previews: Get early access to new product announcements and sneak peeks.
Special Discounts: Enjoy exclusive discounts on our newest products.
Festive Promotions and Giveaways: Take part in giveaways and holiday promotions.
👉 Ready to explore and create with us? Click [here] and join today!
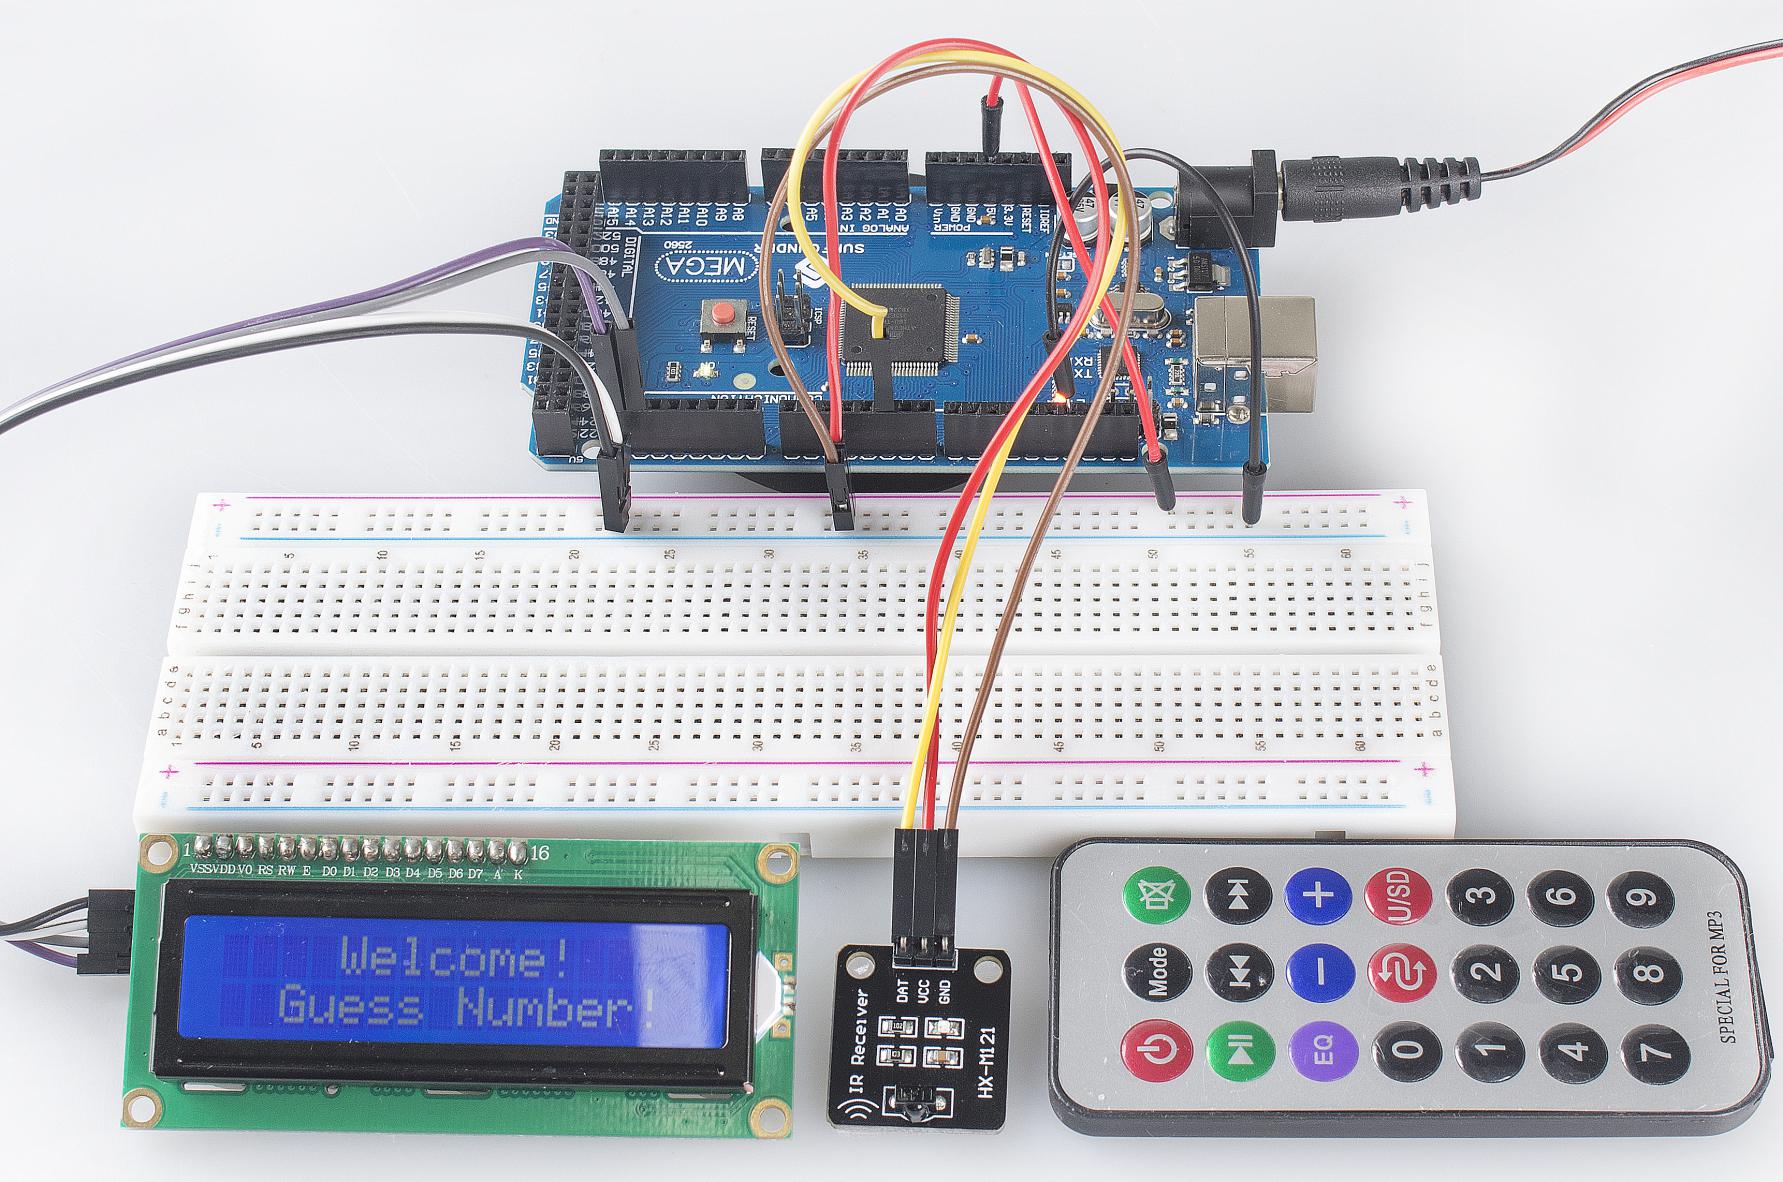
3.4 Guess Number
Overview
Guessing Numbers is a fun party game where you and your friends take turns inputting a number (0~99). The range will be smaller with the inputting of the number till a player answers the riddle correctly. Then the player is defeated and punished. For example, if the lucky number is 51 which the players cannot see, and the player 1 inputs 50, the prompt of number range changes to 50~99; if the player 2 inputs 70, the range of number can be 50~70; if the player 3 inputs 51, he or she is the unlucky one. Here, we use IR Remote Controller to input numbers and use LCD to output outcomes.
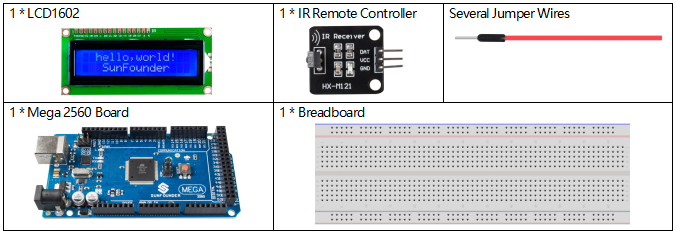
Components Required
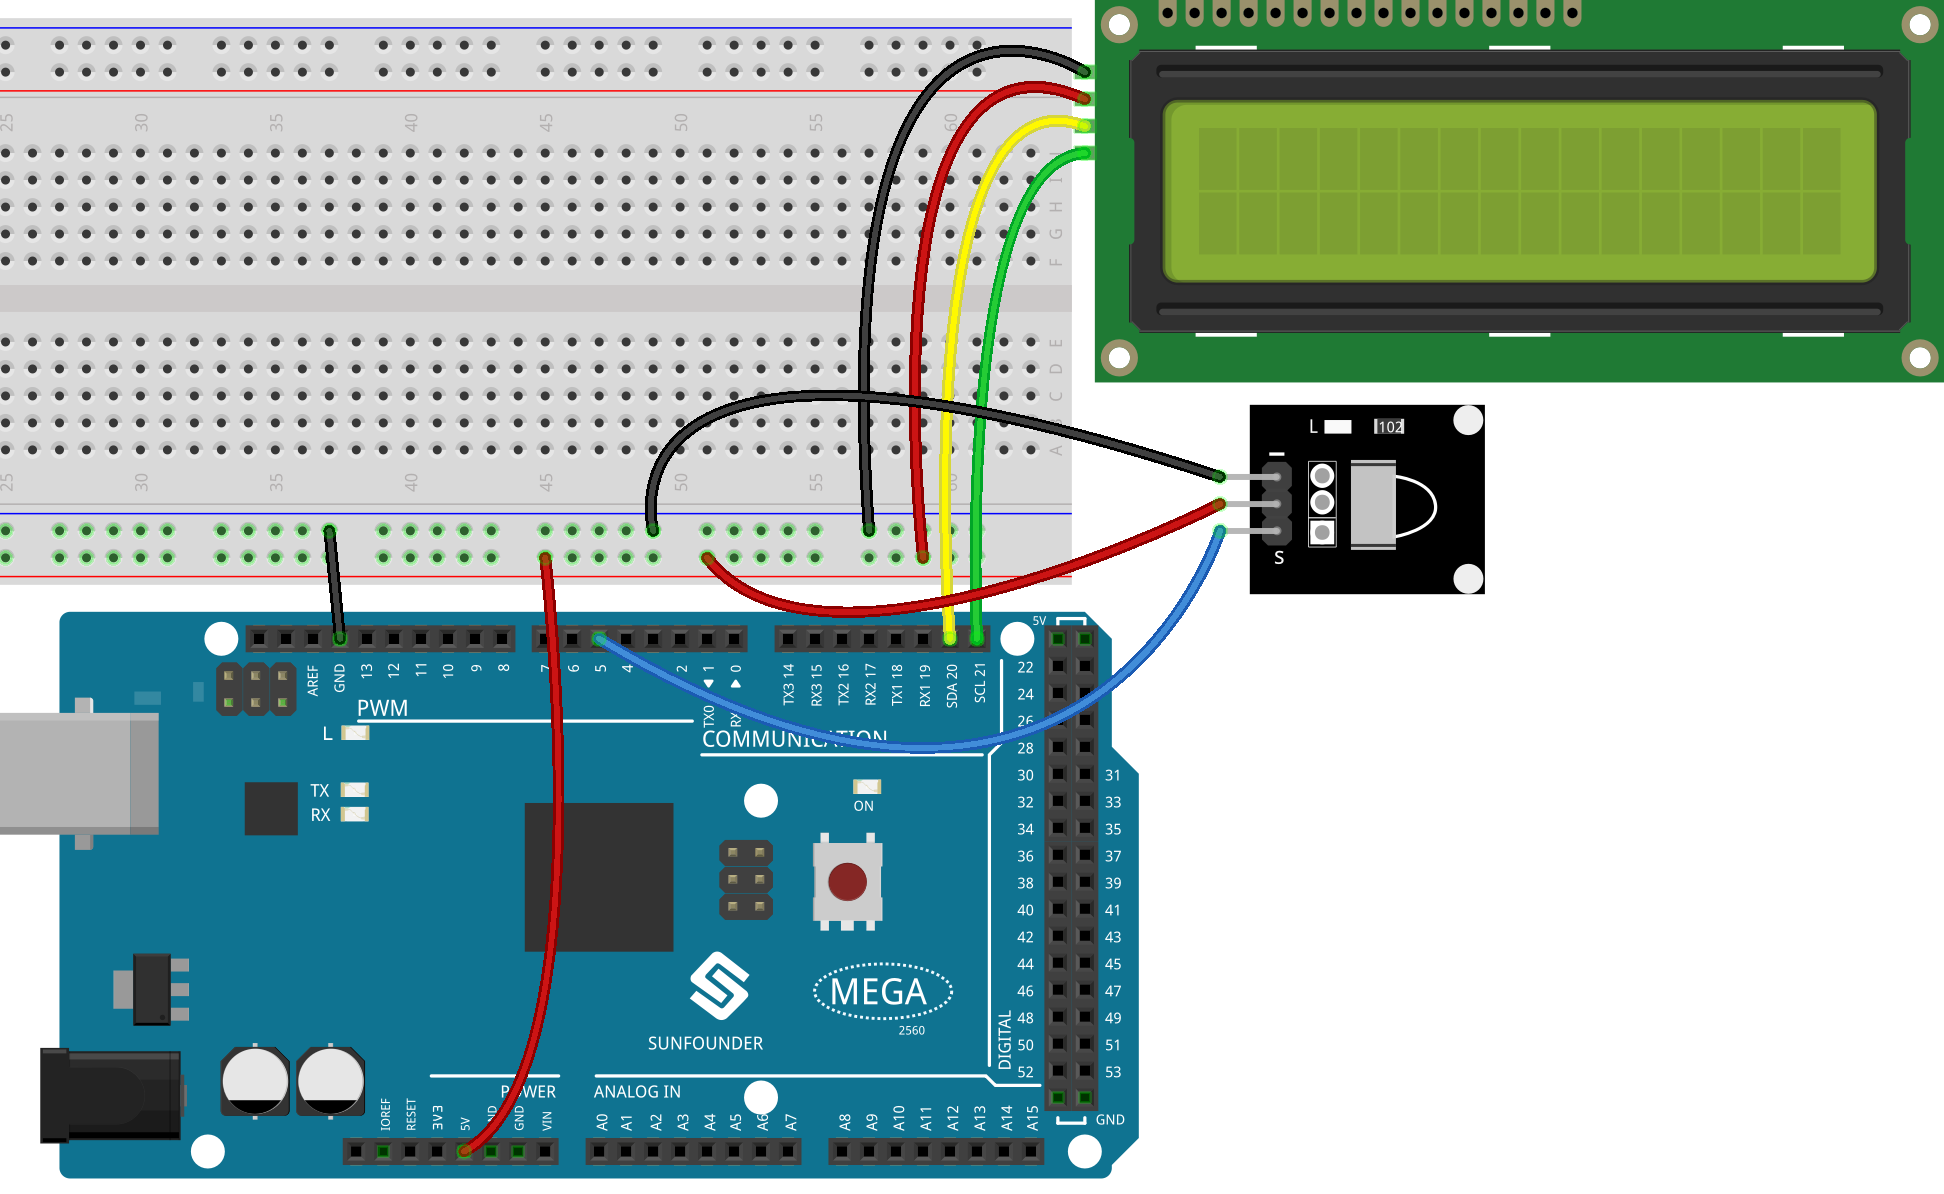
Fritzing Circuit
In this example, the wiring of LCD1602 and infrared receiving module is as follows.
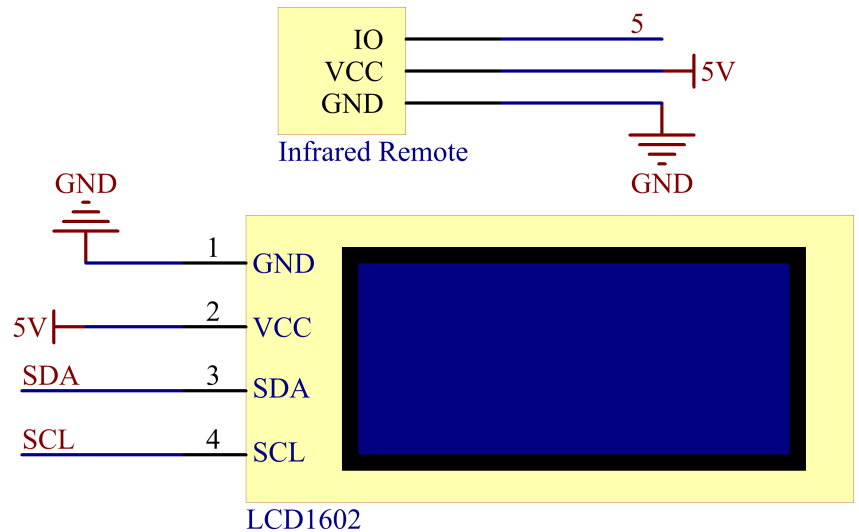
Schematic Diagram
Code
Note
You can open the file
3.4_guessNumber.inounder the path ofsunfounder_vincent_kit_for_arduino\code\3.4_guessNumberdirectly.The
LiquidCrystal I2CandIRremotelibraries are used here, you can install them from the Library Manager.
Example Explanation

In order to make the number guessing game become vivid and funny, we need to achieve the following functions:
The lucky number will be displayed when we start and reset the game, and the number range prompt is reset to 0 ~ 99.
LCD will display the number being input and the number range prompt.
After inputting two digits, there appears result judgment automatically.
If you input a single digit, you can press the CYCLE key (the key at the center of the Controller) to start the result judgment.
If the answer is not guessed, the new number range prompt will be displayed (if the lucky number is 51 and you enter 50, the number range prompt will change to 50~99).
The game is automatically reset after the lucky number is guessed, so that the player can play a new round.
The game can be reset by directly pressing the POWER button (the button in the upper left corner).
In conclusion, the work flow of the project is shown in the flow chart.
Phenomenon Picture