Note
Hello, welcome to the SunFounder Raspberry Pi & Arduino & ESP32 Enthusiasts Community on Facebook! Dive deeper into Raspberry Pi, Arduino, and ESP32 with fellow enthusiasts.
Why Join?
Expert Support: Solve post-sale issues and technical challenges with help from our community and team.
Learn & Share: Exchange tips and tutorials to enhance your skills.
Exclusive Previews: Get early access to new product announcements and sneak peeks.
Special Discounts: Enjoy exclusive discounts on our newest products.
Festive Promotions and Giveaways: Take part in giveaways and holiday promotions.
👉 Ready to explore and create with us? Click [here] and join today!
2.27 Thermistor
Overview
In this lesson, you will learn how to use thermistor. Thermistor can be used as electronic circuit components for temperature compensation of instrument circuits. In the current meter, flowmeter, gas analyzer, and other devices. It can also be used for overheating protection, contactless relay, constant temperature, automatic gain control, motor start, time delay, color TV automatic degaussing, fire alarm and temperature compensation.
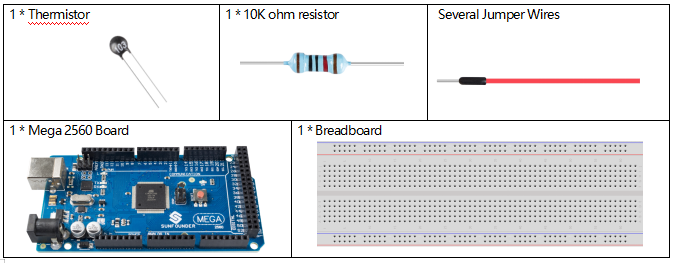
Components Required
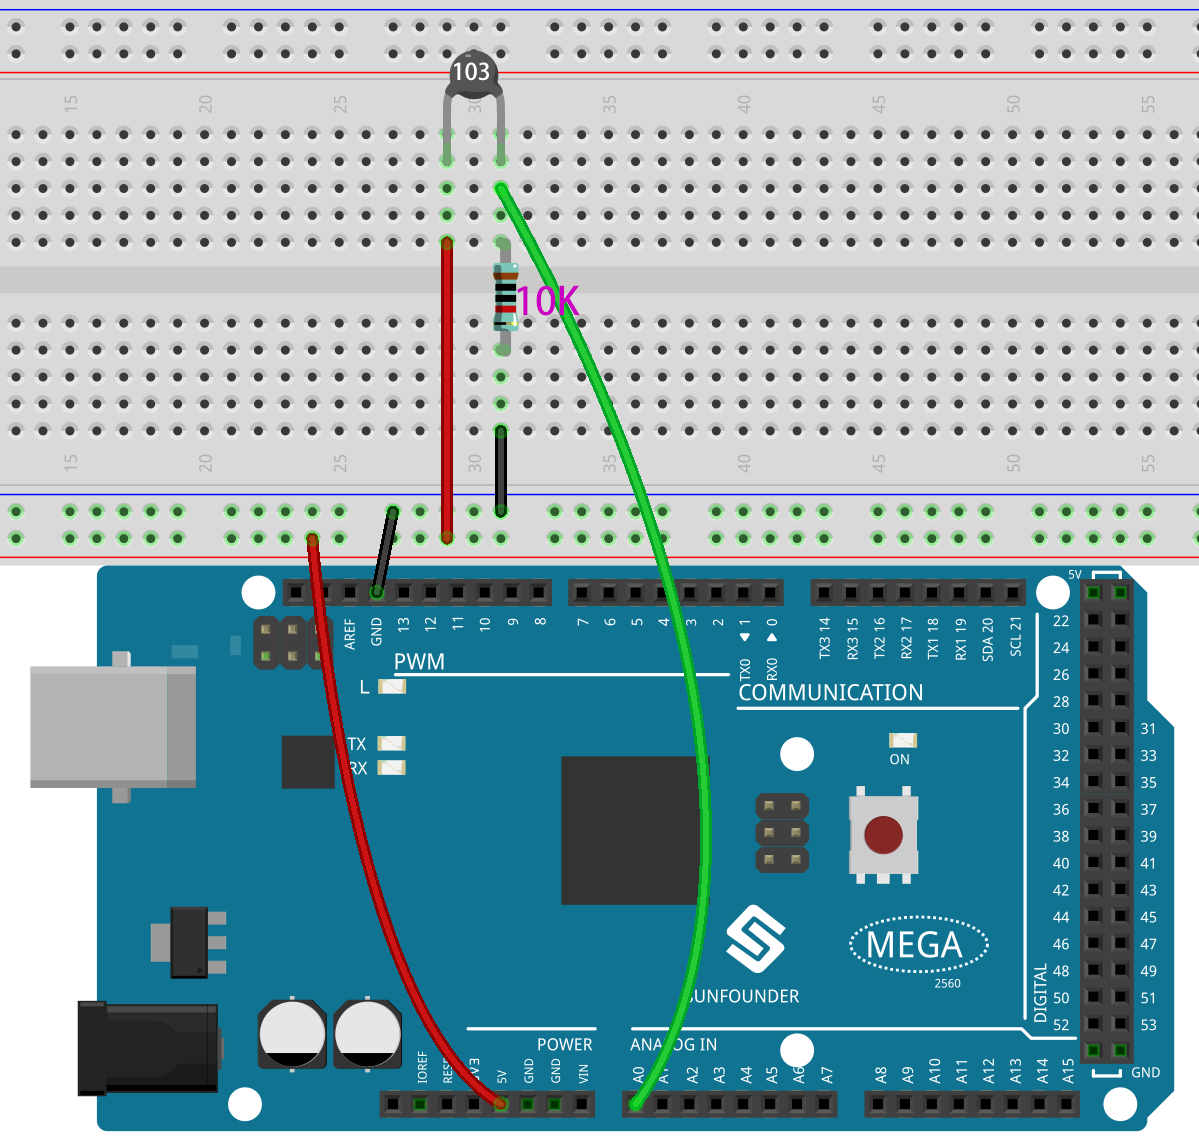
Fritzing Circuit
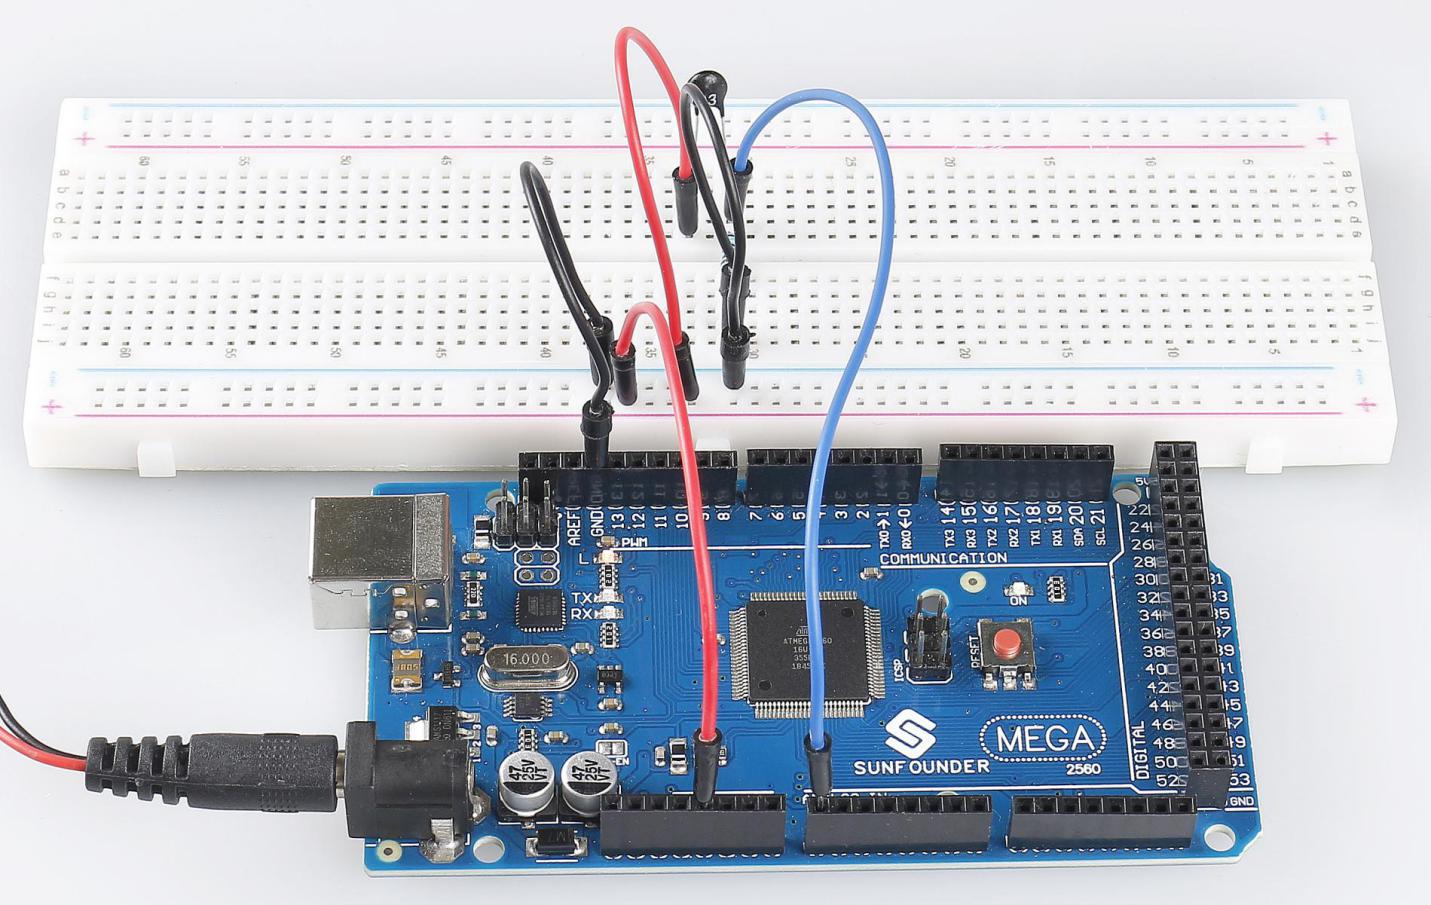
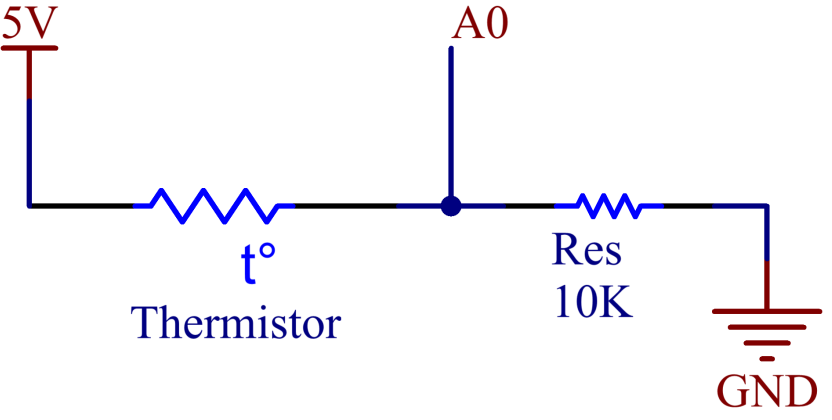
In this example, we use the analog pin A0 to get the value of Thermistor. One pin of thermistor is connected to 5V, and the other is wired up to A0. At the same time, a 10kΩ resistor is connected with the other pin before connecting to GND.
Schematic Diagram
Code
Note
You can open the file
2.27_thermistor.inounder the path ofsunfounder_vincent_kit_for_arduino\code\2.27_thermistordirectly.Or copy this code into Arduino IDE.
After uploading the code to the Mega2560 board, you can open the serial monitor to check the current temperature. The Kelvin temperature is calculated according to the formula TK=1/(ln(RT/RN)/B+1/TN).
Phenomenon Picture