Note
Hello, welcome to the SunFounder Raspberry Pi & Arduino & ESP32 Enthusiasts Community on Facebook! Dive deeper into Raspberry Pi, Arduino, and ESP32 with fellow enthusiasts.
Why Join?
Expert Support: Solve post-sale issues and technical challenges with help from our community and team.
Learn & Share: Exchange tips and tutorials to enhance your skills.
Exclusive Previews: Get early access to new product announcements and sneak peeks.
Special Discounts: Enjoy exclusive discounts on our newest products.
Festive Promotions and Giveaways: Take part in giveaways and holiday promotions.
👉 Ready to explore and create with us? Click [here] and join today!
2.5 7-Segment Display
Overview
In this lesson, you will learn something about 7-Segment Display. 7-Segment Display has so many advantages that it is widely used in electrical equipments, especially in household appliances that display numerical information, such as display, air conditioner, water heater, refrigerator and so on. LEDs on the 7-Segment Display emit light by the input of different electrical signals to the different pins of it. The numerical information it can display includes time, date, temperature and so on.
Components Required
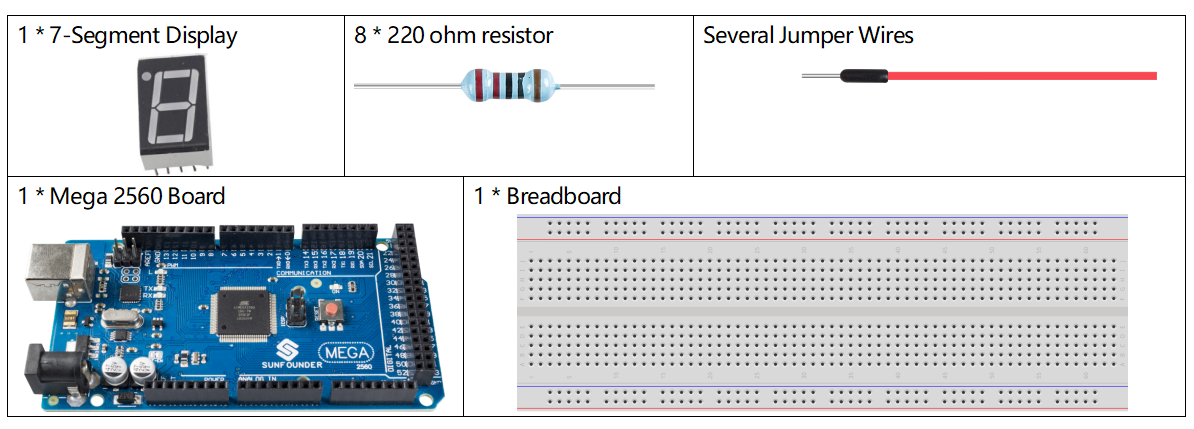
Fritzing Circuit
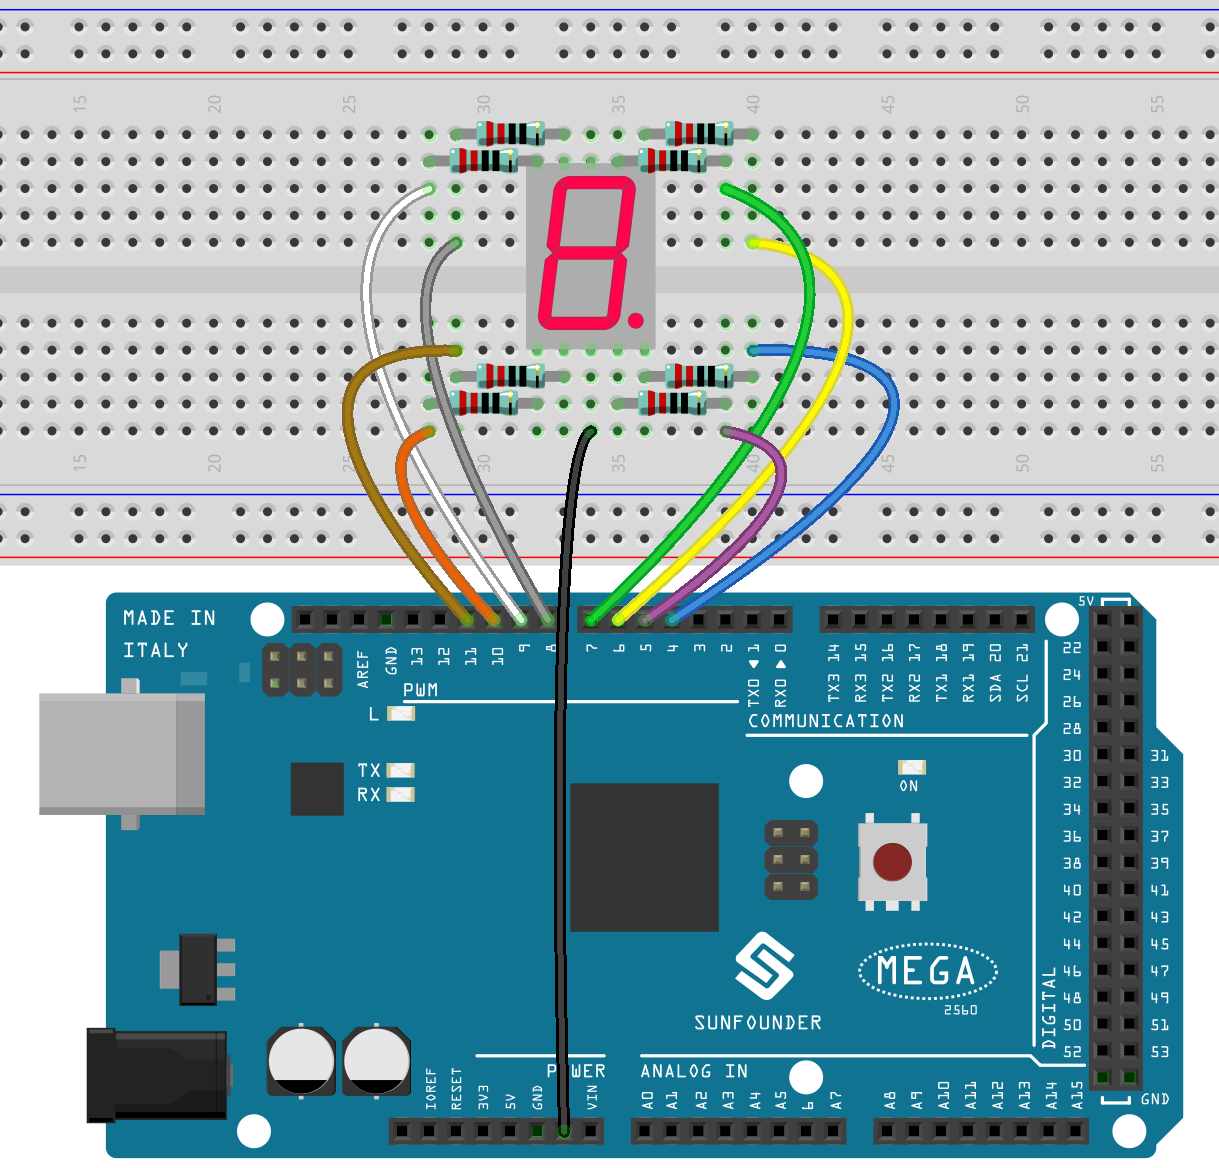
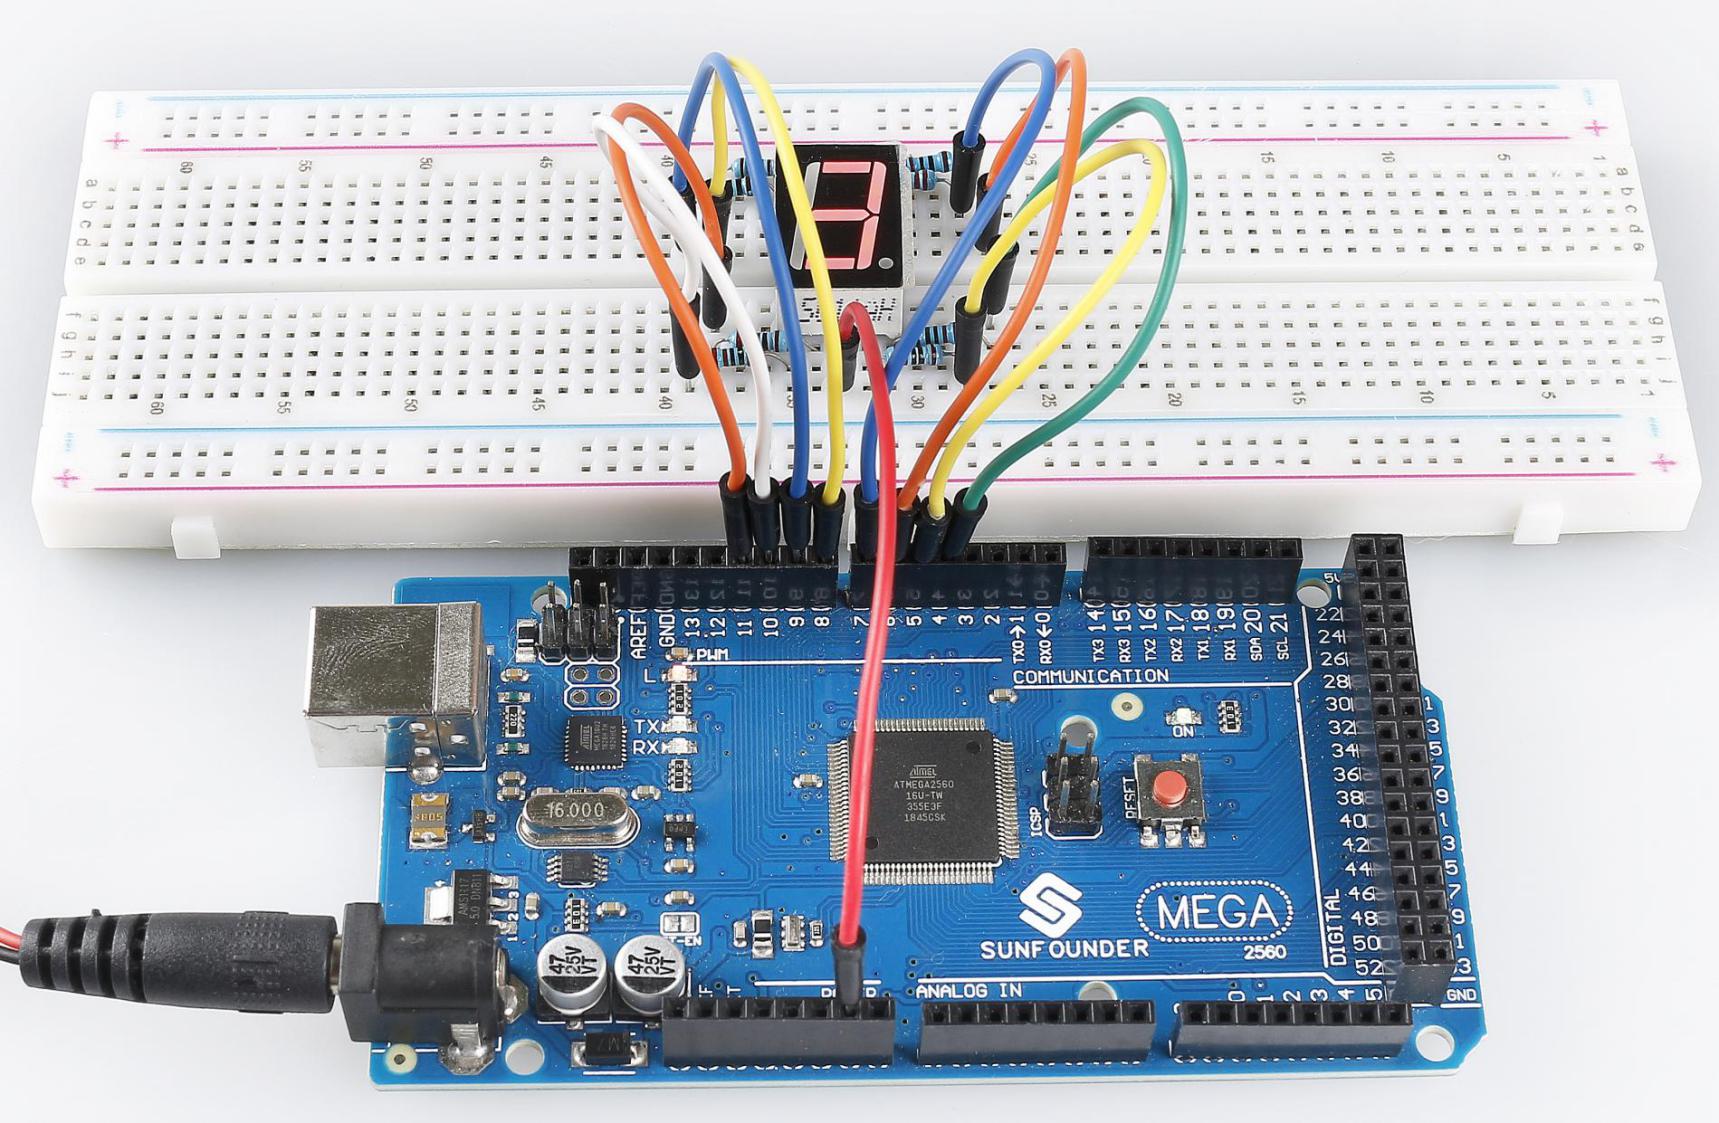
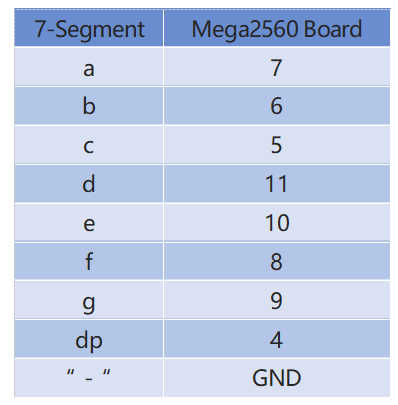
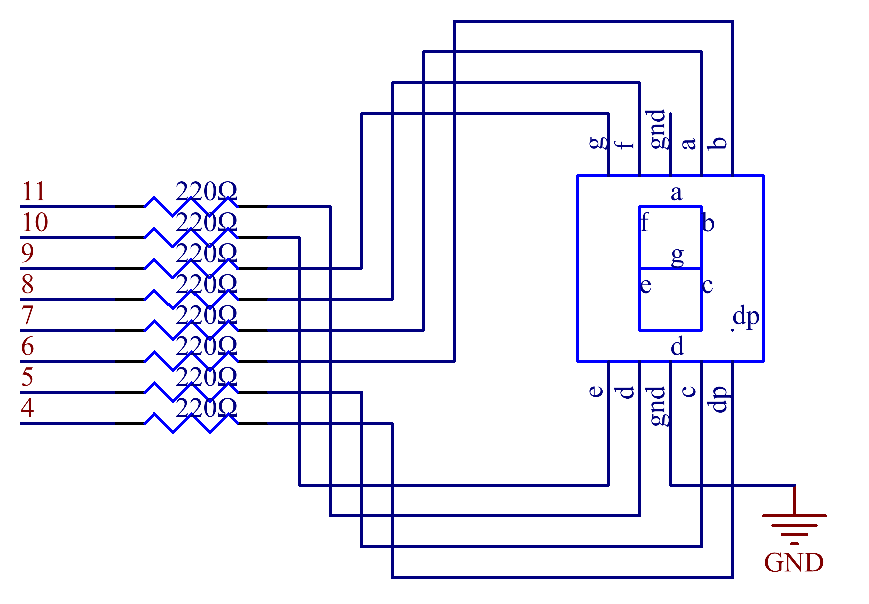
Connect each of pin a-g of the 7-Segment Display to one 220ohm current limiting resistor respectively and then to pin 4–11. GND connects to GND.
The wiring between the 7-segment display and the Mega2560 board as shown below :
Schematic Diagram
Code
Note
You can open the file
2.5_7segment.inounder the path ofsunfounder_vincent_kit_for_arduino\code\2.5_7segmentdirectly.Or copy this code into Arduino IDE.
Once upload the codes, you can see the 7-segment display displaying 1, 2, 3, 4, 5, 6, 7, 8, 9, A, b, C, d, E, F in sequence.
Code Analysis
Take the pin numbers on 7-segment as names, and declare the pins on the Mega2560 board.
const int a=7; //a of 7-segment attach to digital pin 7
const int b=6; //b of 7-segment attach to digital pin 6
const int c=5; //c of 7-segment attach to digital pin 5
const int d=11;//d of 7-segment attach to digital pin 11
const int e=10;//e of 7-segment attach to digital pin 10
const int f=8;//f of 7-segment attach to digital pin 8
const int g=9;//g of 7-segment attach to digital pin 9
const int dp=4;//dp of 7-segment attach to digital pin 4
Install a series of subfunctions to package the level state at each block during the number display of the 7-segment. For example, when the character 「2」 is displayed, the block F and the block c are turn off; the other blocks are lit up.
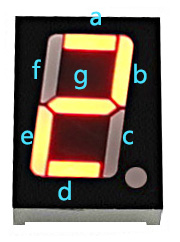
First, we need to understand how the numeral 2 appears on the 7-Segment display. It is achieved by powering on segments a, b, d, e, and g. In programming, pins connected to these segments are set to a High level while c and f are set to Low level. We start by using the function turnOffAllSegments() to turn off all segments and then light up the required ones.
After running this part, the 7-segment will display 2. Similarly, the display of other characters are the same. Since the letters b and d in upper case, namely B and D, would look the same with 8 and 0 on the display, they are displayed in lower case instead.
...
void digital_2()  //diaplay 2 to the 7-segment
{
  turnOffAllSegments();
  digitalWrite(a, HIGH);
  digitalWrite(b, HIGH);
  digitalWrite(g, HIGH);
  digitalWrite(e, HIGH);
  digitalWrite(d, HIGH);
}
...
In loop(), call the function that displays the number.
void loop()
{
digital_1();//diaplay 1 to the 7-segment
delay(1000);//wait for a second
digital_2();//diaplay 2 to the 7-segment
delay(1000); //wait for a second
digital_3();//diaplay 3 to the 7-segment
//...
}
Phenomenon Picture