Note
Hello, welcome to the SunFounder Raspberry Pi & Arduino & ESP32 Enthusiasts Community on Facebook! Dive deeper into Raspberry Pi, Arduino, and ESP32 with fellow enthusiasts.
Why Join?
Expert Support: Solve post-sale issues and technical challenges with help from our community and team.
Learn & Share: Exchange tips and tutorials to enhance your skills.
Exclusive Previews: Get early access to new product announcements and sneak peeks.
Special Discounts: Enjoy exclusive discounts on our newest products.
Festive Promotions and Giveaways: Take part in giveaways and holiday promotions.
👉 Ready to explore and create with us? Click [here] and join today!
1.10 State Change Detection
Overview
When you use button, you can not only press down the button, light on the LED, release the button, turn off the LED, but also can switch the working state of the LED every time the button is pressed. In order to achieve this effect, you need to know when the state of the button changes from off to on, that is, “state change detection”. In this lesson, we will print the results of state change detection of the button in the serial monitor.
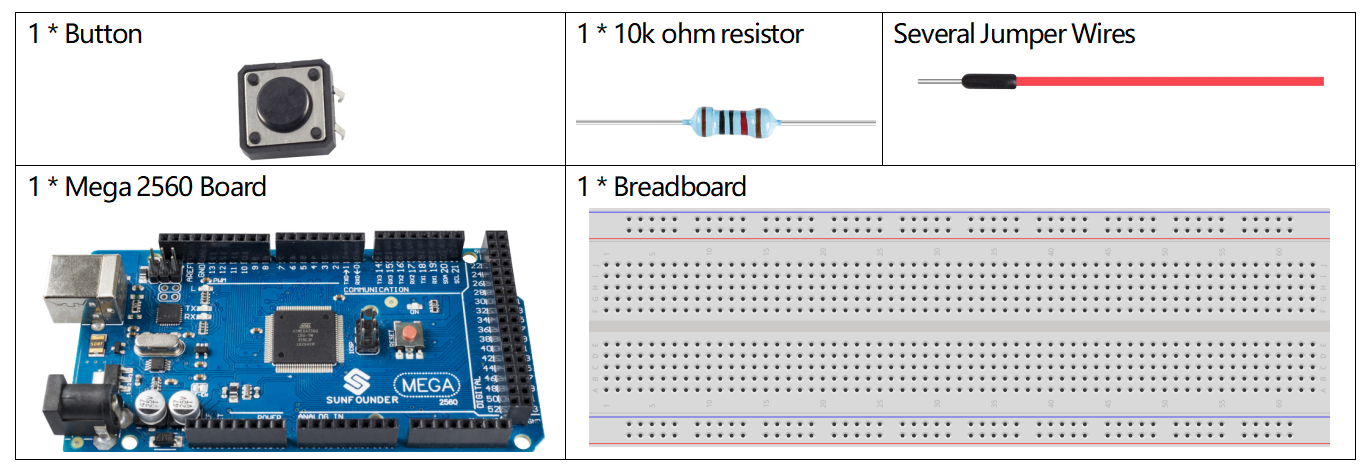
Components Required
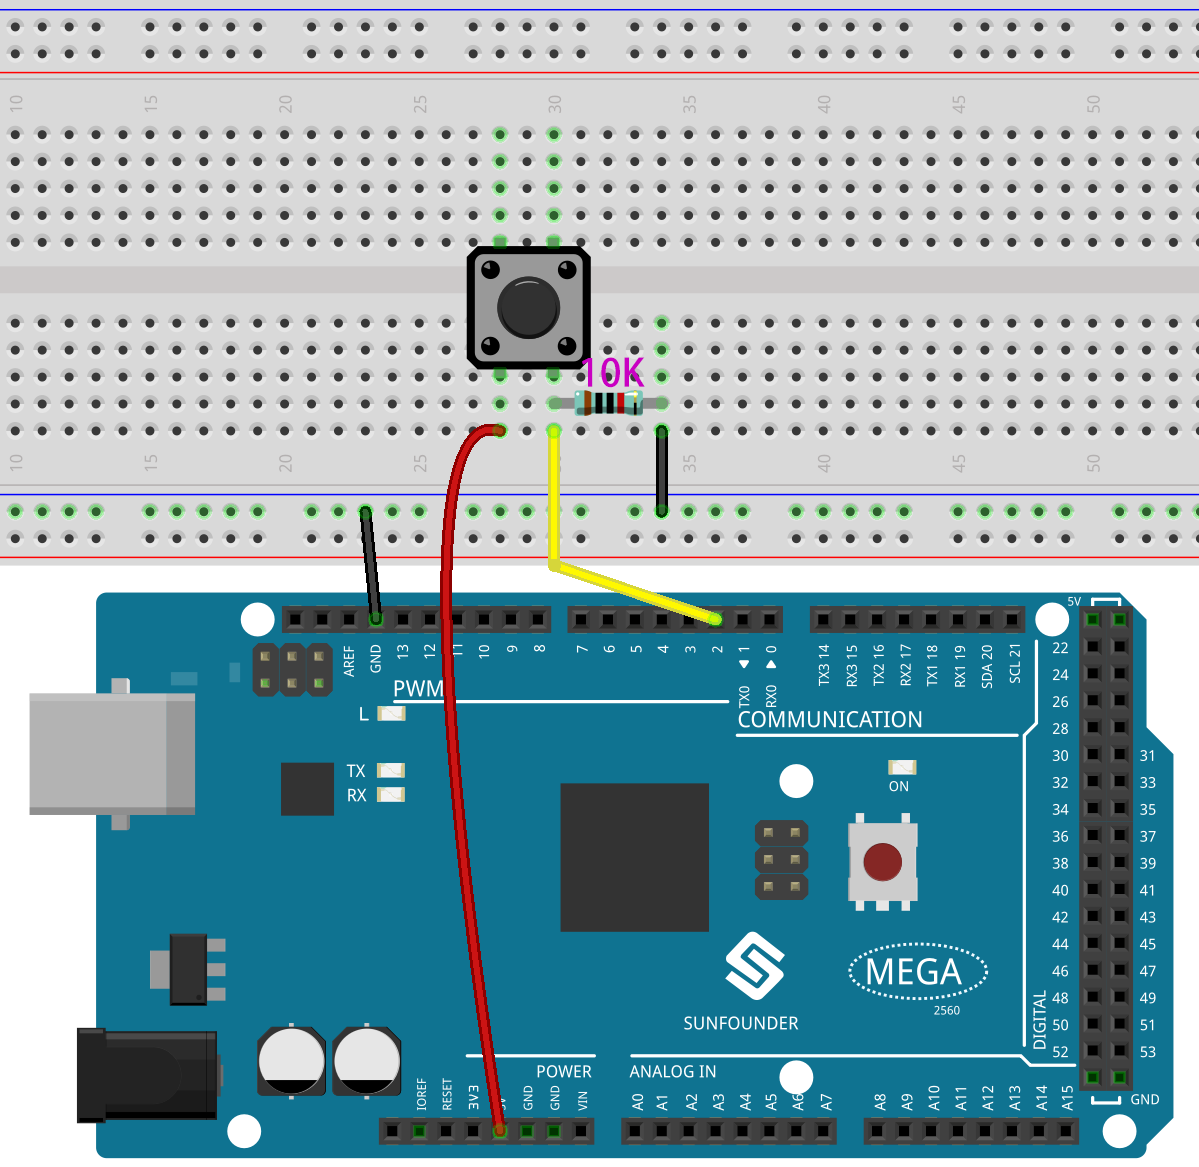
Fritzing Circuit
In this example, we use pin 2 to read the signal of the button.
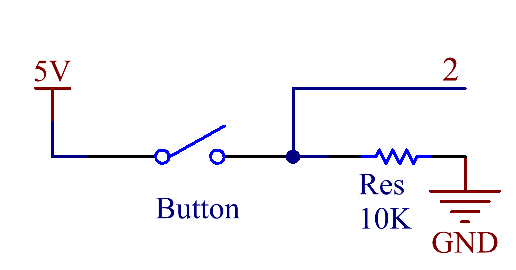
Schematic Diagram
Code
Note
You can open the file
1.10_stateChangeDetection.inounder the path ofsunfounder_vincent_kit_for_arduino\code\1.10_stateChangeDetectiondirectly.Or copy this code into Arduino IDE.
After the codes are uploaded into the Mega2560 board, the output number will switch between 0 and 1 every time you press the button.
Code Analysis
Declare a pin connected to Button.
const int buttonPin = 2;
Declare a variable called 「detectionState」to record every state of state change detection.
int detectionState = 0;
Declare two variables to read the state of the button for state change detection.
int buttonState = 0;
int lastButtonState = 0;
In setup(), initialize the pins and then start up the serial monitor.
pinMode(buttonPin, INPUT);
Serial.begin(9600);
In loop(), read the value of buttonPin and then assign to the variable buttonState.
buttonState = digitalRead(buttonPin);
Compare buttonState with lastButtonState, if they are not equal, it indicates that the state is changed. A delay(50) is needed to realize debouncing during the changing detection. After comparison, assign the buttonState to lastButtonState to make the next round of judgment.
if (buttonState != lastButtonState) {
...
    delay(50);
}
lastButtonState = buttonState;
The state change judgment installed (buttonState != lastButtonState), the further judgment is made to get the condition「Press the button」.
if (buttonState == HIGH) {
...
    }
Under the state「Press the button」, detectionState is being operated and it switches between 1 and 0. Meanwhile, the value of detectionState is printed.
detectionState=(detectionState+1)%2;
Serial.print("The detection state is:");
Serial.println(detectionState);
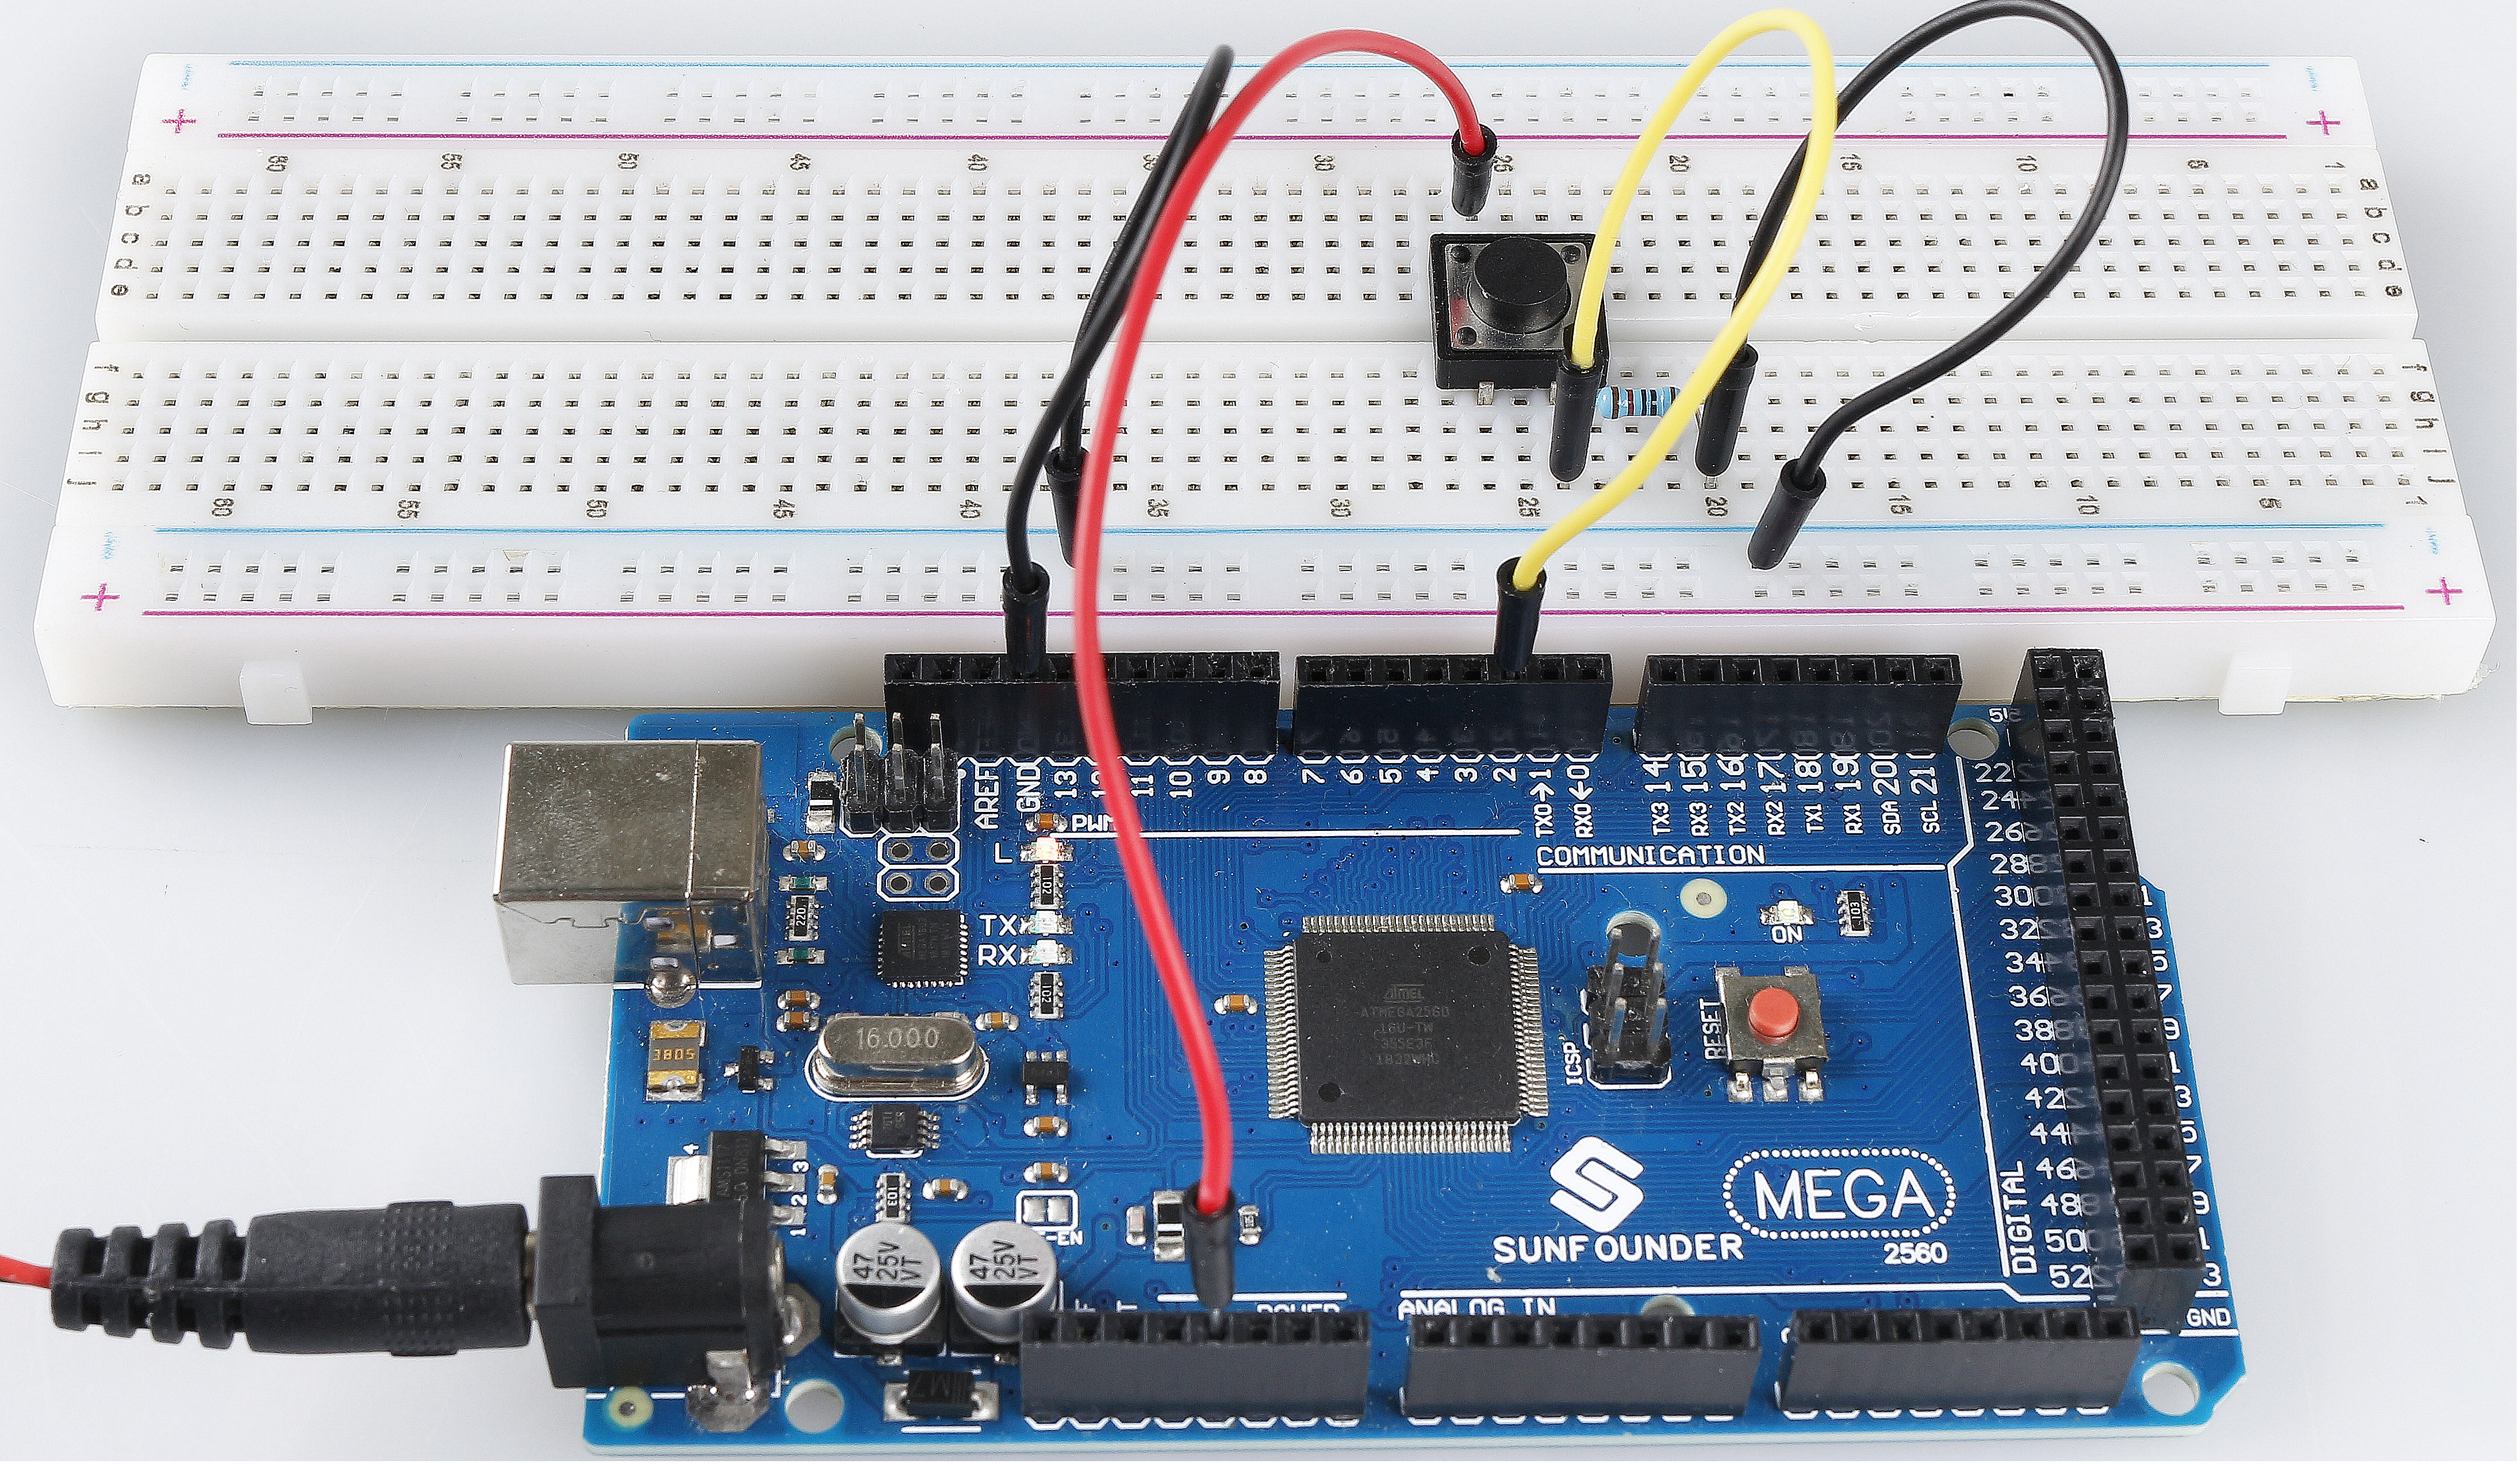
Phenomenon Picture