Note
Hello, welcome to the SunFounder Raspberry Pi & Arduino & ESP32 Enthusiasts Community on Facebook! Dive deeper into Raspberry Pi, Arduino, and ESP32 with fellow enthusiasts.
Why Join?
Expert Support: Solve post-sale issues and technical challenges with help from our community and team.
Learn & Share: Exchange tips and tutorials to enhance your skills.
Exclusive Previews: Get early access to new product announcements and sneak peeks.
Special Discounts: Enjoy exclusive discounts on our newest products.
Festive Promotions and Giveaways: Take part in giveaways and holiday promotions.
👉 Ready to explore and create with us? Click [here] and join today!
2.32 DHT11 Module
Overview
In this lesson, you will learn how to use DHT11 Module. The DHT11 is a basic, ultra low-cost digital temperature and humidity sensor. It uses a capacitive humidity sensor and a thermistor to measure the surrounding air, and spits out a digital signal on the data pin (no analog input pins are needed).
Components Required
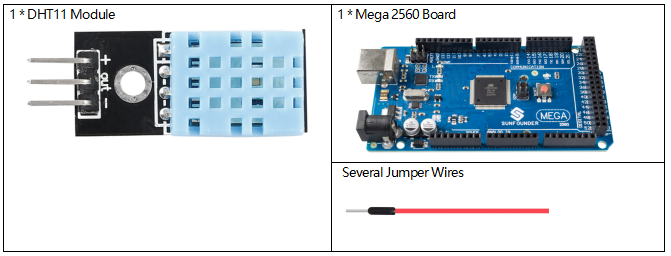
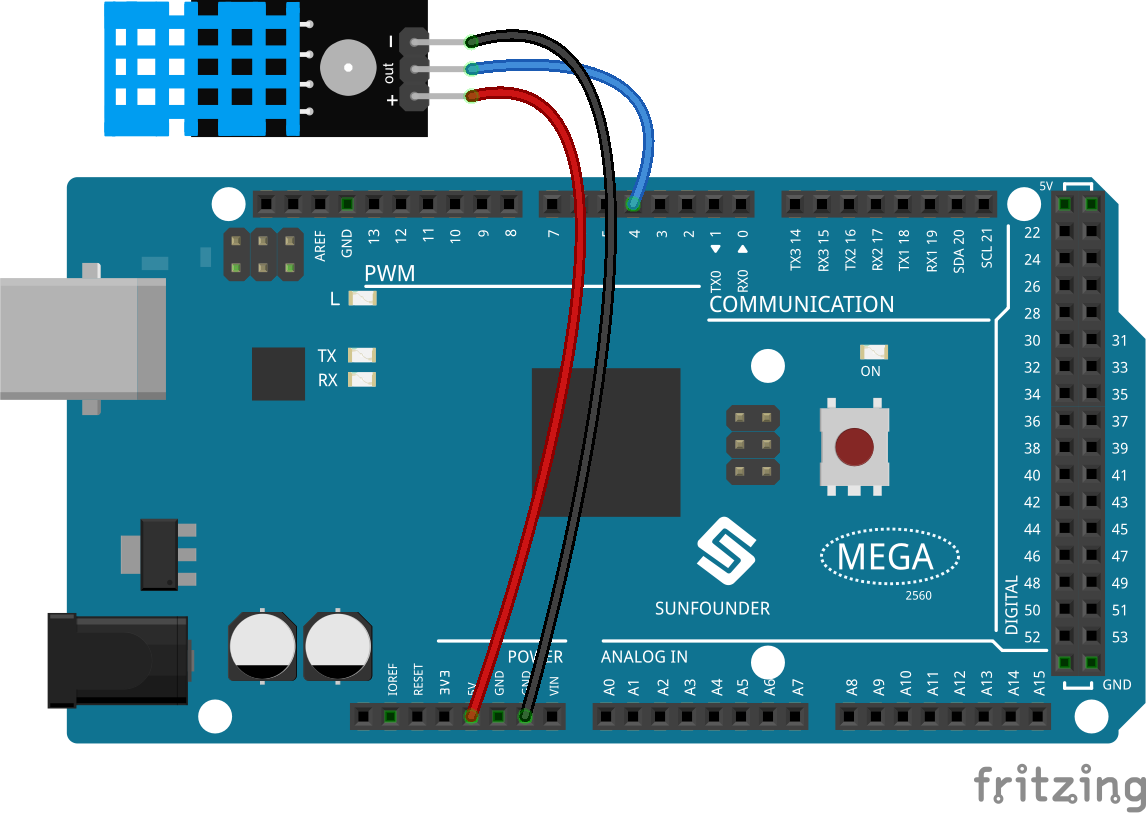
Fritzing Circuit
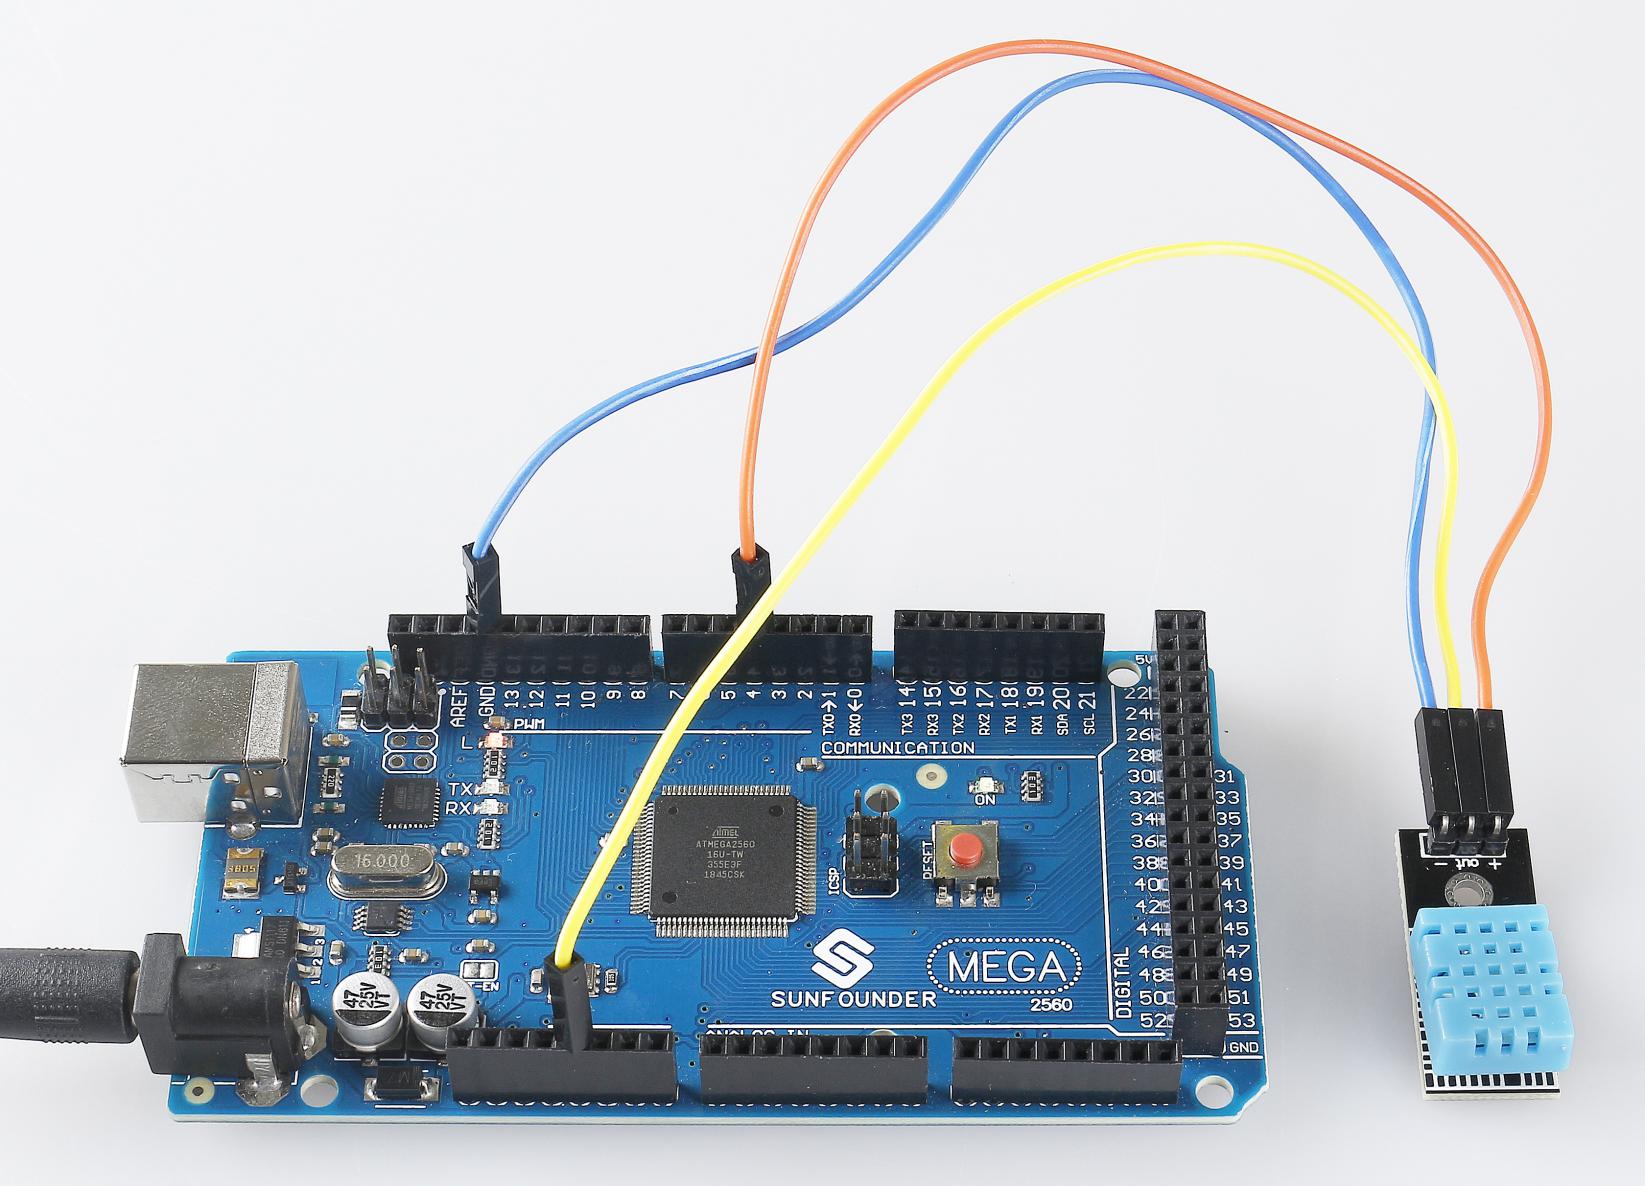
In this example, we can directly connect the pins of DHT11 Module to the pins of Mega 2560 Board, and we use pin 4 to read the signal of DHT11 Module. Connect the pin「+」of DHT11 Module to 5V, the pin「-」 to GND, and the pin OUT to pin 4.
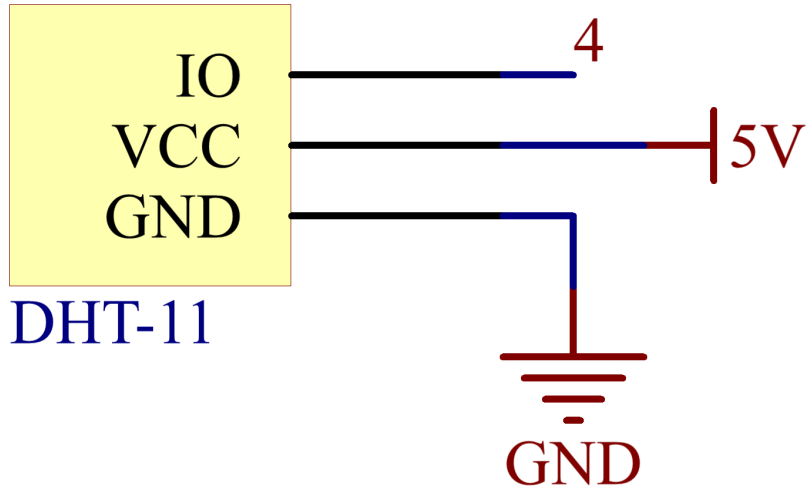
Wiring Diagram
Code
Note
You can open the file
2.32_dhtModule.inounder the path ofsunfounder_vincent_kit_for_arduino\code\2.32_dhtModuledirectly.The
DHT sensor librarylibrary is used here, you can install it from the Library Manager.
After the codes are uploaded to the Mega2560 board, the serial monitor will continue to output the current temperature and humidity values of the environment.
Code Analysis
Includes the
DHT.hlibrary, which provides functions to interact with the DHT sensors. Then, set the pin and type for the DHT sensor.#include "DHT.h" #define DHTPIN 4 // Set the pin connected to the DHT11 data pin #define DHTTYPE DHT11 // DHT 11 DHT dht(DHTPIN, DHTTYPE);
Initializes serial communication at a baud rate of 115200 and initializes the DHT sensor.
void setup() {
    Serial.begin(115200);
    Serial.println("DHT11 test!");
    dht.begin();
}
In the
loop()function, read temperature and humidity values from the DHT11 sensor, and print them to the serial monitor.void loop() { // Wait a few seconds between measurements. delay(2000); // Reading temperature or humidity takes about 250 milliseconds! // Sensor readings may also be up to 2 seconds 'old' (it's a very slow sensor) float humidity = dht.readHumidity(); // Read temperature as Celsius (the default) float temperture = dht.readTemperature(); // Check if any reads failed and exit early (to try again). if (isnan(humidity) || isnan(temperture)) { Serial.println("Failed to read from DHT sensor!"); return; } // Print the humidity and temperature Serial.print("Humidity: "); Serial.print(humidity); Serial.print(" %\t"); Serial.print("Temperature: "); Serial.print(temperture); Serial.println(" *C"); }
The
dht.readHumidity()function is called to read the humidity value from the DHT sensor.The
dht.readTemperature()function is called to read the temperature value from the DHT sensor.The
isnan()function is used to check if the readings are valid. If either the humidity or temperature value is NaN (not a number), it indicates a failed reading from the sensor, and an error message is printed.
Phenomenon Picture