Lesson 30 I2C LCD1602
Introduction
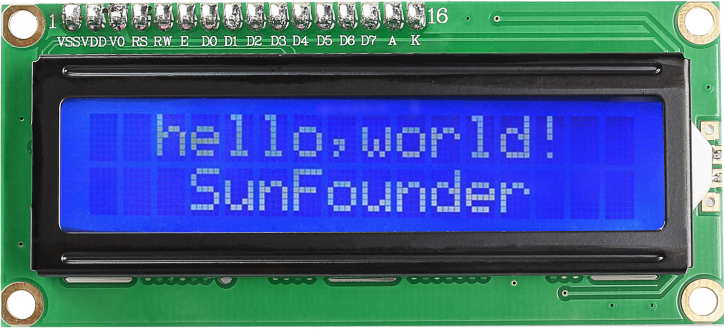
LCD1602 is a character type liquid crystal display, which can display 32 (16*2) characters at the same time. It has 16 pins, of which at least 7 would be used each time. You can use a PCF8574 I2C chip to expand I/O ports so only two GPIO ports would be occupied.
Required Components
1 * Raspberry Pi
1 * Breadboard
1 * I2C LCD1602
Several jumper wires
Experimental Principle
In this experiment, I2C is used to configure LCD so that you can control the LCD1602 to display characters. The I2C slave address of I2C LCD1602 here is 0x27.
Experimental Procedures
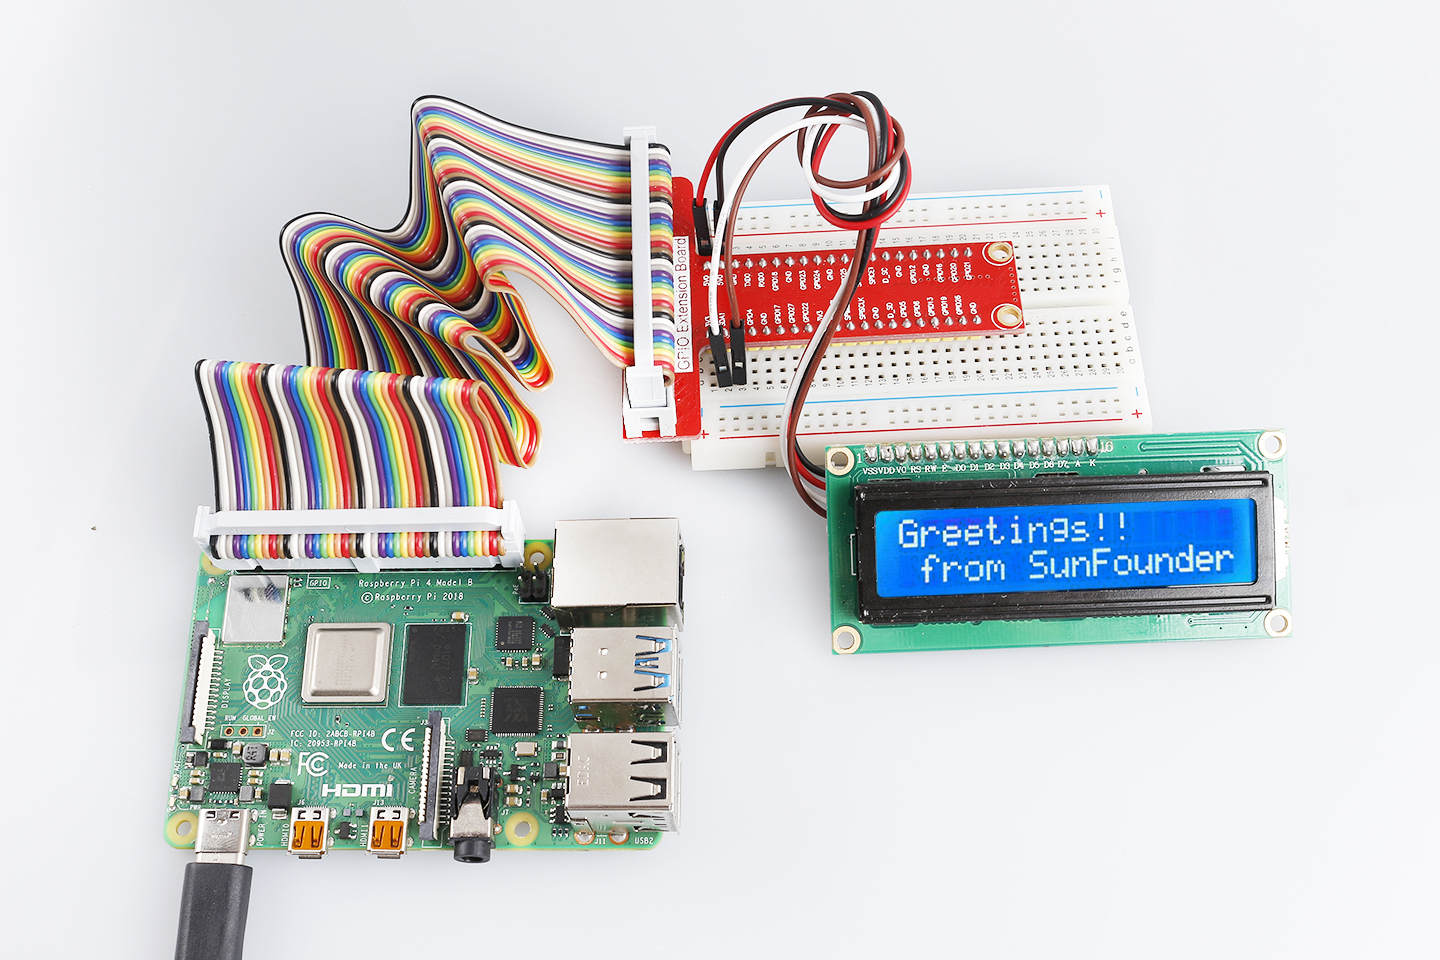
Step 1: Build the circuit.
Raspberry Pi |
GPIO Extension Board |
I2C LCD1602 Module |
SCL |
SCL1 |
SCL |
SDA |
SDA1 |
SDA |
5V |
5V0 |
VCC |
GND |
GND |
GND |

Step 2: Setup I2C(see Appendix. If you have set I2C, skip this step.)
For C Users:
Step 3: Change directory.
cd /home/pi/SunFounder_SensorKit_for_RPi2/C/30_i2c_lcd1602/
Step 4: Compile.
gcc i2c_lcd1602.c -lwiringPi
Note
If it does not work after running, or there is an error prompt wiringPi.h: No such file or directory, please refer to WiringPi to install it.
Step 5: Run.
sudo ./a.out
Note
You can try screwing the potentiometer on the back if the code and wiring are fine, but the LCD still does not show the content.
Code
#include <stdio.h>
#include <wiringPi.h>
#include <wiringPiI2C.h>
#include <string.h>

int LCDAddr = 0x27;
int BLEN = 1;
int fd;

void write_word(int data){
    int temp = data;
    if ( BLEN == 1 )
        temp |= 0x08;
    else
        temp &= 0xF7;
    wiringPiI2CWrite(fd, temp);
}

void send_command(int comm){
    int buf;
    // Send bit7-4 firstly
    buf = comm & 0xF0;
    buf |= 0x04;                    // RS = 0, RW = 0, EN = 1
    write_word(buf);
    delay(2);
    buf &= 0xFB;                    // Make EN = 0
    write_word(buf);

    // Send bit3-0 secondly
    buf = (comm & 0x0F) << 4;
    buf |= 0x04;                    // RS = 0, RW = 0, EN = 1
    write_word(buf);
    delay(2);
    buf &= 0xFB;                    // Make EN = 0
    write_word(buf);
}

void send_data(int data){
    int buf;
    // Send bit7-4 firstly
    buf = data & 0xF0;
    buf |= 0x05;                    // RS = 1, RW = 0, EN = 1
    write_word(buf);
    delay(2);
    buf &= 0xFB;                    // Make EN = 0
    write_word(buf);

    // Send bit3-0 secondly
    buf = (data & 0x0F) << 4;
    buf |= 0x05;                    // RS = 1, RW = 0, EN = 1
    write_word(buf);
    delay(2);
    buf &= 0xFB;                    // Make EN = 0
    write_word(buf);
}

void init(){
    send_command(0x33);     // Must initialize to 8-line mode at first
    delay(5);
    send_command(0x32);     // Then initialize to 4-line mode
    delay(5);
    send_command(0x28);     // 2 Lines & 5*7 dots
    delay(5);
    send_command(0x0C);     // Enable display without cursor
    delay(5);
    send_command(0x01);     // Clear Screen
    wiringPiI2CWrite(fd, 0x08);
}

void clear(){
    send_command(0x01);     //clear Screen
}

void write(int x, int y, char data[]){
    int addr, i;
    int tmp;
    if (x < 0)  x = 0;
    if (x > 15) x = 15;
    if (y < 0)  y = 0;
    if (y > 1)  y = 1;

    // Move cursor
    addr = 0x80 + 0x40 * y + x;
    send_command(addr);

    tmp = strlen(data);
    for (i = 0; i < tmp; i++){
        send_data(data[i]);
    }
}

void main(){
    fd = wiringPiI2CSetup(LCDAddr);
    init();
    write(0, 0, "Greetings!");
    write(1, 1, "From SunFounder");
    delay(2000);
    clear();
}
For Python Users:
Step 3: Change directory.
cd /home/pi/SunFounder_SensorKit_for_RPi2/Python/
Step 4: Run.
sudo python3 30_i2c_lcd1602.py
Note
If you get the error
FileNotFoundError: [Errno 2] No such file or directory: '/dev/i2c-1', you need to setup I2C (see Appendix -> I2C Configuration).If you get
ModuleNotFoundError: No module named 'smbus2'error, please run the command:sudo pip3 install smbus2.If the error
OSError: [Errno 121] Remote I/Oappears, it means the module is miswired or the module is broken.If the module is connected correctly and still has the error
TimeoutError: [Errno 110] Connection timed out, it means that the module is broken, please contact service@sunfounder.com. It is also possible to test if the I2C address appears with the commandi2cdetect -y 1if you have the I2C tools installed (sudo apt-get install i2c-tools).
Code
#!/usr/bin/env python3
import LCD1602
import time

def setup():
    LCD1602.init(0x27, 1)   # init(slave address, background light)
    LCD1602.write(0, 0, 'Greetings!!')
    LCD1602.write(1, 1, 'from SunFounder')
    time.sleep(2)

def loop():
    space = '                '
    greetings = 'Thank you for buying SunFounder Sensor Kit for Raspberry! ^_^'
    greetings = space + greetings
    while True:
        tmp = greetings
        for i in range(0, len(greetings)):
            LCD1602.write(0, 0, tmp)
            tmp = tmp[1:]
            time.sleep(0.8)
            LCD1602.clear()

def destroy():
    pass

if __name__ == "__main__":
    try:
        setup()
        #loop()
        while True:
            pass
    except KeyboardInterrupt:
        destroy()
Now you can see “Greetings! From SunFounder” displayed on the LCD.