Lesson 25 Ultrasonic Ranging Module
Introduction
The ultrasonic sensor uses sound to accurately detect objects and measure distances. It sends out ultrasonic waves and converts them into electronic signals.
Required Components
1 * Raspberry Pi
1 * Breadboard
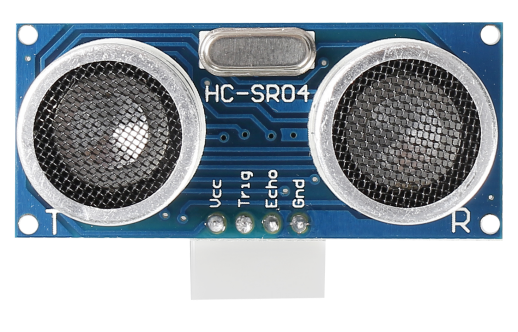
1 * Ultrasonic ranging module
1 * 4-Pin anti-reverse cable
Experimental Principle
This sensor works by sending a sound wave out and calculating the time it takes for the sound wave to get back to the ultrasonic sensor. By doing this, it can tell us how far away objects are relative to the ultrasonic sensor.
Test distance = (high level time * velocity of sound (340M/S)) / 2 (in meters)
Experimental Procedures
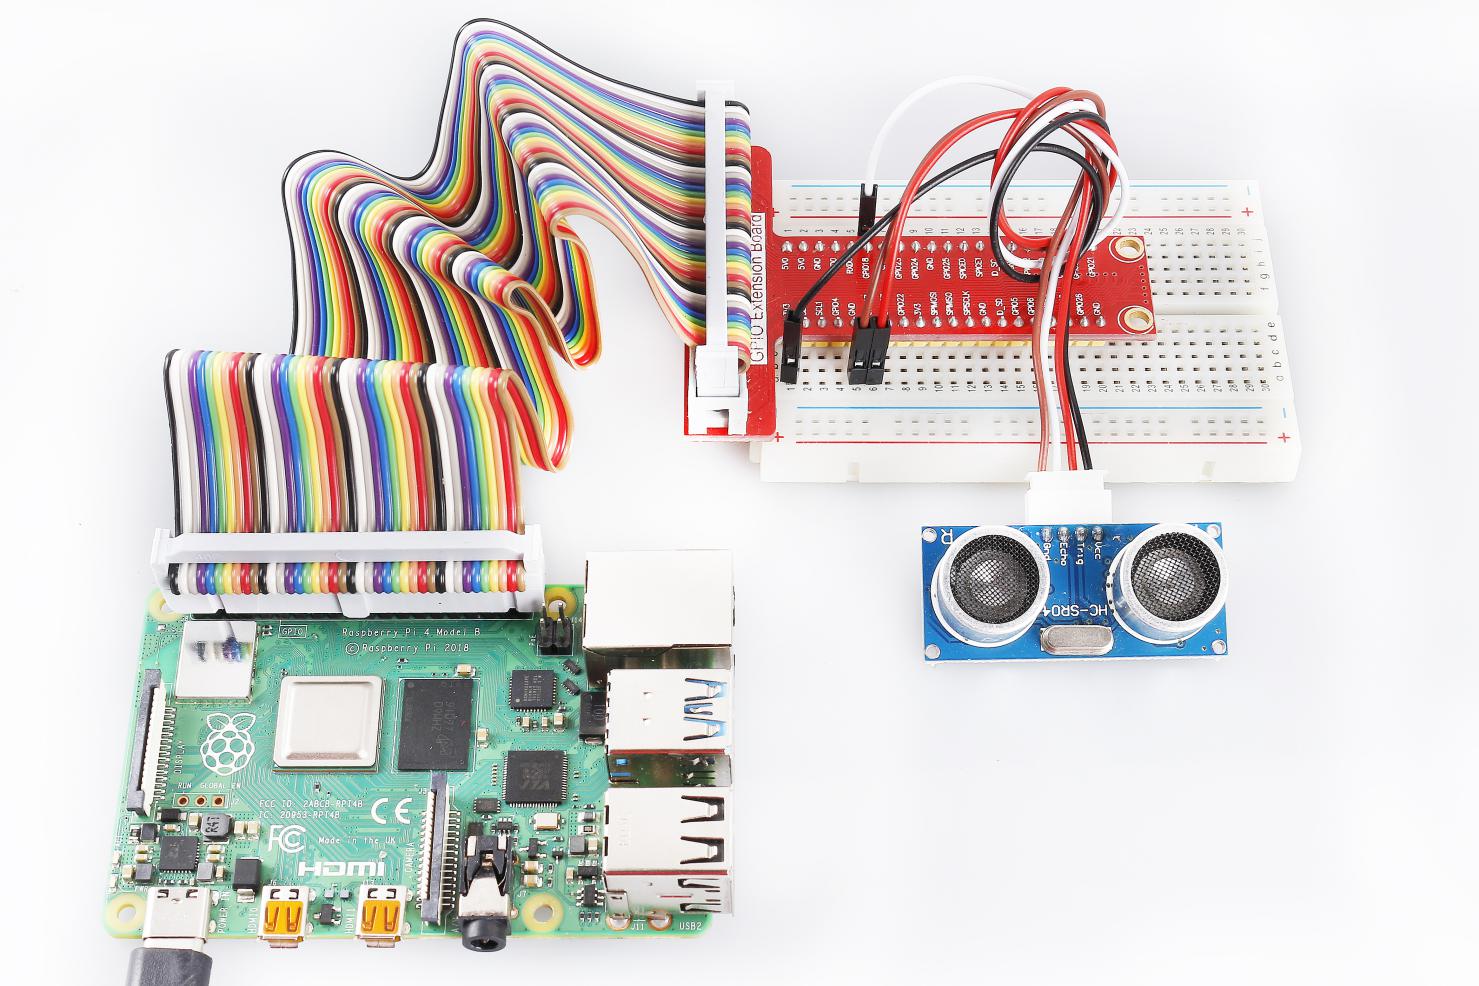
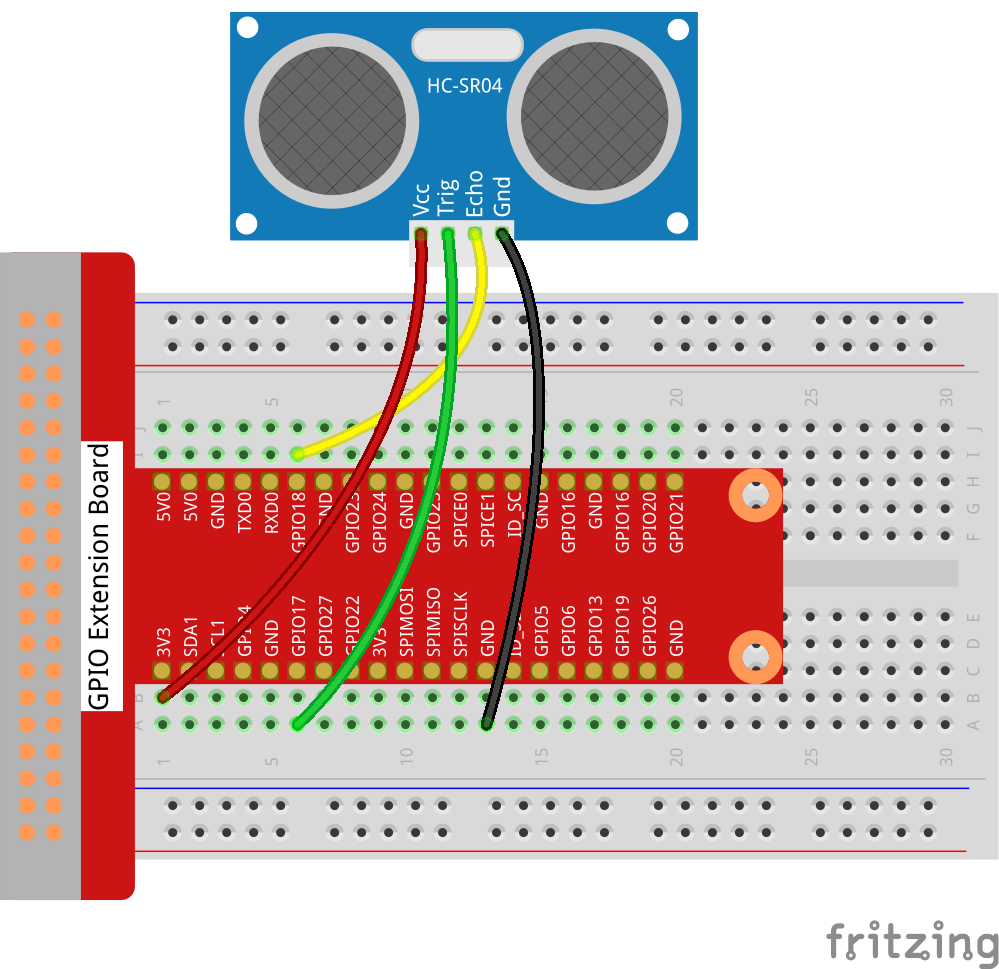
Step 1: Build the circuit.
Raspberry Pi |
GPIO Extension Board |
Ultrasonic Ranging Module |
3.3V |
3V3 |
VCC |
GPIO0 |
GPIO17 |
Trig |
GPIO1 |
GPIO18 |
Echo |
GND |
GND |
GND |
For C Users:
Step 2: Change directory.
cd /home/pi/SunFounder_SensorKit_for_RPi2/C/25_ultrasonic_ranging/
Step 3: Compile.
gcc ultrasonic_ranging.c -lwiringPi
Note
If it does not work after running, or there is an error prompt wiringPi.h: No such file or directory, please refer to WiringPi to install it.
Step 4: Run.
sudo ./a.out
Code
#include <wiringPi.h>
#include <stdio.h>
#include <sys/time.h>

#define Trig    0
#define Echo    1

void ultraInit(void)
{
    pinMode(Echo, INPUT);
    pinMode(Trig, OUTPUT);
}

float disMeasure(void)
{
    struct timeval tv1;
    struct timeval tv2;
    long time1, time2;
    float dis;

    digitalWrite(Trig, LOW);
    delayMicroseconds(2);

    digitalWrite(Trig, HIGH);
    delayMicroseconds(10);      //发出超声波脉冲
    digitalWrite(Trig, LOW);

    while(!(digitalRead(Echo) == 1));
    gettimeofday(&tv1, NULL);           //获取当前时间

    while(!(digitalRead(Echo) == 0));
    gettimeofday(&tv2, NULL);           //获取当前时间

    time1 = tv1.tv_sec * 1000000 + tv1.tv_usec;   //微秒级的时间
    time2  = tv2.tv_sec * 1000000 + tv2.tv_usec;

    dis = (float)(time2 - time1) / 1000000 * 34000 / 2;  //求出距离

    return dis;
}

int main(void)
{
    float dis;

    if(wiringPiSetup() == -1){ //when initialize wiring failed,print messageto screen
        printf("setup wiringPi failed !");
        return 1;
    }

    ultraInit();

    while(1){
        dis = disMeasure();
        printf("%0.2f cm\n\n",dis);
        delay(300);
    }

    return 0;
}
For Python Users:
Step 2: Change directory.
cd /home/pi/SunFounder_SensorKit_for_RPi2/Python/
Step 3: Run.
sudo python3 25_ultrasonic_ranging.py
Code
#!/usr/bin/env python3

import RPi.GPIO as GPIO
import time

TRIG = 11
ECHO = 12

def setup():
    GPIO.setmode(GPIO.BOARD)
    GPIO.setup(TRIG, GPIO.OUT)
    GPIO.setup(ECHO, GPIO.IN)

def distance():
    GPIO.output(TRIG, 0)
    time.sleep(0.000002)

    GPIO.output(TRIG, 1)
    time.sleep(0.00001)
    GPIO.output(TRIG, 0)

    while GPIO.input(ECHO) == 0:
        a = 0
    time1 = time.time()
    while GPIO.input(ECHO) == 1:
        a = 1
    time2 = time.time()

    during = time2 - time1
    return during * 340 / 2 * 100

def loop():
    while True:
        dis = distance()
        print (dis, 'cm')
        print ('')
        time.sleep(0.3)

def destroy():
    GPIO.cleanup()

if __name__ == "__main__":
    setup()
    try:
        loop()
    except KeyboardInterrupt:
        destroy()
Now you can see the distance between the ultrasonic ranging module and the obstacle (like your palm) in front on the screen. Sway your hand over the ultrasonic ranging module slowly and observe the distance printed on the screen.