Nota
Ciao, benvenuto nella SunFounder Raspberry Pi & Arduino & ESP32 Enthusiasts Community su Facebook! Approfondisci l’esplorazione del Raspberry Pi, Arduino ed ESP32 con altri appassionati.
Perché unirti a noi?
Supporto esperto: Risolvi i problemi post-vendita e le sfide tecniche con l’aiuto della nostra comunità e del nostro team.
Impara e condividi: Scambia consigli e tutorial per migliorare le tue competenze.
Anteprime esclusive: Accedi in anteprima agli annunci di nuovi prodotti e alle anticipazioni esclusive.
Sconti speciali: Approfitta di sconti esclusivi sui nostri prodotti più recenti.
Promozioni e omaggi festivi: Partecipa a omaggi e promozioni speciali durante le festività.
👉 Sei pronto a esplorare e creare con noi? Clicca su [Qui] e unisciti oggi stesso!
4.1.1 Fotocamera
Introduzione
Qui realizzeremo una fotocamera con un otturatore: quando premi il pulsante, la fotocamera scatta mentre il LED lampeggia.
Componenti necessari
In questo progetto avremo bisogno dei seguenti componenti.
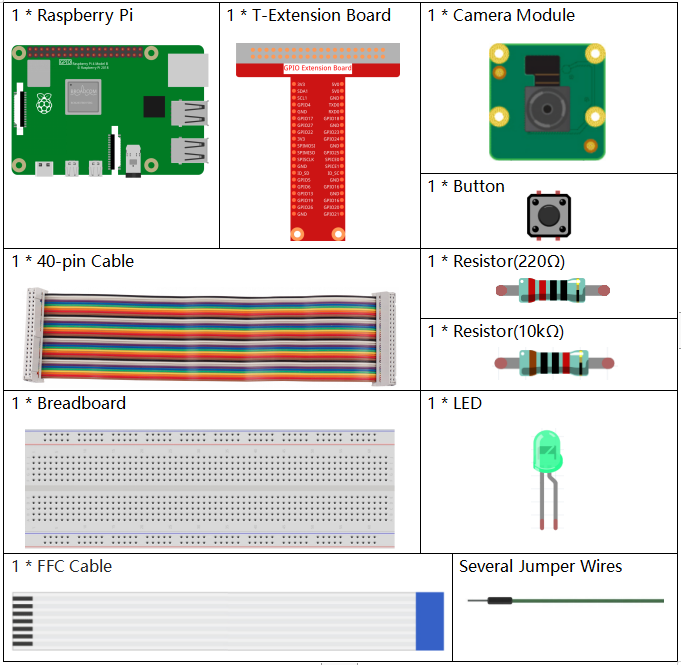
È sicuramente conveniente acquistare un kit completo, ecco il link:
Nome |
ELEMENTI IN QUESTO KIT |
LINK |
|---|---|---|
Kit Raphael |
337 |
Puoi anche acquistarli separatamente dai link sottostanti.
INTRODUZIONE AI COMPONENTI |
LINK PER L’ACQUISTO |
|---|---|
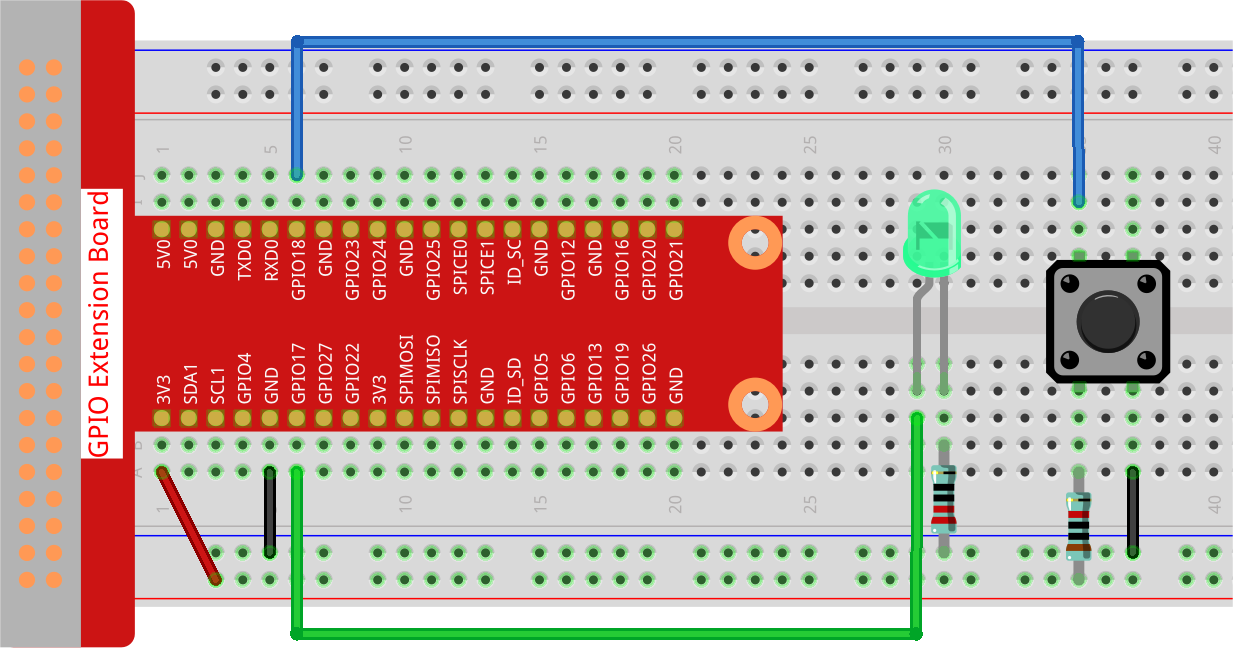
Schema elettrico
T-Board Name |
physical |
wiringPi |
BCM |
GPIO17 |
Pin 11 |
0 |
17 |
GPIO18 |
Pin 12 |
1 |
18 |

Procedura sperimentale
Passo 1: Costruisci il circuito.
Passo 2: Per collegare il modulo fotocamera e completare la configurazione, fai riferimento a: Modulo Fotocamera.
Passo 3: Accedi al desktop del Raspberry Pi. Potresti aver bisogno di uno schermo per un’esperienza migliore, fai riferimento a: Collega il tuo Raspberry Pi. Oppure accedi al desktop del Raspberry Pi da remoto, per un tutorial dettagliato fai riferimento a Desktop Remoto.
Passo 4: Apri un terminale e accedi alla cartella del codice.
cd ~/raphael-kit/python/
Passo 5: Esegui.
sudo python3 4.1.1_Camera.py
Dopo l’esecuzione del programma:
Si apre una finestra di anteprima live della fotocamera.
Il programma attende la pressione del pulsante.
Quando il pulsante viene premuto:
Il LED lampeggia tre volte.
La fotocamera cattura una foto.
Il LED rimane acceso per 0,5 secondi come conferma.
L’immagine viene salvata con un nome contenente timestamp in
/home/<username>/.
Premere
Ctrl+Cin qualsiasi momento per interrompere l’anteprima, liberare le risorse GPIO e uscire dal programma in modo pulito.
Nota
Puoi anche aprire 4.1.1_Camera.py nel percorso ~/raphael-kit/python/ con un IDE Python, clicca sul pulsante Run per eseguire e sul pulsante Stop per interrompere il codice.
Se desideri scaricare la foto sul tuo PC, fai riferimento a Software FileZilla.
Codice
#!/usr/bin/env python3
import time
import os
import RPi.GPIO as GPIO
from picamera2 import Picamera2, Preview

# ----------------------------
# GPIO SETUP
# ----------------------------

BUTTON_PIN = 18  # The push button is connected to GPIO18
LED_PIN = 17     # The LED is connected to GPIO17

GPIO.setmode(GPIO.BCM)  # Use BCM GPIO numbering

# The button uses a 10K pull-up resistor externally.
# When released → HIGH, when pressed → LOW.
GPIO.setup(BUTTON_PIN, GPIO.IN, pull_up_down=GPIO.PUD_UP)

# LED is an output (HIGH → ON, LOW → OFF)
GPIO.setup(LED_PIN, GPIO.OUT)
GPIO.output(LED_PIN, GPIO.LOW)  # Ensure LED is OFF at startup

# ----------------------------
# USER DIRECTORY SETUP
# ----------------------------

# Get the current logged-in username
user = os.getlogin()

# Build the path to the user's home directory (ex: /home/pi)
user_home = os.path.expanduser(f"~{user}")

# ----------------------------
# CAMERA SETUP
# ----------------------------

# Create a Picamera2 object
camera = Picamera2()

# Create a preview configuration:
# main → the main camera stream
# size → resolution 800x600
# format → display format used by the preview window
preview_config = camera.create_preview_configuration(
    main={"size": (800, 600), "format": "XRGB8888"}
)

# Apply the configuration to the camera
camera.configure(preview_config)

# Start the preview window using QTGL (GPU-accelerated)
camera.start_preview(Preview.QTGL)

# Start the camera hardware
camera.start()

print("Ready! Press the button to take a photo...")

# ----------------------------
# MAIN LOOP
# ----------------------------
try:
    while True:
        # Check if button is pressed (LOW means pressed)
        if GPIO.input(BUTTON_PIN) == GPIO.LOW:
            print("Button pressed! Taking photo...")

            # Flash LED 3 times to warn before taking the photo
            for _ in range(3):
                GPIO.output(LED_PIN, GPIO.HIGH)
                time.sleep(0.1)
                GPIO.output(LED_PIN, GPIO.LOW)
                time.sleep(0.1)

            # Build a unique filename using current date and time
            # Example: /home/pi/my_photo_20251201_143522.jpg
            timestamp = time.strftime("%Y%m%d_%H%M%S")
            filename = os.path.join(user_home, f"my_photo_{timestamp}.jpg")

            # Capture the image
            camera.capture_file(filename)

            print(f"Photo saved to: {filename}")

            # Turn LED ON briefly to confirm capture
            GPIO.output(LED_PIN, GPIO.HIGH)
            time.sleep(0.5)
            GPIO.output(LED_PIN, GPIO.LOW)

            # Debounce delay to prevent repeated triggers
            time.sleep(0.3)

        # Small delay to reduce CPU usage
        time.sleep(0.01)

# ----------------------------
# CLEAN EXIT WHEN CTRL+C IS PRESSED
# ----------------------------
except KeyboardInterrupt:
    print("\nCtrl+C received, exiting...")

# ----------------------------
# CLEANUP SECTION
# ----------------------------
finally:
    # Safely try to stop the camera preview
    try:
        camera.stop_preview()
    except:
        pass  # Ignore errors if preview wasn't running

    # Safely close the camera device
    try:
        camera.close()
    except:
        pass

    # Reset GPIO pins to a safe state
    GPIO.cleanup()

    print("Program exited cleanly.")
Spiegazione del Codice
Controlla se il pulsante collegato a
BUTTON_PINè premuto.if GPIO.input(BUTTON_PIN) == GPIO.LOW:
Poiché il pulsante utilizza una resistenza di pull-up, il suo stato predefinito è
HIGH. Quando il pulsante viene premuto, il segnale diventaLOWe avvia il processo di acquisizione della foto.Fa lampeggiare il LED tre volte come feedback visivo prima di scattare una foto.
for _ in range(3):
    GPIO.output(LED_PIN, GPIO.HIGH)
    time.sleep(0.1)
    GPIO.output(LED_PIN, GPIO.LOW)
    time.sleep(0.1)
Questo indica che il Raspberry Pi si sta preparando a catturare un’immagine.
Genera un nome file univoco utilizzando un timestamp e cattura una foto.
timestamp = time.strftime("%Y%m%d_%H%M%S")
filename = os.path.join(user_home, f"my_photo_{timestamp}.jpg")
camera.capture_file(filename)
Il timestamp garantisce che ogni foto salvata abbia un nome diverso. L’immagine viene poi memorizzata nella directory home dell’utente.
Accende il LED per 0,5 secondi per confermare che la foto è stata scattata.
GPIO.output(LED_PIN, GPIO.HIGH)
time.sleep(0.5)
GPIO.output(LED_PIN, GPIO.LOW)
Questa breve illuminazione segnala che lo scatto è avvenuto con successo.
Aggiunge un breve ritardo per evitare attivazioni multiple da una singola pressione del pulsante.
time.sleep(0.3)
Questo ritardo di debounce garantisce un funzionamento affidabile del pulsante.
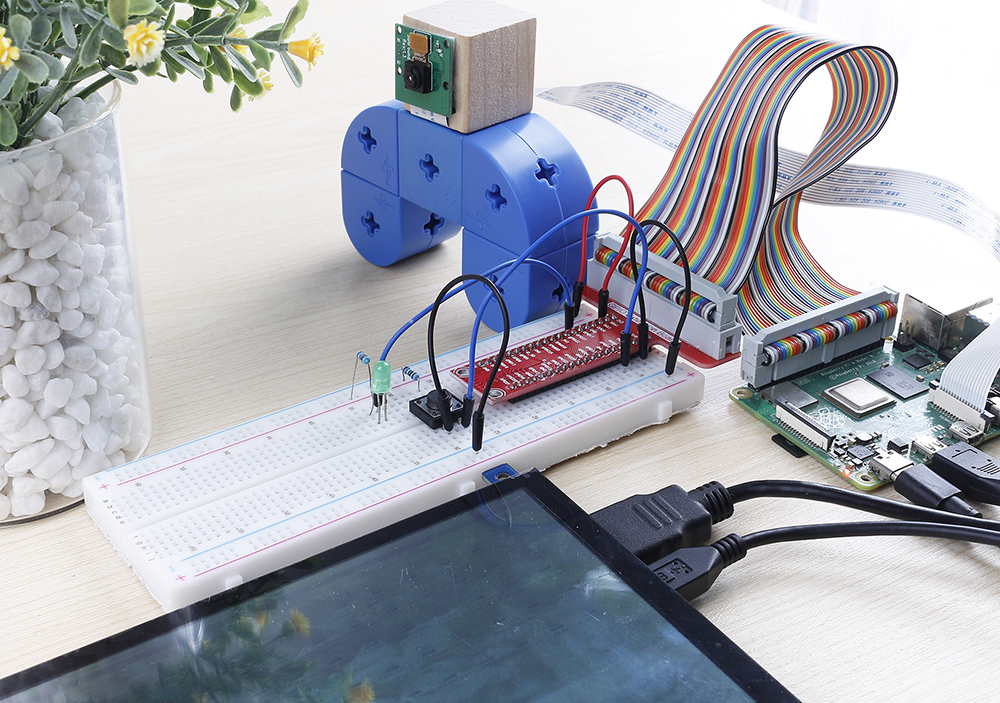
Immagine del fenomeno