Note
Hello, welcome to the SunFounder Raspberry Pi & Arduino & ESP32 Enthusiasts Community on Facebook! Dive deeper into Raspberry Pi, Arduino, and ESP32 with fellow enthusiasts.
Why Join?
Expert Support: Solve post-sale issues and technical challenges with help from our community and team.
Learn & Share: Exchange tips and tutorials to enhance your skills.
Exclusive Previews: Get early access to new product announcements and sneak peeks.
Special Discounts: Enjoy exclusive discounts on our newest products.
Festive Promotions and Giveaways: Take part in giveaways and holiday promotions.
👉 Ready to explore and create with us? Click [here] and join today!
Water Pump
Overview
The water pump is also a motor, which converts the mechanical energy of the motor or other external energy through a special structure to transport the liquid.
Required Components
In this project, we need the following components.
It’s definitely convenient to buy a whole kit, here’s the link:
Name |
ITEMS IN THIS KIT |
LINK |
|---|---|---|
Elite Explorer Kit |
300+ |
You can also buy them separately from the links below.
COMPONENT INTRODUCTION |
PURCHASE LINK |
|---|---|
- |
|
- |
|
- |
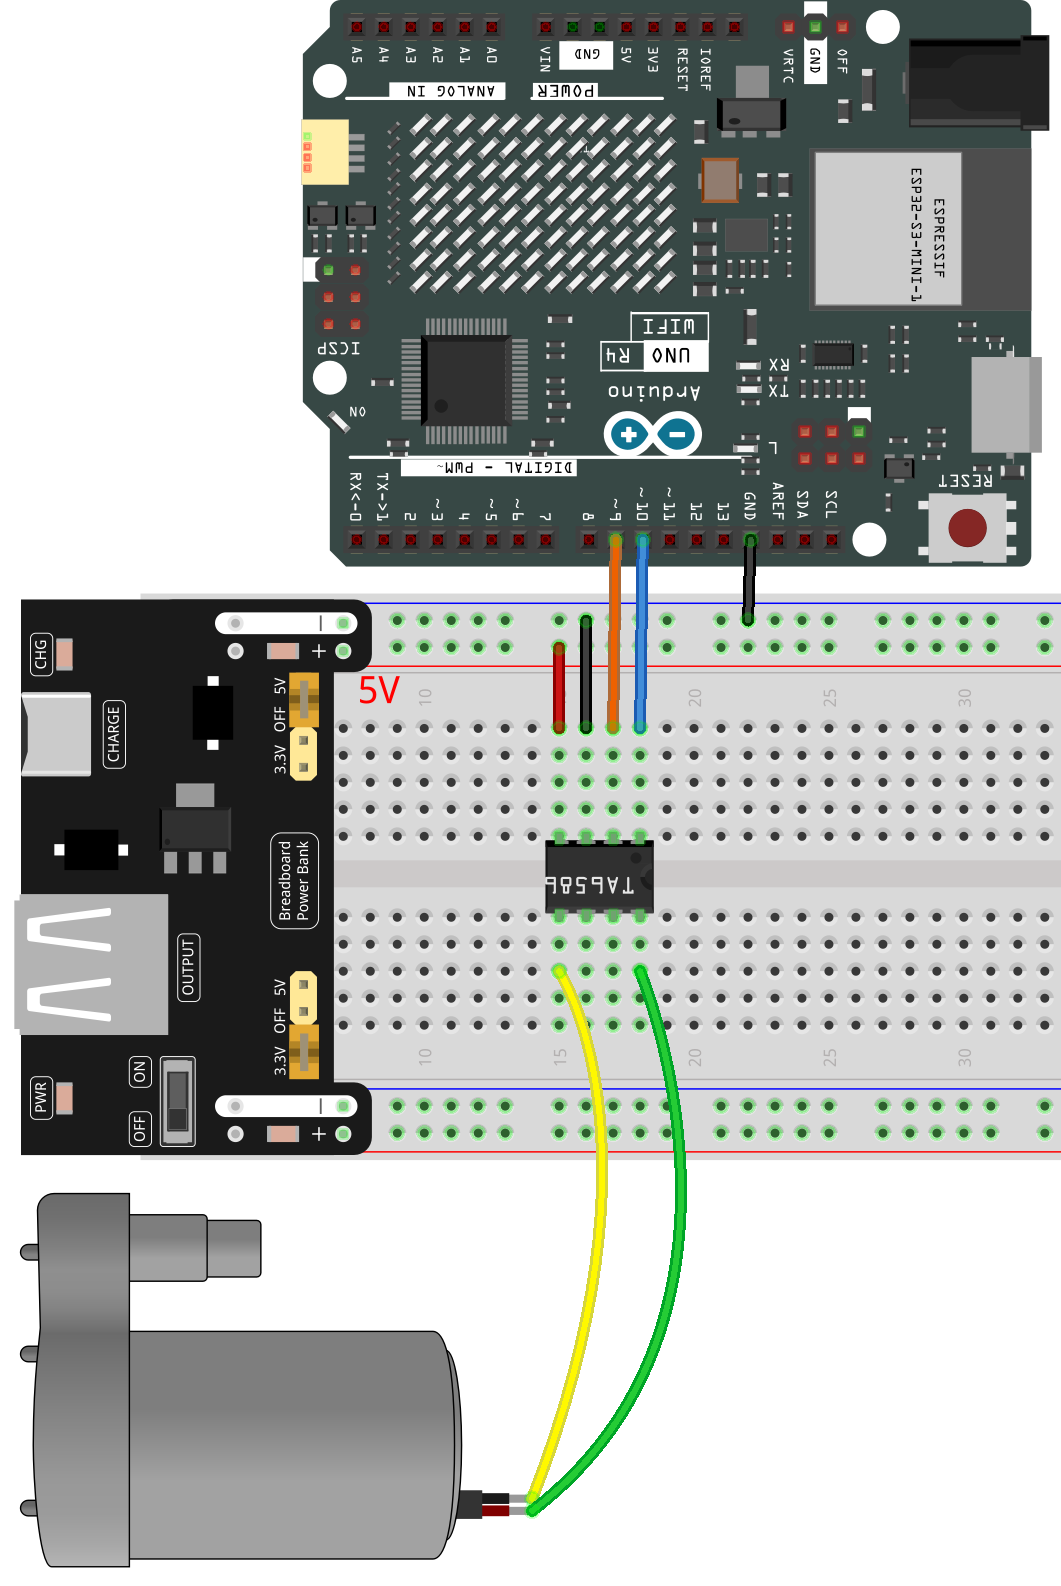
Wiring
Note
To protect the Power Supply Module’s Power Pack, please fully charge it before using it for the first time.
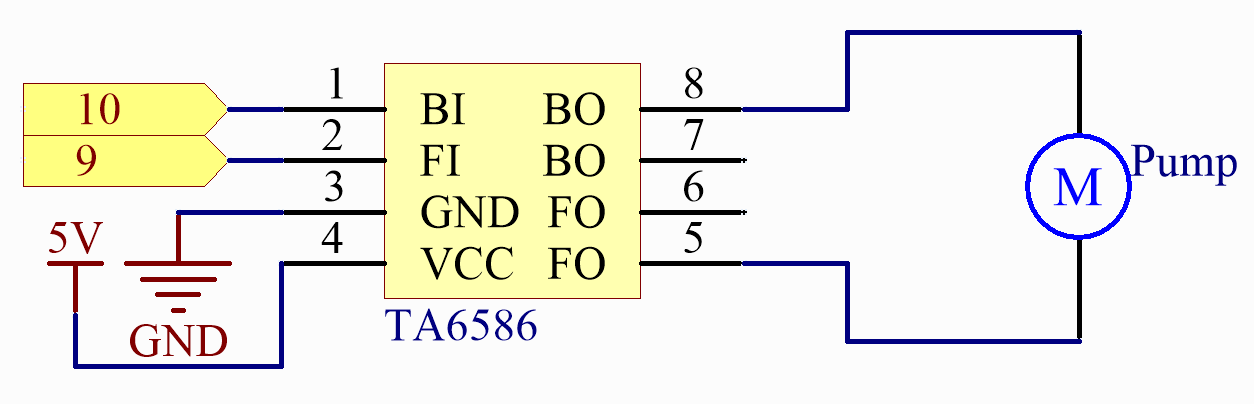
Schematic Diagram
Code
Note
You can open the file
25-pump.inounder the path ofelite-explorer-kit-main\basic_project\25-pump.Or copy this code into Arduino IDE.
 1/*
 2  This code controls a water pump using a TA6586 chip with an Arduino Uno R4.
 3  It turns on the pump for 5 seconds and then turns it off.
 4
 5  Board: Arduino Uno R4
 6  Component: Water pump and TA6586 chip
 7*/
 8
 9// Define the control pins for the TA6586 chip
10const int motorBI = 9;  // Backward Input pin
11const int motorFI = 10; // Forward Input pin
12
13void setup() {
14  // Configure the motor control pins as output
15  pinMode(motorBI, OUTPUT);
16  pinMode(motorFI, OUTPUT);
17
18  // Turn on the water pump by setting the control pins
19  digitalWrite(motorBI, HIGH);
20  digitalWrite(motorFI, LOW);
21
22  // Keep the pump on for 5 seconds
23  delay(5000);
24
25  // Turn off the water pump
26  digitalWrite(motorFI, LOW);
27  digitalWrite(motorBI, LOW);  // This line was missing in the original code to fully turn off the pump
28}
29
30void loop() {
31  // Empty loop, no operation is done here
32}
Attach the tubing to the pump and position it in the basin. Once the code is successfully uploaded, the water pump will turn on and remain active for five seconds. When conducting this experiment, please ensure that the circuit is kept away from water to prevent any potential short circuits.
Code Analysis
The motor can be driven by providing a voltage difference between the copper sheets at both sides of the motor.
digitalWrite(motorBI, HIGH);
digitalWrite(motorFI, LOW);