Active Buzzer
Overview
The active buzzer is a typical digital output device that is as easy to use as lighting up an LED!
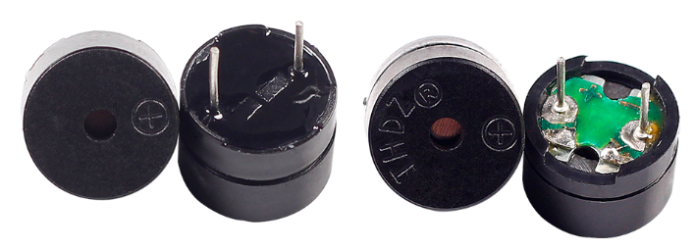
Two types of buzzers are included in the kit. We need to use active buzzer. Turn them around, the sealed back (not the exposed PCB) is the one we want.

Required Components
In this project, we need the following components.
It’s definitely convenient to buy a whole kit, here’s the link:
Name |
ITEMS IN THIS KIT |
LINK |
|---|---|---|
Elite Explorer Kit |
300+ |
You can also buy them separately from the links below.
COMPONENT INTRODUCTION |
PURCHASE LINK |
|---|---|
- |
|
- |
Wiring
Note
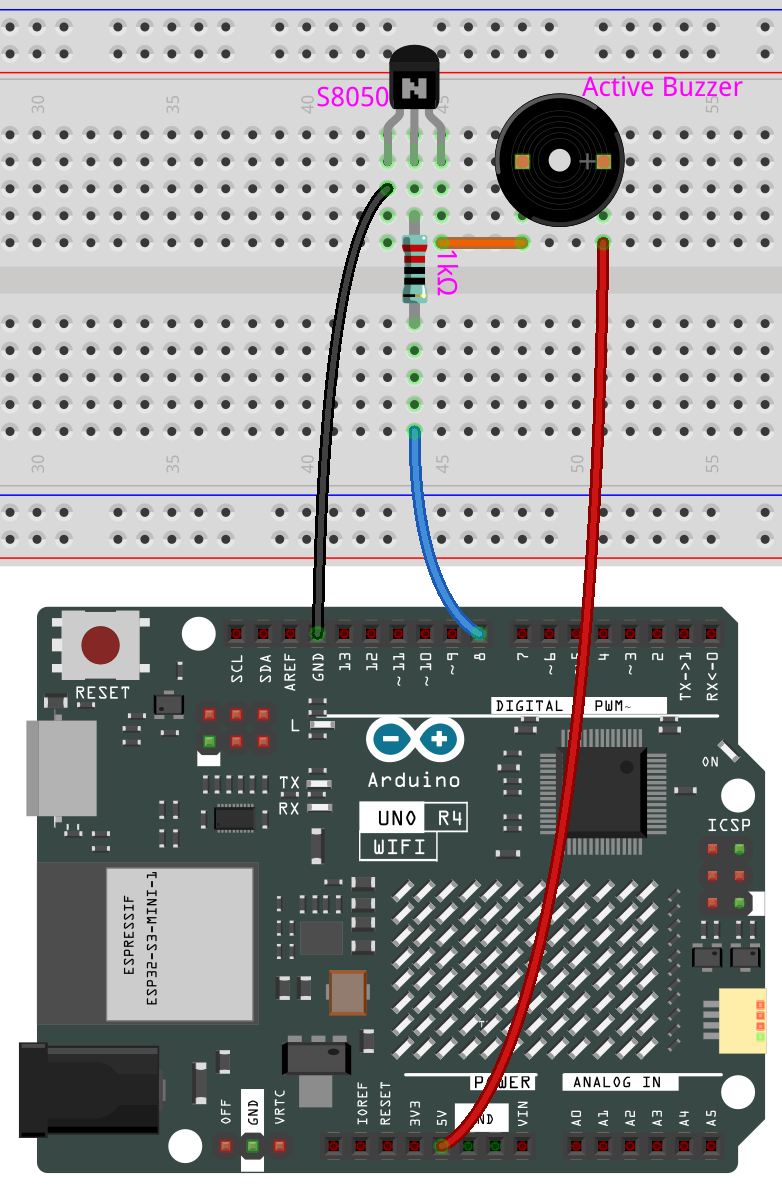
When connecting the buzzer, make sure to check its pins. The longer pin is the anode and the shorter one is the cathode. It’s important not to mix them up, as doing so will prevent the buzzer from producing any sound.

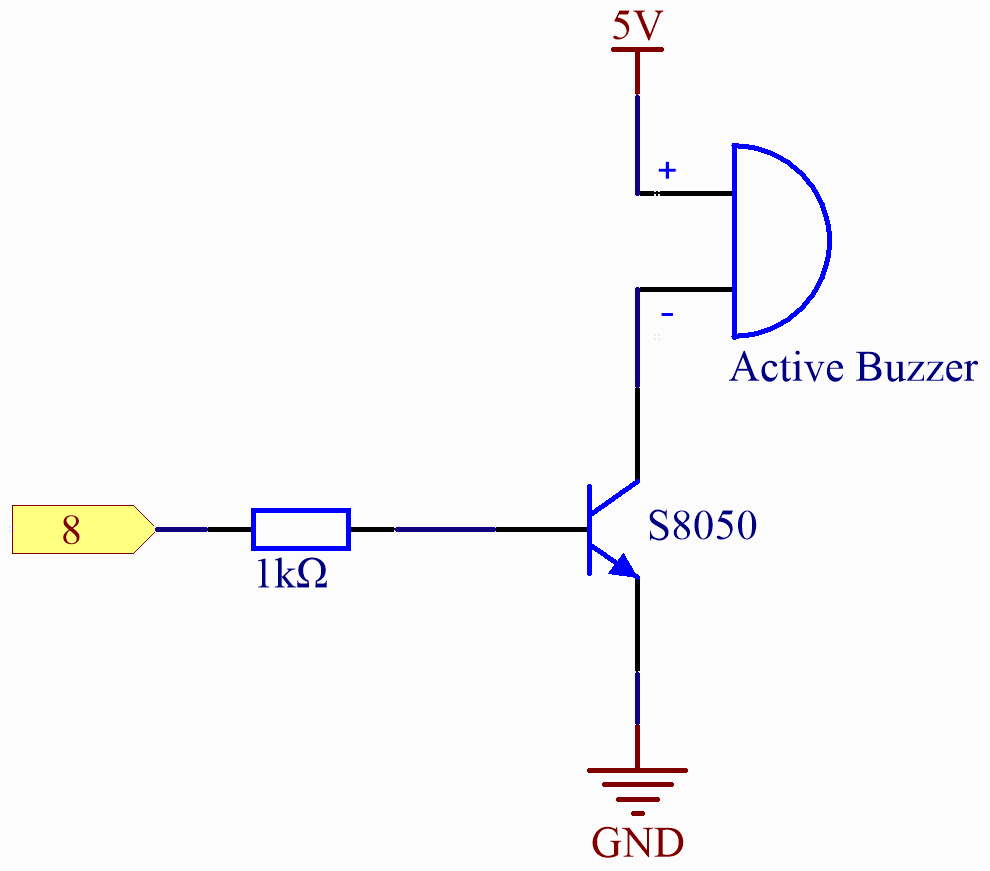
Schematic Diagram

Code
Note
You can open the file
16-active_buzzer.inounder the path ofelite-explorer-kit-main\basic_project\16-active_buzzerdirectly.Or copy this code into Arduino IDE.
After the code is uploaded successfully, you will hear a beep every second.