MPR121
Overview
In this lesson, you will learn how to use MPR121. It’s a good option when you want to add a lot of touch switches to your project. The electrode of MPR121 can be extended with a conductor. If you connect a wire to a banana, you can turn the banana into a touch switch, thus realizing projects such as fruit piano.
Required Components
In this project, we need the following components.
It’s definitely convenient to buy a whole kit, here’s the link:
Name |
ITEMS IN THIS KIT |
LINK |
|---|---|---|
Elite Explorer Kit |
300+ |
You can also buy them separately from the links below.
COMPONENT INTRODUCTION |
PURCHASE LINK |
|---|---|
- |
|
- |
Wiring
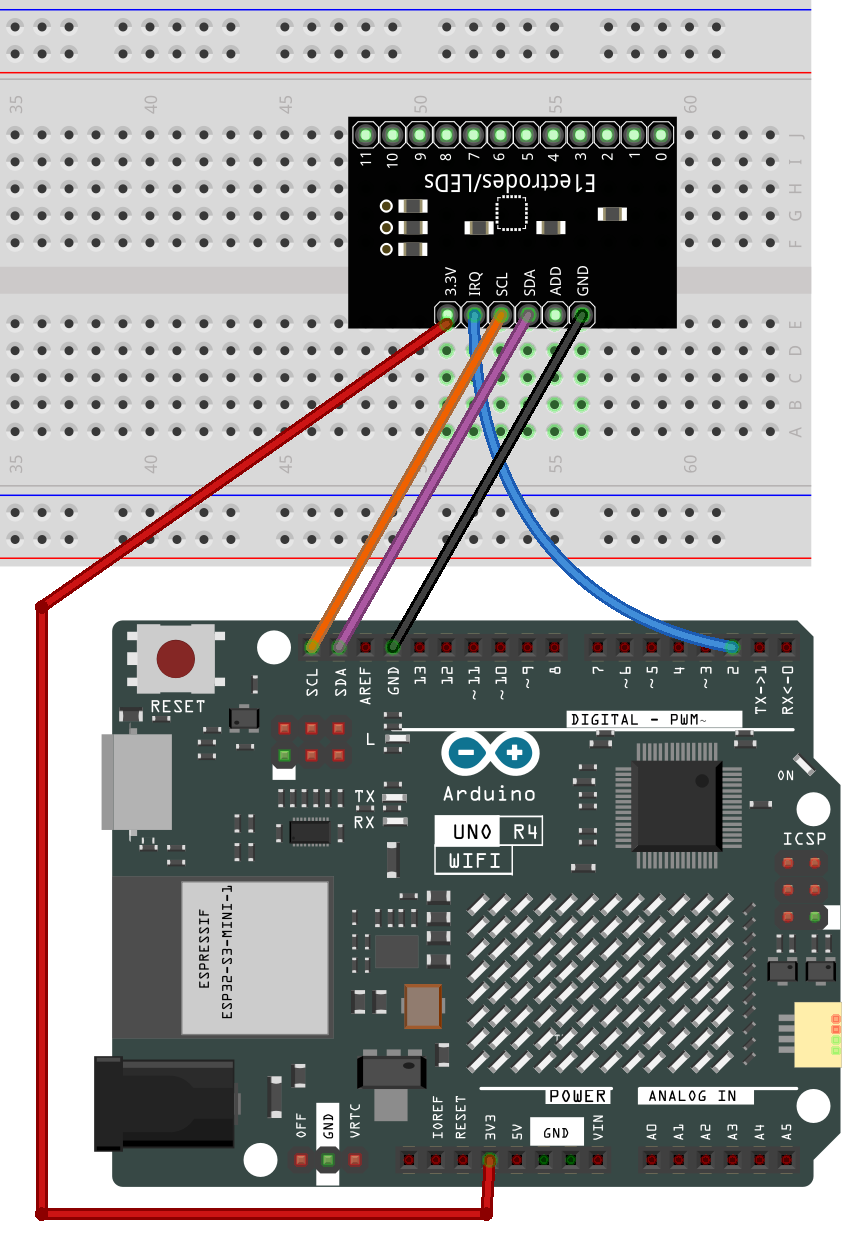
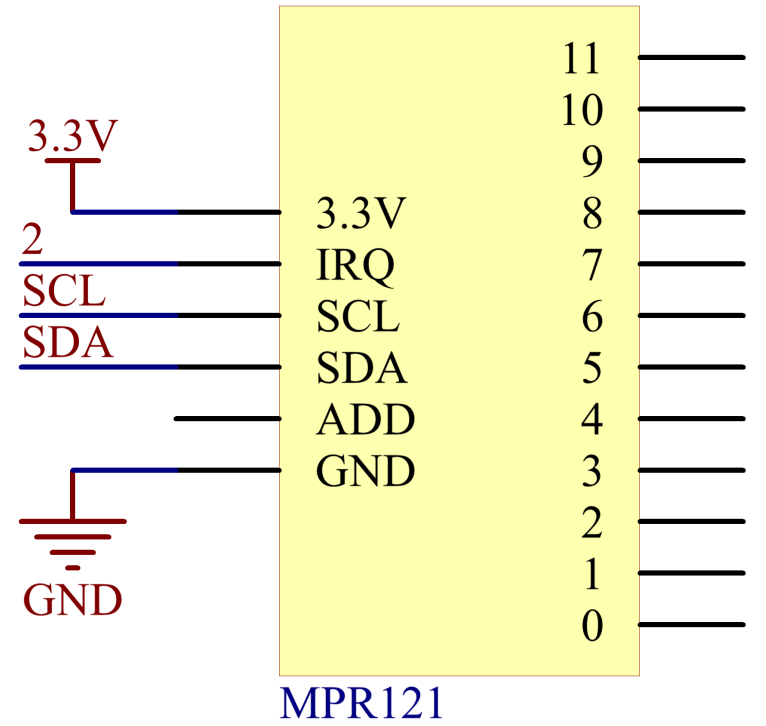
In this example, we insert MPR121 into the breadboard. Get the GND of MPR121 connected to GND, 3.3V to 3V3, IRQ to the digital pin 2, SCL to the pin SCL(A5), and SDA to the pin SDA(A4). There are 12 electrodes for touch sensing.
Note
MPR121 is powered by 3.3V, not 5V.

Schematic Diagram

Code
Note
You can open the file
23-mpr121.inounder the path ofelite-explorer-kit-main\basic_project\23-mpr121directly.The
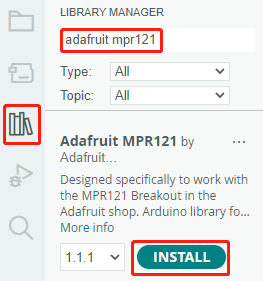
Adafruit MPR121library is used here, you can install it from the Library Manager.
After uploading the code to the UNO board, the touch state of pins MPR121 “1” and “0” will be recorded in a 12-bit boolean array. This array will then be printed on the serial monitor.
Code Analysis
This code facilitates communication and operation of the MPR121 touch sensor. It can detect the status of touch electrodes and print information about touched or released electrodes on the serial interface. If detailed sensor data is required, the relevant code can be uncommented.
Here’s an analysis of the code:
Import Libraries:
#include <Wire.h>
#include "Adafruit_MPR121.h"
Wire.h: Used for I2C communication.Adafruit_MPR121.h: Adafruit’s MPR121 library for operating the MPR121 touch sensor.
Define the
_BVMacro:#ifndef _BV #define _BV(bit) (1 << (bit)) #endif
_BV(bit)defines a macro that converts a given bit into the corresponding binary value, similar to 1 << bit.Initialize
Adafruit_MPR121Class Instance:Adafruit_MPR121 cap = Adafruit_MPR121();
Create an instance of the
Adafruit_MPR121class namedcap. Thecapobject will be used to communicate with and operate the MPR121 touch sensor.setup()Function:Initialize serial communication at a baud rate of 9600. then initialize the MPR121 touch sensor with the default I2C address of 0x5A. If initialization fails, print an error message and enter an infinite loop.
void setup() {
    Serial.begin(9600);

    while (!Serial) { // needed to keep leonardo/micro from starting too fast!
        delay(10);
    }

    Serial.println("Adafruit MPR121 Capacitive Touch sensor test");

    // Default address is 0x5A, if tied to 3.3V its 0x5B
    // If tied to SDA its 0x5C and if SCL then 0x5D
    if (!cap.begin(0x5A)) {
        Serial.println("MPR121 not found, check wiring?");
        while (1);
    }
    Serial.println("MPR121 found!");
}
loop()Function:Obtain the current touch status, returned as a 16-bit integer.
currtouched = cap.touched();
Iterate through the status of 12 electrodes (numbered from 0 to 11).
for (uint8_t i=0; i<12; i++) {
    // it if *is* touched and *wasnt* touched before, alert!
    if ((currtouched & _BV(i)) && !(lasttouched & _BV(i)) ) {
        Serial.print(i); Serial.println(" touched");
    }
    // if it *was* touched and now *isnt*, alert!
    if (!(currtouched & _BV(i)) && (lasttouched & _BV(i)) ) {
        Serial.print(i); Serial.println(" released");
    }
}
If an electrode is touched and wasn’t touched before, print “x touched,” where x is the electrode number.
If an electrode was touched before but is not touched now, print “x released.”
Update
lasttouchedto store the current touch status for comparison in the next iteration.lasttouched = currtouched;
Debugging Information (Optional Section):
// debugging info, what
Serial.print("\t\t\t\t\t\t\t\t\t\t\t\t\t 0x"); Serial.println(cap.touched(), HEX);
Serial.print("Filt: ");
for (uint8_t i=0; i<12; i++) {
    Serial.print(cap.filteredData(i)); Serial.print("\t");
}
Serial.println();
Serial.print("Base: ");
for (uint8_t i=0; i<12; i++) {
    Serial.print(cap.baselineData(i)); Serial.print("\t");
}
Serial.println();

// put a delay so it isn't overwhelming
delay(100);