Note
Hello, welcome to the SunFounder Raspberry Pi & Arduino & ESP32 Enthusiasts Community on Facebook! Dive deeper into Raspberry Pi, Arduino, and ESP32 with fellow enthusiasts.
Why Join?
Expert Support: Solve post-sale issues and technical challenges with help from our community and team.
Learn & Share: Exchange tips and tutorials to enhance your skills.
Exclusive Previews: Get early access to new product announcements and sneak peeks.
Special Discounts: Enjoy exclusive discounts on our newest products.
Festive Promotions and Giveaways: Take part in giveaways and holiday promotions.
👉 Ready to explore and create with us? Click [here] and join today!
Servo
Overview
In this lesson, you will explore the use of Arduino and Servo Motors. Focusing on the Arduino Uno and the SG90 servo motor, you’ll learn how to program the Arduino to control the servo’s sweeping motion. This technique is essential in various applications like robotics and automated systems.
Required Components
In this project, we need the following components.
It’s definitely convenient to buy a whole kit, here’s the link:
Name |
ITEMS IN THIS KIT |
LINK |
|---|---|---|
Elite Explorer Kit |
300+ |
You can also buy them separately from the links below.
COMPONENT INTRODUCTION |
PURCHASE LINK |
|---|---|
- |
|
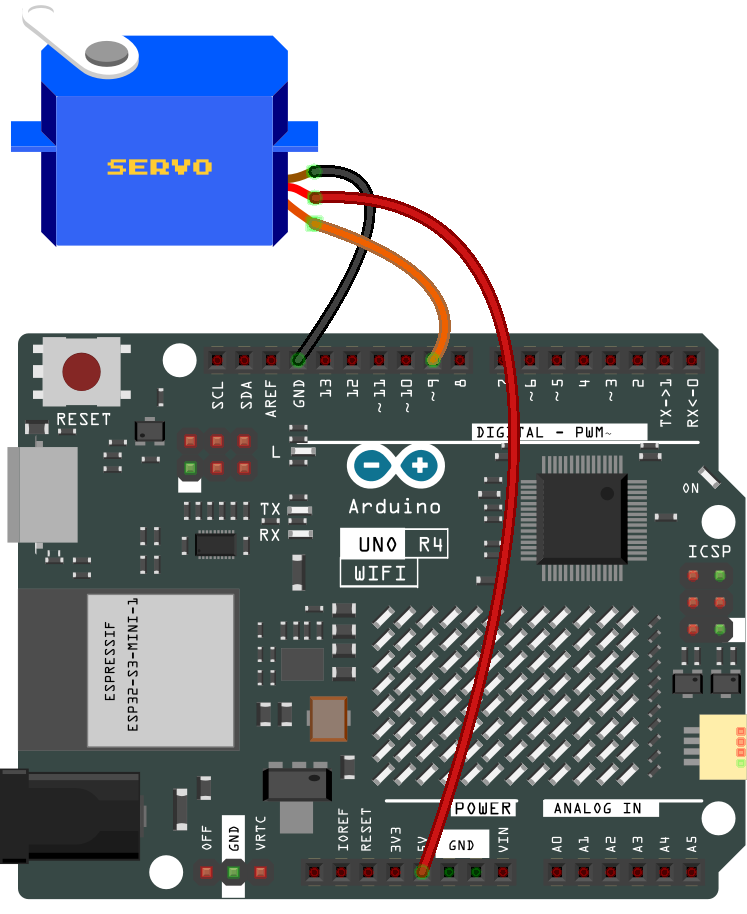
Wiring
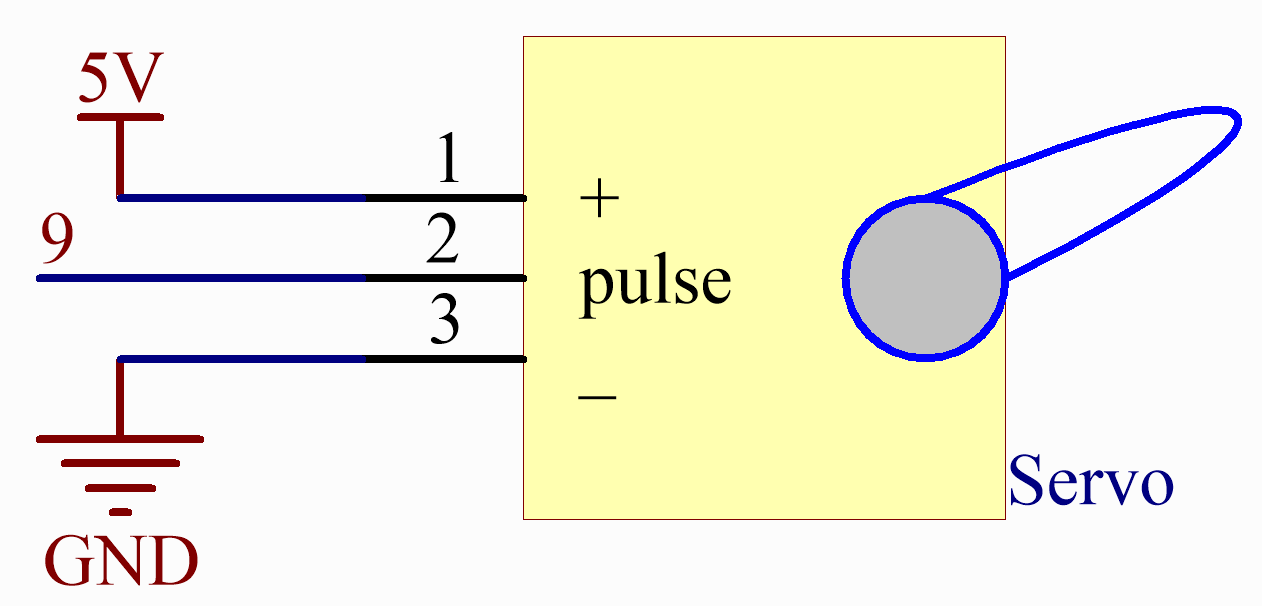
Schematic Diagram
Code
Note
You can open the file
27-servo.inounder the path ofelite-explorer-kit-main\basic_project\27-servodirectly.Or copy this code into Arduino IDE.
 1/*
 2  This code snippet is used to control a servo motor to scan from 0 to 180 degrees
 3  and then back from 180 to 0 degrees repeatedly.
 4
 5  Board: Arduino Uno R4 (or R3)
 6  Component: Servo motor(SG90)
 7*/
 8
 9#include <Servo.h>
10
11const int servoPin = 9;  // Define the servo pin
12int angle = 0;           // Initialize the angle variable to 0 degrees
13Servo servo;             // Create a servo object
14
15void setup() {
16  servo.attach(servoPin);
17}
18
19void loop() {
20  // scan from 0 to 180 degrees
21  for (angle = 0; angle < 180; angle+=10) {
22    servo.write(angle);
23    delay(50);
24  }
25  // now scan back from 180 to 0 degrees
26  for (angle = 180; angle > 0; angle-=10) {
27    servo.write(angle);
28    delay(50);
29  }
30}
Code Analysis
Here, the
Servolibrary is included which allows for easy control of the servo motor. The pin connected to the servo and the initial angle of the servo are also defined.#include <Servo.h> const int servoPin = 9; // Define the servo pin int angle = 0; // Initialize the angle variable to 0 degrees Servo servo; // Create a servo object
The
setup()function runs once when the Arduino starts. The servo is attached to the defined pin using theattach()function.void setup() { servo.attach(servoPin); }
The main loop has two
forloops. The first loop increases the angle from 0 to 180 degrees, and the second loop decreases the angle from 180 to 0 degrees. Theservo.write(angle)command sets the servo to the specified angle. Thedelay(15)causes the servo to wait for 15 milliseconds before moving to the next angle, controlling the speed of the scanning movement.void loop() { // scan from 0 to 180 degrees for (angle = 0; angle < 180; angle++) { servo.write(angle); delay(15); } // now scan back from 180 to 0 degrees for (angle = 180; angle > 0; angle--) { servo.write(angle); delay(15); } }