Note
Hello, welcome to the SunFounder Raspberry Pi & Arduino & ESP32 Enthusiasts Community on Facebook! Dive deeper into Raspberry Pi, Arduino, and ESP32 with fellow enthusiasts.
Why Join?
Expert Support: Solve post-sale issues and technical challenges with help from our community and team.
Learn & Share: Exchange tips and tutorials to enhance your skills.
Exclusive Previews: Get early access to new product announcements and sneak peeks.
Special Discounts: Enjoy exclusive discounts on our newest products.
Festive Promotions and Giveaways: Take part in giveaways and holiday promotions.
👉 Ready to explore and create with us? Click [here] and join today!
2.6 Display Characters
Now, we will explore the fascinating world of character display using the I2C LCD1602 module.
Through this project, we will learn how to initialize the LCD module, set the desired display parameters, and send character data to be displayed on the screen. We can showcase custom messages, display sensor readings, or create interactive menus. The possibilities are endless!
By mastering the art of character display on the I2C LCD1602, we will unlock new avenues for communication and information display in our projects. Let’s dive into this exciting journey and bring our characters to life on the LCD screen
Required Components
In this project, we need the following components.
It’s definitely convenient to buy a whole kit, here’s the link:
Name |
ITEMS IN THIS KIT |
LINK |
|---|---|---|
ESP32 Starter Kit |
320+ |
You can also buy them separately from the links below.
COMPONENT INTRODUCTION |
PURCHASE LINK |
|---|---|
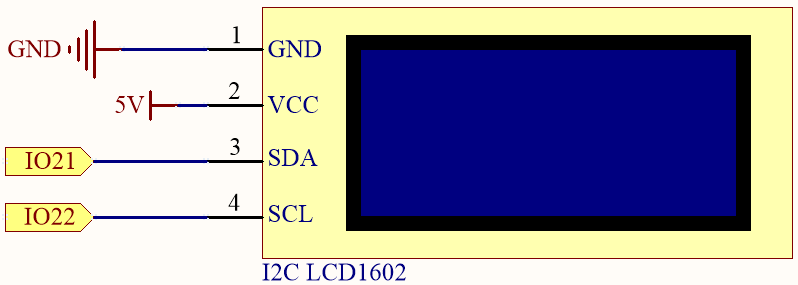
Available Pins
Here is a list of available pins on the ESP32 board for this project.
Available Pins |
Usage Description |
|---|---|
IO21 |
SDA |
IO22 |
SCL |
Schematic
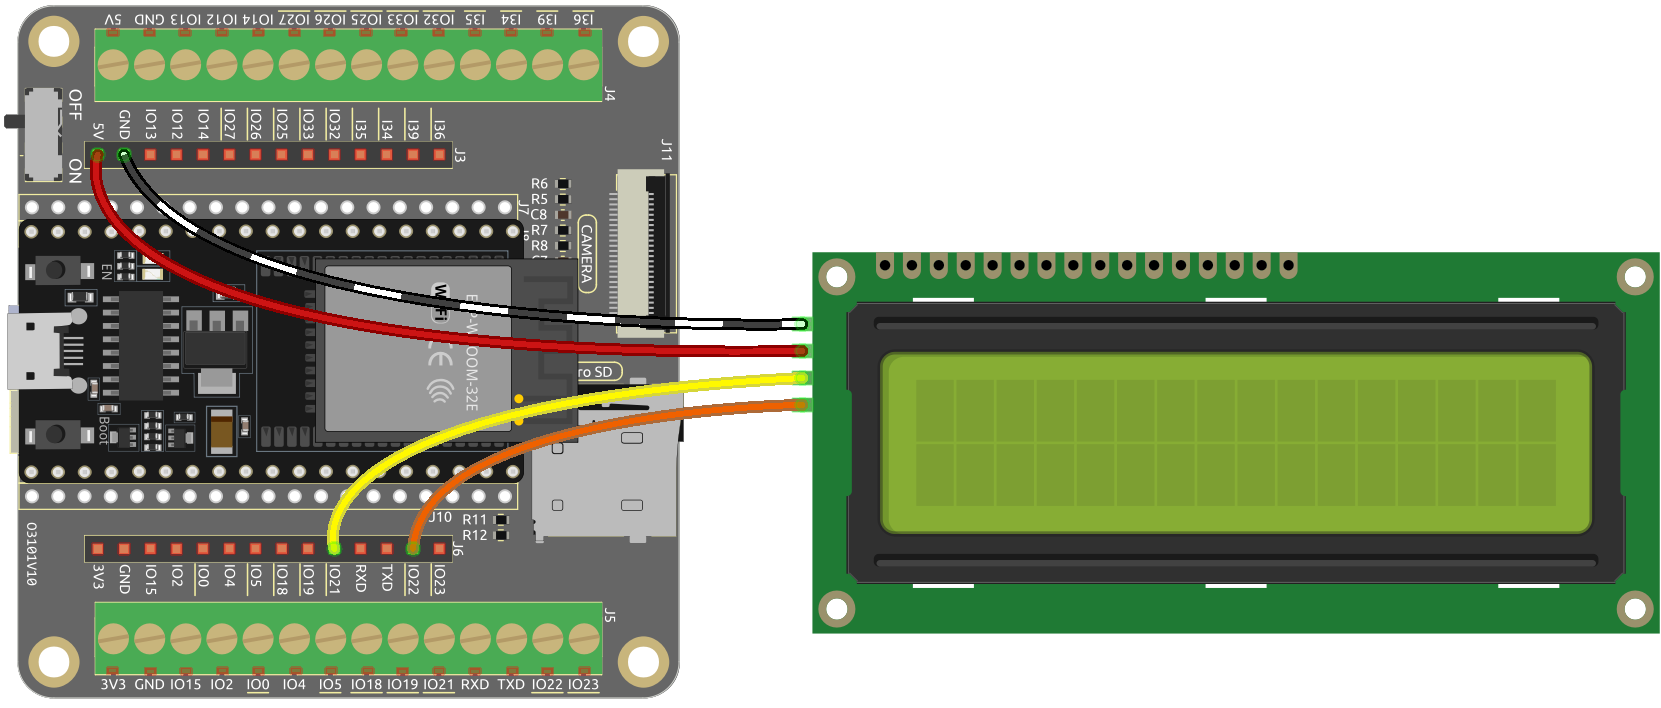
Wiring
Code
Note
Open the
2.6_liquid_crystal_display.pyfile located in theesp32-starter-kit-main\micropython\codespath, or copy and paste the code into Thonny. Then, click “Run Current Script” or press F5 to execute it.Make sure to select the “MicroPython (ESP32).COMxx” interpreter in the bottom right corner.
The
lcd1602.pylibrary is used here and check if it’s uploaded to ESP32. Refer to 1.4 Upload the Libraries (Important) for a tutorial.
# Import the LCD class from the lcd1602 module
from lcd1602 import LCD

import time

# Create an instance of the LCD class and assign it to the lcd variable
lcd = LCD()
# Set the string " Hello!\n"
string = " Hello!\n"
# Display the string on the LCD screen
lcd.message(string)

time.sleep(2)
# Set the string "    Sunfounder!"
string = "    Sunfounder!"
# Display the string on the LCD screen
lcd.message(string)

time.sleep(2)
# Clear the LCD screen
lcd.clear()
After the script runs, you will be able to see two lines of text will appear on the LCD screen in turn and then disappear.
Note
If the code and wiring are correct, but the LCD still fails to display any content, you can adjust the potentiometer on the back to increase the contrast.
How it works?
In the lcd1602 library, we integrate the relevant functions of lcd1602 into the LCD class.
Import
lcd1602module.from lcd1602 import LCD
Declare an object of the
LCDclass and name itlcd.lcd = LCD()
This statement will display the text on the LCD. It should be noted that the argument must be a string type. If we want to pass an integer or float, we must use the forced conversion statement
str().lcd.message(string)
If you call this statement multiple times, lcd will superimpose the texts. This requires the use of the following statement to clear the display.
lcd.clear()