Note
Hello, welcome to the SunFounder Raspberry Pi & Arduino & ESP32 Enthusiasts Community on Facebook! Dive deeper into Raspberry Pi, Arduino, and ESP32 with fellow enthusiasts.
Why Join?
Expert Support: Solve post-sale issues and technical challenges with help from our community and team.
Learn & Share: Exchange tips and tutorials to enhance your skills.
Exclusive Previews: Get early access to new product announcements and sneak peeks.
Special Discounts: Enjoy exclusive discounts on our newest products.
Festive Promotions and Giveaways: Take part in giveaways and holiday promotions.
👉 Ready to explore and create with us? Click [here] and join today!
1.4 Install libraries (Important)
Many libraries are available directly through the Arduino Library Manager. You can access the Library Manager by following these steps:
In the Library Manager, you can search for the desired library by name or browse through different categories.
Note
In projects where library installation is required, there will be prompts indicating which libraries to install. Follow the instructions provided, such as “The DHT sensor library library is used here, you can install it from the Library Manager.” Simply install the recommended libraries as prompted.

Once you find the library you want to install, click on it and then click the INSTALL button.

The Arduino IDE will automatically download and install the library for you.
Note
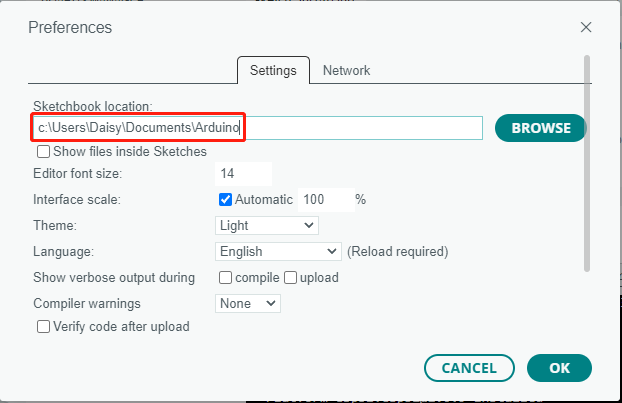
The libraries installed can be found in the default library directory of the Arduino IDE, which is usually located at C:\Users\xxx\Documents\Arduino\libraries.
If your library directory is different, you can check it by going to File -> Preferences.