3.2 - Custom Tone
We have used active buzzer in the previous project, this time we will use passive buzzer.
Like the active buzzer, the passive buzzer also uses the phenomenon of electromagnetic induction to work. The difference is that a passive buzzer does not have oscillating source, so it will not beep if DC signals are used. But this allows the passive buzzer to adjust its own oscillation frequency and can emit different notes such as “doh, re, mi, fa, sol, la, ti”.
Let the passive buzzer emit a melody!
Required Components
In this project, we need the following components.
It’s definitely convenient to buy a whole kit, here’s the link:
Name |
ITEMS IN THIS KIT |
PURCHASE LINK |
|---|---|---|
Kepler Kit |
450+ |
You can also buy them separately from the links below.
SN |
COMPONENT INTRODUCTION |
QUANTITY |
PURCHASE LINK |
|---|---|---|---|
1 |
1 |
||
2 |
Micro USB Cable |
1 |
|
3 |
1 |
||
4 |
Several |
||
5 |
1(S8050) |
||
6 |
1(1KΩ) |
||
7 |
Passive Buzzer |
1 |
Schematic

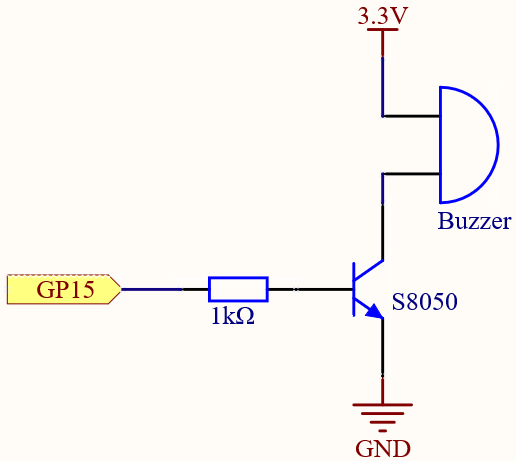
When the GP15 output is high, after the 1K current limiting resistor (to protect the transistor), the S8050 (NPN transistor) will conduct, so that the buzzer will sound.
The role of S8050 (NPN transistor) is to amplify the current and make the buzzer sound louder. In fact, you can also connect the buzzer directly to GP15, but you will find that the buzzer sound is smaller.
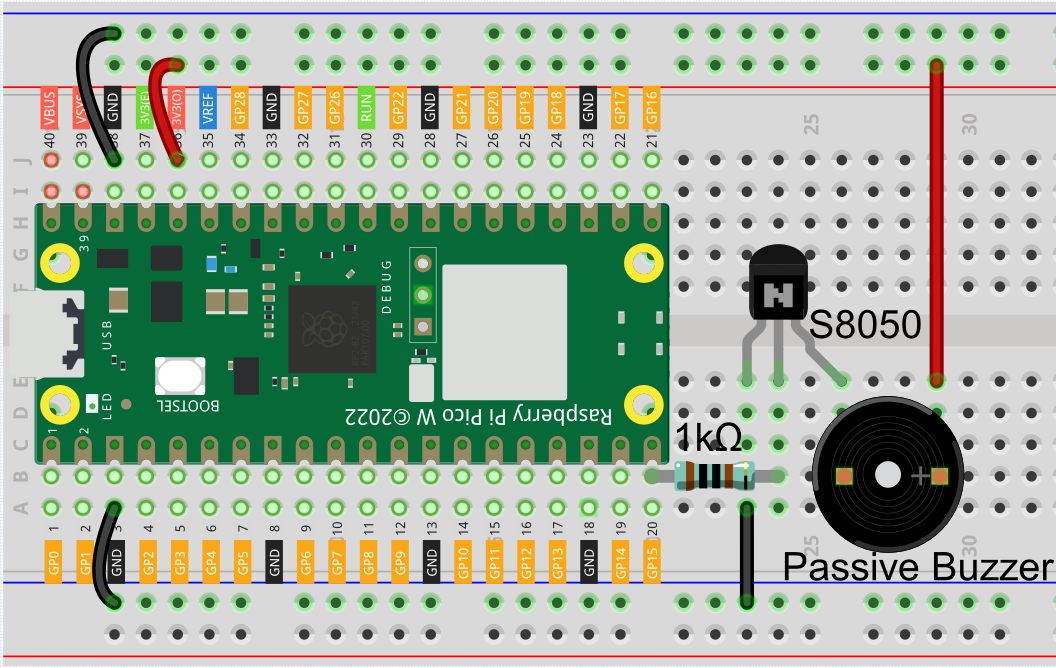
Wiring
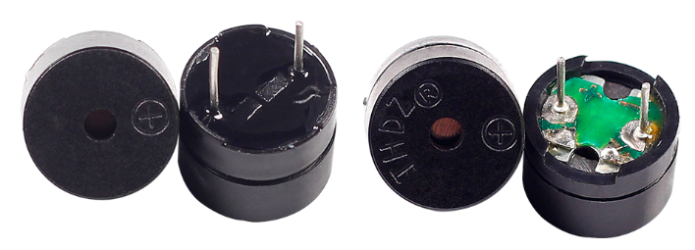
Two buzzers are included in the kit, we use a passive buzzer (one with an exposed PCB on the back).
The buzzer needs a transistor to work, here we use S8050.
Code
Note
You can open the file
3.2_custom_tone.inounder the path ofkepler-kit-main/arduino/3.2_custom_tone.Or copy this code into Arduino IDE.
Don’t forget to select the board(Raspberry Pi Pico) and the correct port before clicking the Upload button.
How it works?
If the passive buzzer given a digital signal, it can only keep pushing the diaphragm without producing sound.
Therefore, we use the tone() function to generate the PWM signal to make the passive buzzer sound.
This function has three parameters:
pin, the GPIO pin that controls the buzzer.
frequency, the pitch of the buzzer is determined by the frequency, the higher the frequency, the higher the pitch.
Duration, the duration of the tone.
Learn More
We can simulate the specific tone according to the fundamental frequency of the piano, so as to play a complete piece of music.
Note
You can open the file
3.2_custom_tone_2.inounder the path ofkepler-kit-main/arduino/3.2_custom_tone_2.Or copy this code into Arduino IDE.
Don’t forget to select the board(Raspberry Pi Pico) and the correct port before clicking the Upload button.

