6.1 - Measuring Distance
The ultrasonic sensor module works on the principle of sonar and radar systems for determining the distance to an object.
Required Components
In this project, we need the following components.
It’s definitely convenient to buy a whole kit, here’s the link:
Name |
ITEMS IN THIS KIT |
PURCHASE LINK |
|---|---|---|
Kepler Kit |
450+ |
You can also buy them separately from the links below.
SN |
COMPONENT INTRODUCTION |
QUANTITY |
PURCHASE LINK |
|---|---|---|---|
1 |
1 |
||
2 |
Micro USB Cable |
1 |
|
3 |
1 |
||
4 |
Several |
||
5 |
1 |
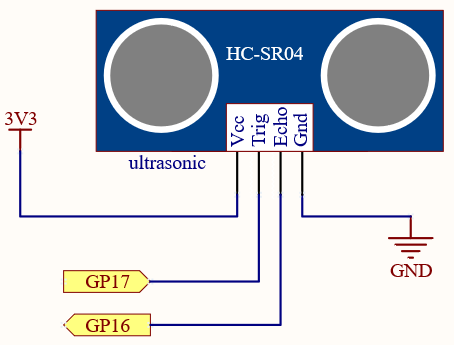
Schematic

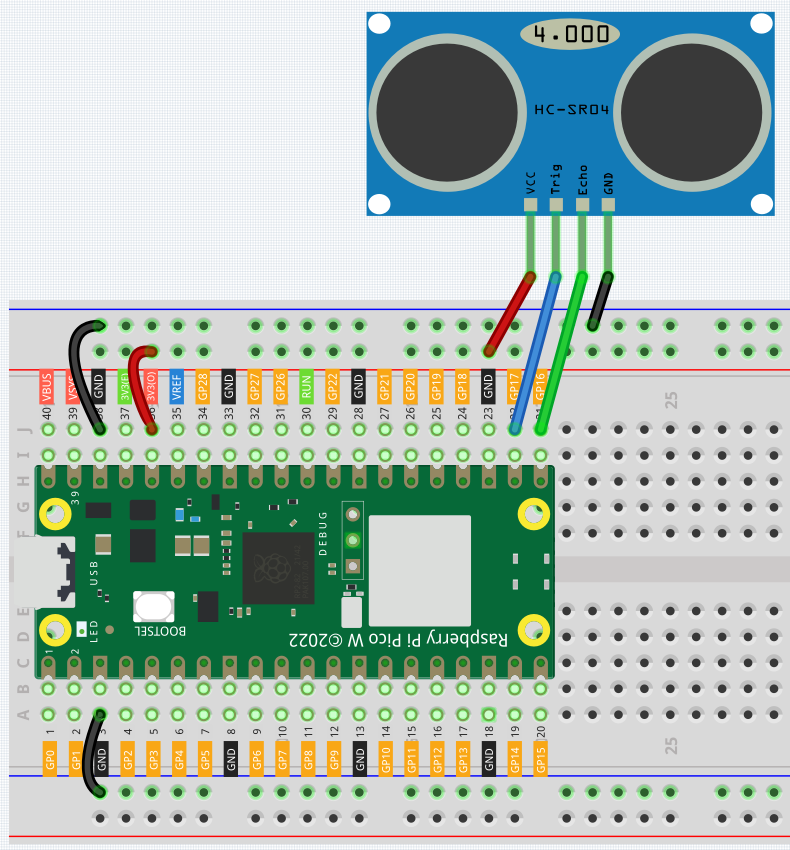
Wiring

Code
Note
You can open the file
6.1_ultrasonic.inounder the path ofkepler-kit-main/arduino/6.1_ultrasonic.Or copy this code into Arduino IDE.
Don’t forget to select the board(Raspberry Pi Pico) and the correct port before clicking the Upload button.
Once the program is running, the Serial Monitor will print out the distance of the ultrasonic sensor from the obstacle ahead.
How it works?
About the application of ultrasonic sensor, we can directly check the subfunction.
float readSensorData(){// ...}
PING is triggered by a HIGH pulse of 2 or more microseconds. (Give a
short LOW pulse beforehand to ensure a clean HIGH pulse.)
digitalWrite(trigPin, LOW);
delayMicroseconds(2);
digitalWrite(trigPin, HIGH);
delayMicroseconds(10);
digitalWrite(trigPin, LOW);
The echo pin is used to read signal from PING, a HIGH pulse whose
duration is the time (in microseconds) from the sending of the ping to
the reception of echo of the object.
microsecond=pulseIn(echoPin, HIGH);
The speed of sound is 340 m/s or 29 microseconds per centimeter.
This gives the distance travelled by the ping, outbound and return, so we divide by 2 to get the distance of the obstacle.
float distance = microsecond / 29.00 / 2;
Note that the ultrasonic sensor will pause the program when it is working, which may cause some lagging when writing complex projects.