2.6 - Tilt It!
The tilt switch is a 2-pin device with a metal ball in the middle. When you put it upright, the 2 pins are connected together; when you tilt the switch, 2 pins will be disconnected.
Required Components
In this project, we need the following components.
It’s definitely convenient to buy a whole kit, here’s the link:
Name |
ITEMS IN THIS KIT |
PURCHASE LINK |
|---|---|---|
Kepler Kit |
450+ |
You can also buy them separately from the links below.
SN |
COMPONENT INTRODUCTION |
QUANTITY |
PURCHASE LINK |
|---|---|---|---|
1 |
1 |
||
2 |
Micro USB Cable |
1 |
|
3 |
1 |
||
4 |
Several |
||
5 |
1(10KΩ) |
||
6 |
1 |
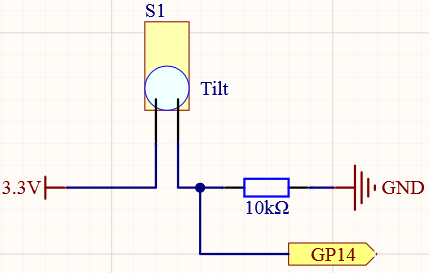
Schematic

When you put it upright, GP14 will get high; after tilting it, GP14 will get low.
The purpose of the 10K resistor is to keep the GP14 in a stable low state when the tilt switch is in a tilted state.
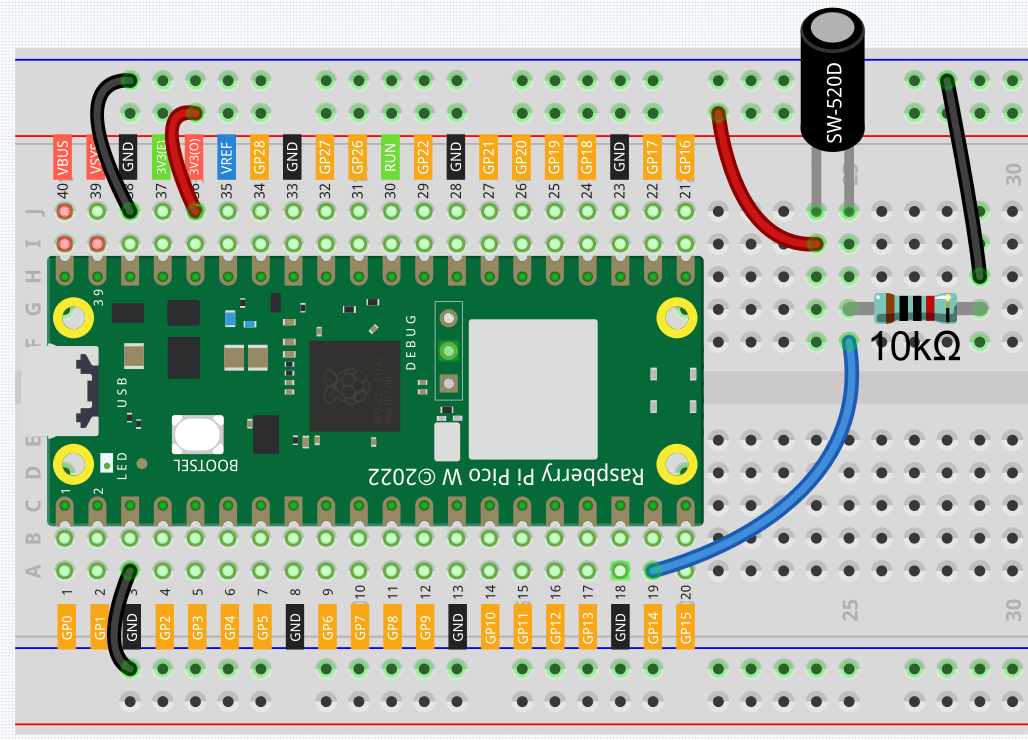
Wiring

Code
Note
You can open the file
2.6_tilt_it.inounder the path ofkepler-kit-main/arduino/2.4_colorful_light.Or copy this code into Arduino IDE.
Don’t forget to select the board(Raspberry Pi Pico) and the correct port before clicking the Upload button.
After the program runs, when you tilt the breadboard (tilt switch), “The switch works!” will appear in the shell.
