2.9 - Feel the Magnetism
The most common type of reed switch contains a pair of magnetizable, flexible, metal reeds whose end portions are separated by a small gap when the switch is open.
A magnetic field from an electromagnet or a permanent magnet will cause the reeds to attract each other, thus completing an electrical circuit. The spring force of the reeds causes them to separate, and open the circuit, when the magnetic field ceases.
A common example of a reed switch application is to detect the opening of a door or windows, for a security alarm.
Required Components
In this project, we need the following components.
It’s definitely convenient to buy a whole kit, here’s the link:
Name |
ITEMS IN THIS KIT |
PURCHASE LINK |
|---|---|---|
Kepler Kit |
450+ |
You can also buy them separately from the links below.
SN |
COMPONENT INTRODUCTION |
QUANTITY |
PURCHASE LINK |
|---|---|---|---|
1 |
1 |
||
2 |
Micro USB Cable |
1 |
|
3 |
1 |
||
4 |
Several |
||
5 |
1(10KΩ) |
||
6 |
1 |
Schematic

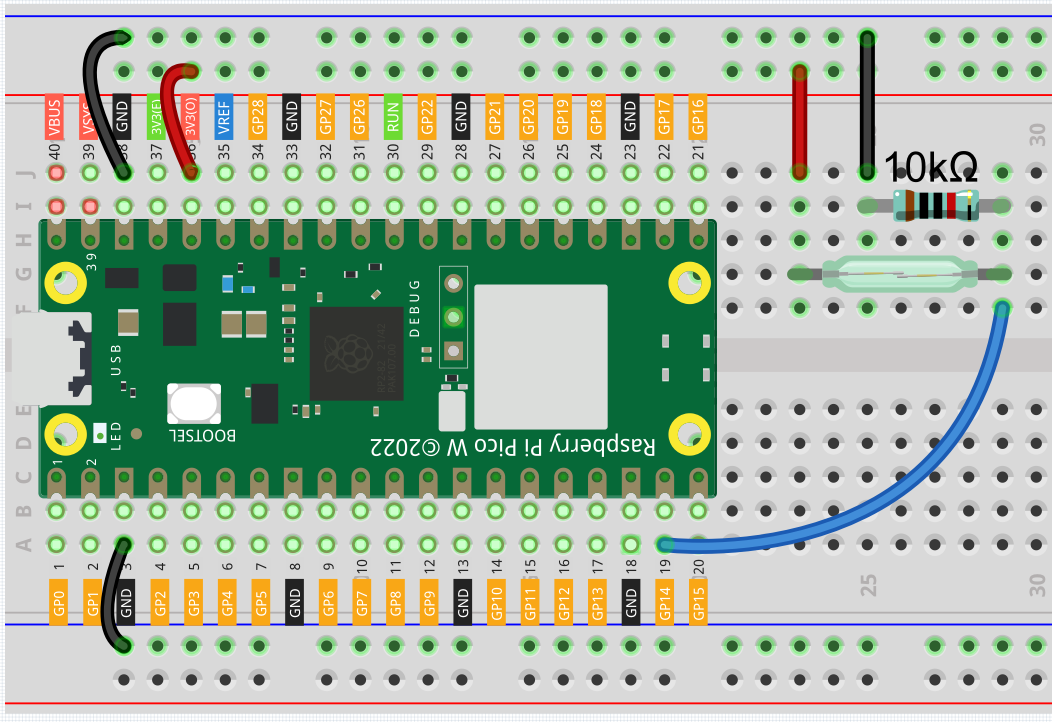
By default, GP14 is low; and will go high when the magnet is near the reed switch.
The purpose of the 10K resistor is to keep the GP14 at a steady low level when no magnet is near.
Wiring

Code
Note
You can open the file
2.9_feel_the_magnetism.inounder the path ofkepler-kit-main/arduino/2.9_feel_the_magnetism.Or copy this code into Arduino IDE.
Don’t forget to select the board(Raspberry Pi Pico) and the correct port before clicking the Upload button.
When a magnet approaches, the circuit will be closed. Just like the button in the 2.5 - Reading Button Value chapter.