Note
Hello, welcome to the SunFounder Raspberry Pi & Arduino & ESP32 Enthusiasts Community on Facebook! Dive deeper into Raspberry Pi, Arduino, and ESP32 with fellow enthusiasts.
Why Join?
Expert Support: Solve post-sale issues and technical challenges with help from our community and team.
Learn & Share: Exchange tips and tutorials to enhance your skills.
Exclusive Previews: Get early access to new product announcements and sneak peeks.
Special Discounts: Enjoy exclusive discounts on our newest products.
Festive Promotions and Giveaways: Take part in giveaways and holiday promotions.
👉 Ready to explore and create with us? Click [here] and join today!
Button
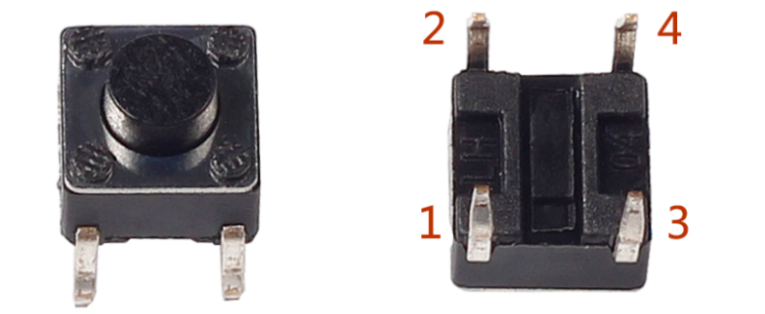
Buttons are a common component used to control electronic devices. They are usually used as switches to connect or break circuits. Although buttons come in a variety of sizes and shapes, the one used here is a 6mm mini-button as shown in the following pictures. Pin 1 is connected to pin 2 and pin 3 to pin 4. So you just need to connect either of pin 1 and pin 2 to pin 3 or pin 4.
The following is the internal structure of a button. The symbol on the right below is usually used to represent a button in circuits.
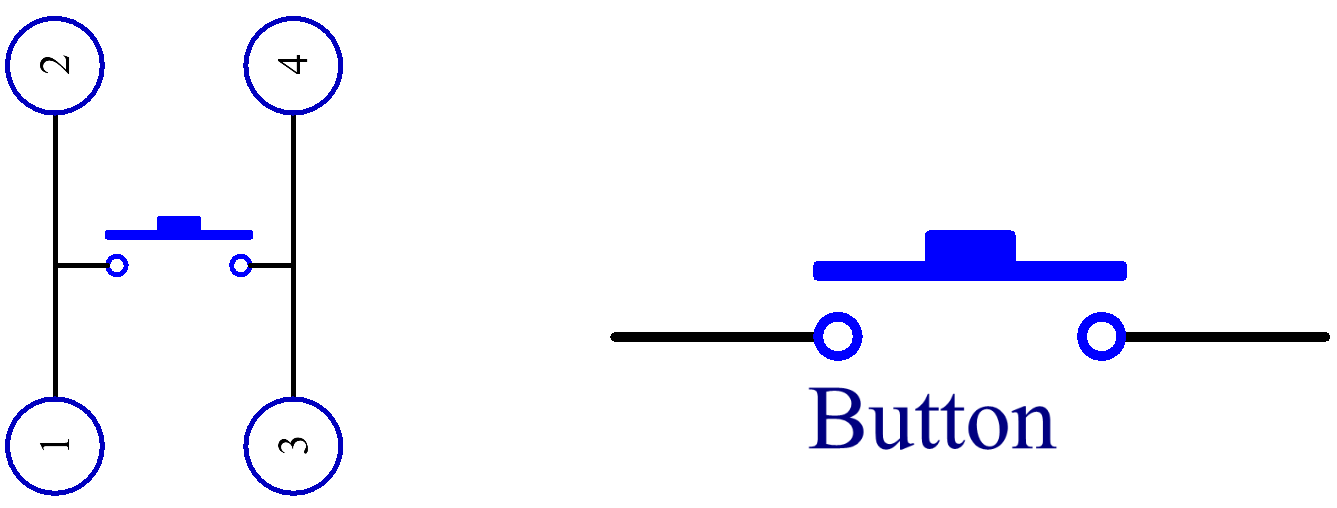
Since the pin 1 is connected to pin 2, and pin 3 to pin 4, when the button is pressed, the 4 pins are connected, thus closing the circuit.

Example
2.1.1 Button (C Project)
3.1.4 Smart Fan (C Project)
3.1.13 GAME– NotNot (C Project)
2.1.1 Button (Python Project)
4.1.2 Music Player (Python Project)
4.1.10 Smart Fan (Python Project)
1.4 Hare (Scratch Project)