Note
Hello, welcome to the SunFounder Raspberry Pi & Arduino & ESP32 Enthusiasts Community on Facebook! Dive deeper into Raspberry Pi, Arduino, and ESP32 with fellow enthusiasts.
Why Join?
Expert Support: Solve post-sale issues and technical challenges with help from our community and team.
Learn & Share: Exchange tips and tutorials to enhance your skills.
Exclusive Previews: Get early access to new product announcements and sneak peeks.
Special Discounts: Enjoy exclusive discounts on our newest products.
Festive Promotions and Giveaways: Take part in giveaways and holiday promotions.
👉 Ready to explore and create with us? Click [here] and join today!
Micro Switch
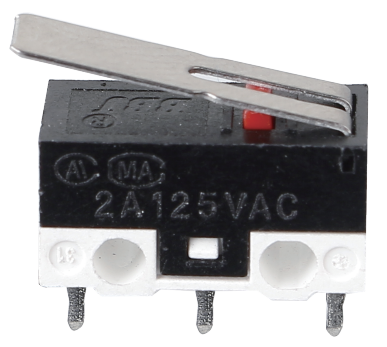
The construction of a micro switch is really simple. The main parts of the switch are:
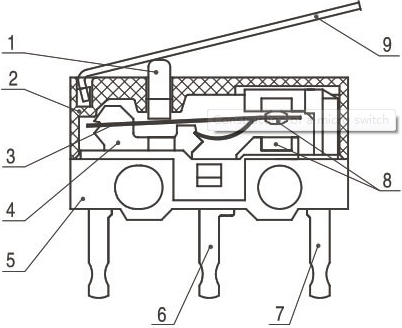
1.Plunger (Actuator)
2.Cover
3.Moving piece
4.Support
5.Case
6.NO terminal: normally open
7.NC terminal: normally closed
8.Contact
9.Moving arm
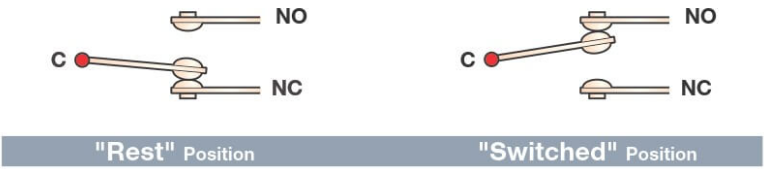
After a micro switch makes physical contact with an object, its contacts change position. The basic working principle is as follows.
When the plunger is in the released or rest position.
The normally closed circuit can carry current.
The normally open circuit is electrically insulated.
When the plunger is depressed or switched.
The normally closed circuit is open.
The normally open circuit is closed.
Example
2.1.2 Micro Switch (C Project)
2.1.2 Micro Switch (Python Project)
1.8 Service Bell (Scratch Project)