3.1.7 Overheat Monitor
Introduction
You may want to make an overheat monitoring device that applies to various situations, ex., in the factory, if we want to have an alarm and the timely automatic turning off of the machine when there is a circuit overheating. In this project, we will use thermistor, joystick, buzzer, LED and LCD to make an smart temperature monitoring device whose threshold is adjustable.
Required Components
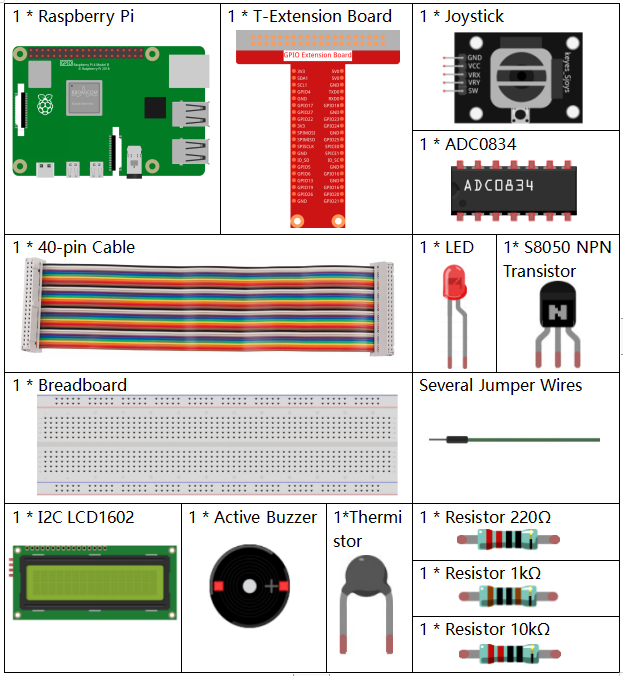
In this project, we need the following components.

It’s definitely convenient to buy a whole kit, here’s the link:
Name |
ITEMS IN THIS KIT |
LINK |
|---|---|---|
Raphael Kit |
337 |
You can also buy them separately from the links below.
COMPONENT INTRODUCTION |
PURCHASE LINK |
|---|---|
- |
|
- |
|
- |
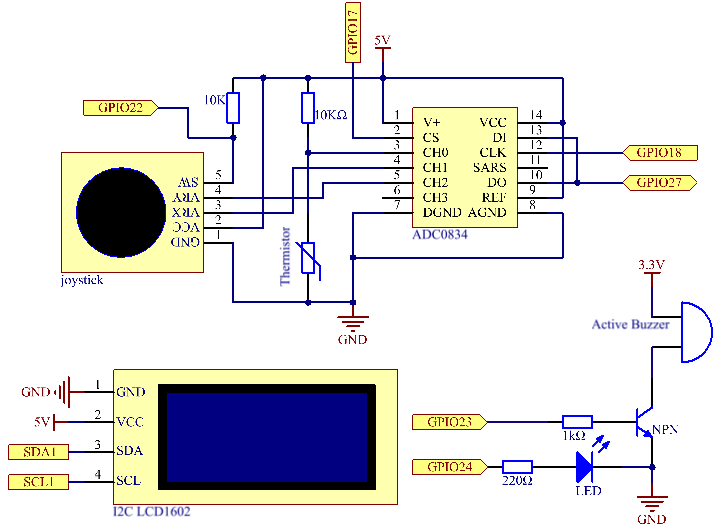
Schematic Diagram
T-Board Name |
physical |
wiringPi |
BCM |
GPIO17 |
Pin 11 |
0 |
17 |
GPIO18 |
Pin 12 |
1 |
18 |
GPIO27 |
Pin 13 |
2 |
27 |
GPIO22 |
Pin15 |
3 |
22 |
GPIO23 |
Pin16 |
4 |
23 |
GPIO24 |
Pin18 |
5 |
24 |
SDA1 |
Pin 3 |
||
SCL1 |
Pin 5 |

Experimental Procedures
Step 1: Build the circuit.

Step 2: Go to the folder of the code.
cd ~/raphael-kit/c/3.1.7/
Step 3: Compile the code.
gcc 3.1.7_OverheatMonitor.c -lm -lwiringPi
Step 4: Run the executable file.
sudo ./a.out
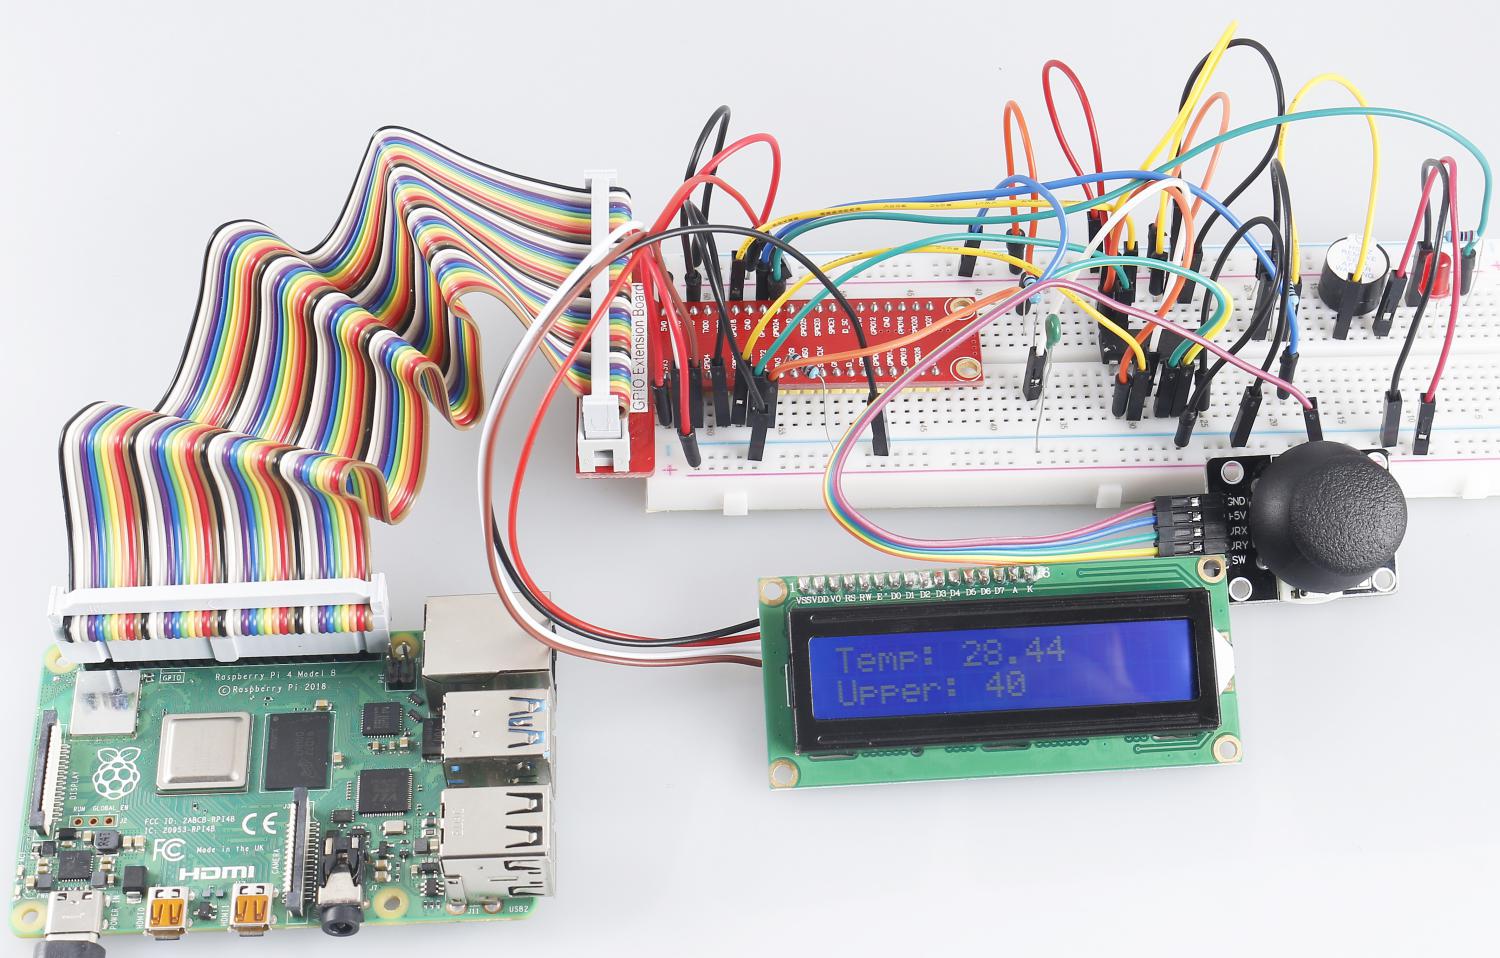
As the code runs, the current temperature and the high-temperature threshold 40 are displayed on I2C LCD1602. If the current temperature is larger than the threshold, the buzzer and LED are started to alarm you.
Joystick here is for your pressing to adjust the high-temperature threshold. Toggling the Joystick in the direction of X-axis and Y-axis can adjust (turn up or down) the current high-temperature threshold. Press the Joystick once again to reset the threshold to initial value.
Note
If there is an error prompt
wiringPi.h: No such file or directory, please refer to Install and Check the WiringPi.If you get
Unable to open I2C device: No such file or directoryerror, you need to refer to I2C Configuration to enable I2C and check if the wiring is correct.If the code and wiring are fine, but the LCD still does not display content, you can turn the potentiometer on the back to increase the contrast.
Code Explanation
int get_joystick_value(){
    uchar x_val;
    uchar y_val;
    x_val = get_ADC_Result(1);
    y_val = get_ADC_Result(2);
    if (x_val > 200){
        return 1;
    }
    else if(x_val < 50){
        return -1;
    }
    else if(y_val > 200){
        return -10;
    }
    else if(y_val < 50){
        return 10;
    }
    else{
        return 0;
    }
}
This function reads values of X and Y. If X>200, there will return
1; X<50, return -1; y>200, return
-10, and y<50, return 10.
void upper_tem_setting(){
    write(0, 0, "Upper Adjust:");
    int change = get_joystick_value();
    upperTem = upperTem + change;
    char str[6];
    snprintf(str,3,"%d",upperTem);
write(0,1,str);
int len;
  len = strlen(str);
  write(len,1,"             ");
    delay(100);
}
This function is for adjusting the threshold and displaying it on the I2C LCD1602.
double temperature(){
    unsigned char temp_value;
    double Vr, Rt, temp, cel, Fah;
    temp_value = get_ADC_Result(0);
    Vr = 5 * (double)(temp_value) / 255;
    Rt = 10000 * (double)(Vr) / (5 - (double)(Vr));
    temp = 1 / (((log(Rt/10000)) / 3950)+(1 / (273.15 + 25)));
    cel = temp - 273.15;
    Fah = cel * 1.8 +32;
    return cel;
}
Read the analog value of the CH0 (thermistor) of ADC0834 and then convert it to temperature value.
void monitoring_temp(){
    char str[6];
    double cel = temperature();
    snprintf(str,6,"%.2f",cel);
    write(0, 0, "Temp: ");
    write(6, 0, str);
    snprintf(str,3,"%d",upperTem);
    write(0, 1, "Upper: ");
    write(7, 1, str);
    delay(100);
    if(cel >= upperTem){
        digitalWrite(buzzPin, HIGH);
        digitalWrite(LedPin, HIGH);
    }
    else if(cel < upperTem){
        digitalWrite(buzzPin, LOW);
        digitalWrite(LedPin, LOW);
    }
}
As the code runs, the current temperature and the high-temperature threshold 40 are displayed on I2C LCD1602. If the current temperature is larger than the threshold, the buzzer and LED are started to alarm you.
int main(void)
{
    setup();
    int lastState =1;
    int stage=0;
    while (1)
    {
        int currentState = digitalRead(Joy_BtnPin);
        if(currentState==1 && lastState == 0){
            stage=(stage+1)%2;
            delay(100);
            lcd_clear();
        }
        lastState=currentState;
        if (stage==1){
            upper_tem_setting();
        }
        else{
            monitoring_temp();
        }
    }
    return 0;
}
The function main() contains the whole program process as shown:
When the program starts, the initial value of stage is 0, and the current temperature and the high-temperature threshold 40 are displayed on I2C LCD1602. If the current temperature is larger than the threshold, the buzzer and the LED are started to alarm you.
Press the Joystick, and stage will be 1 and you can adjust the high-temperature threshold. Toggling the Joystick in the direction of X-axis and Y-axis can adjust (turn up or down) the current threshold. Press the Joystick once again to reset the threshold to initial value.
Phenomenon Picture
