Note
Hello, welcome to the SunFounder Raspberry Pi & Arduino & ESP32 Enthusiasts Community on Facebook! Dive deeper into Raspberry Pi, Arduino, and ESP32 with fellow enthusiasts.
Why Join?
Expert Support: Solve post-sale issues and technical challenges with help from our community and team.
Learn & Share: Exchange tips and tutorials to enhance your skills.
Exclusive Previews: Get early access to new product announcements and sneak peeks.
Special Discounts: Enjoy exclusive discounts on our newest products.
Festive Promotions and Giveaways: Take part in giveaways and holiday promotions.
👉 Ready to explore and create with us? Click [here] and join today!
I²C Configuration
Follow the steps below to enable and test the I²C interface on your Raspberry Pi. These instructions apply to Raspberry Pi 5, 4, 3, and Zero 2W.
Enable the I²C Interface
Open a terminal on your computer (Windows: PowerShell; macOS/Linux: Terminal) and connect to your Raspberry Pi:
ssh <username>@<hostname>.localor:
ssh <username>@<ip_address>Open the Raspberry Pi configuration tool:
sudo raspi-configSelect Interfacing Options and press Enter.
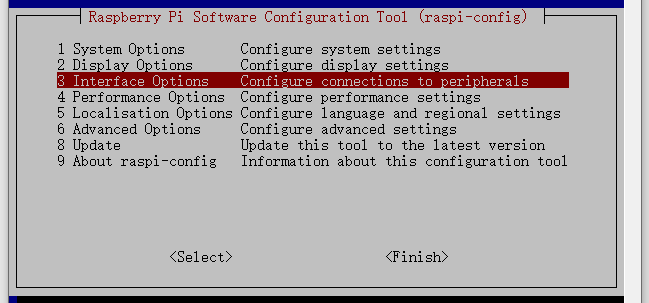
Select I2C.
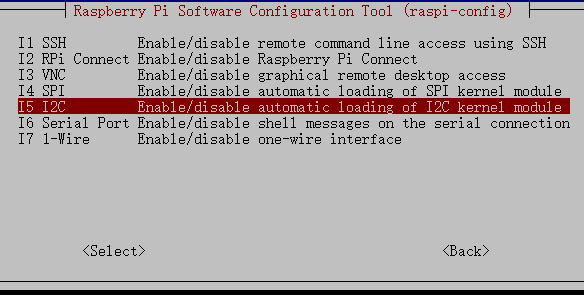
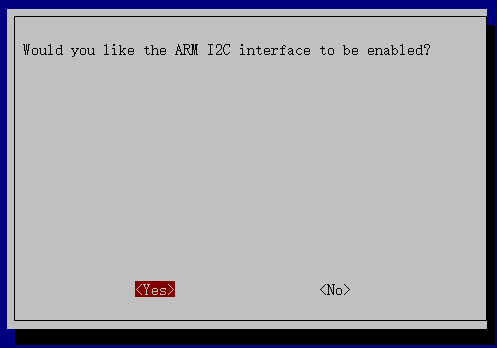
Choose <Yes>, then <Ok> → <Finish> to apply the changes. If prompted, reboot your Raspberry Pi.
Check I²C Kernel Modules
Run the following command:
lsmod | grep i2c
If I²C is enabled, you will see modules such as:
i2c_dev        6276    0
i2c_bcm2708    4121    0
If nothing appears, reboot the system:
sudo reboot
Install i2c-tools
Install the utilities required for scanning and testing I²C devices:
sudo apt install i2c-tools
Detect Connected I²C Devices
Scan the I²C bus:
i2cdetect -y 1
Example output:
pi@raspberrypi ~ $ i2cdetect -y 1
    0  1  2  3   4  5  6  7  8  9   a  b  c  d  e  f
00:           -- -- -- -- -- -- -- -- -- -- -- -- --
10: -- -- -- -- -- -- -- -- -- -- -- -- -- -- -- --
20: -- -- -- -- -- -- -- -- -- -- -- -- -- -- -- --
30: -- -- -- -- -- -- -- -- -- -- -- -- -- -- -- --
40: -- -- -- -- -- -- -- -- 48 -- -- -- -- -- -- --
50: -- -- -- -- -- -- -- -- -- -- -- -- -- -- -- --
60: -- -- -- -- -- -- -- -- -- -- -- -- -- -- -- --
70: -- -- -- -- -- -- -- --
If a device is connected, its address (e.g., 0x48) will appear in the table.
Install the Python I²C Library
Install the
python3-smbus2package:sudo apt install python3-smbus2
The
smbus2library provides all the functions required to communicate with I²C devices in Python.
Your Raspberry Pi is now fully configured and ready to communicate with I²C devices.