Lesson 1 Blinking LED
Introduction
In this lesson, we will learn how to program Raspberry Pi to make an LED blink. You can play numerous tricks with an LED as you want. Now get to start and you will enjoy the fun of DIY at once!
Components
- 1 * Raspberry Pi
- 1 * Breadboard
- 1 * T-Extension Board
- 1 * 40-Pin Cable
- 1 * LED
- 1 * Resistor (220Ω)
- Jumper wires
Principle
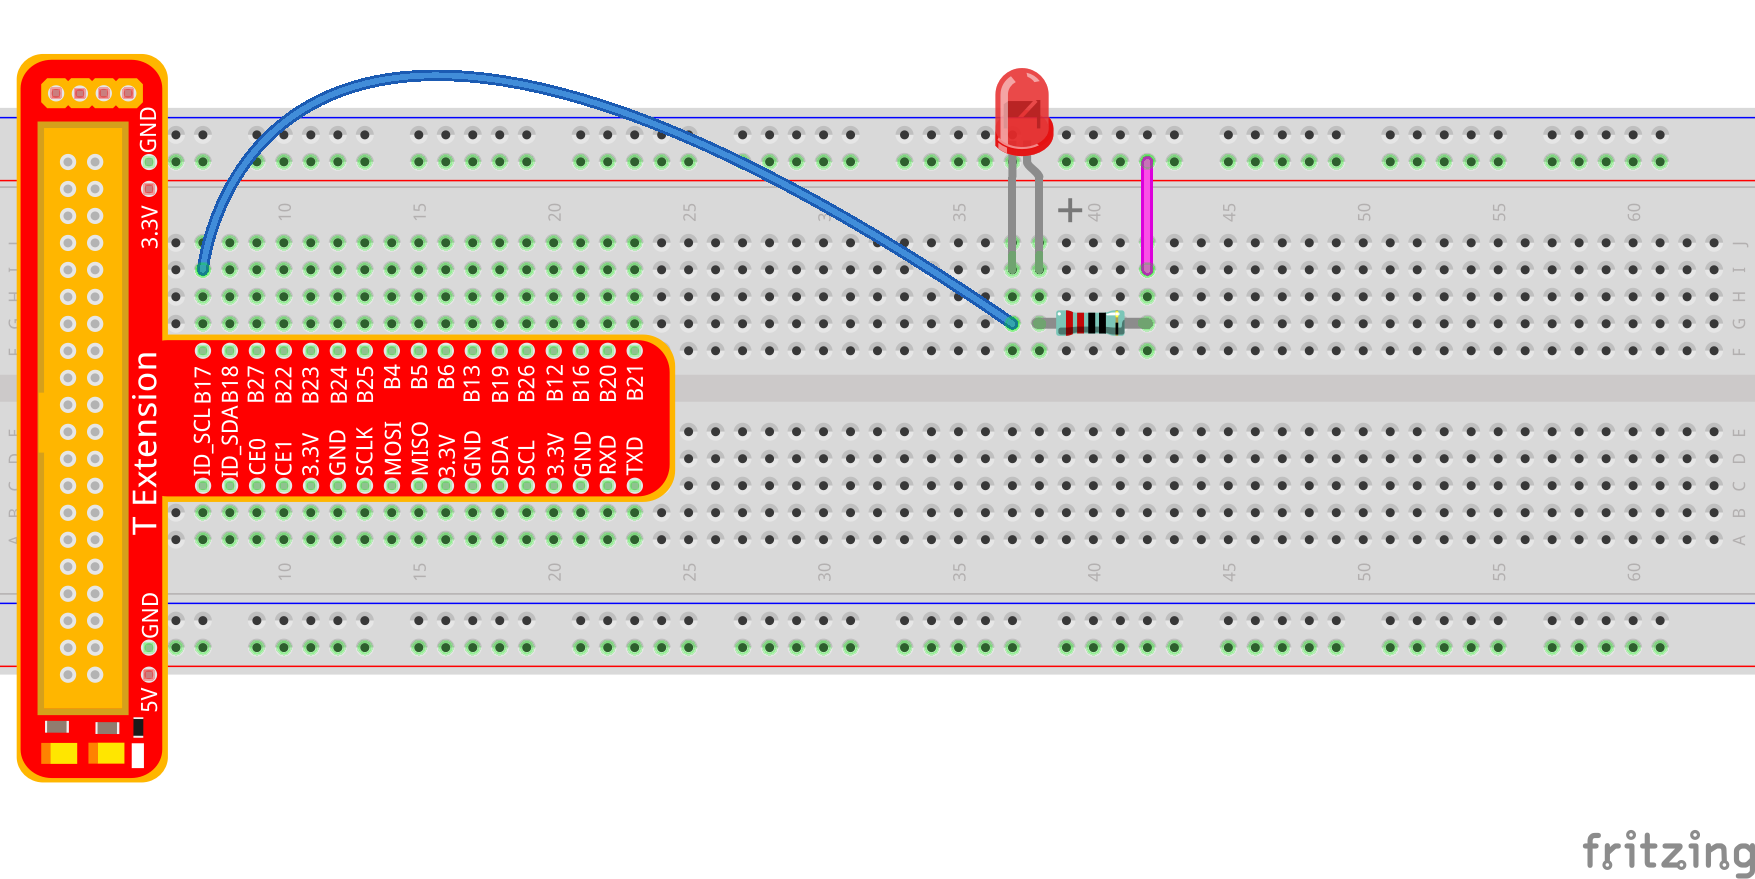
In this experiment, connect a 220Ω resistor to the anode (the long pin of the LED), then the resistor to 3.3 V, and connect the cathode (the short pin) of the LED to B17 of Raspberry Pi. We can see from the schematic diagram that the anode of LED connects to a current-limiting resistor and then to 3.3V. Therefore, to turn on an LED, we need to make B17 low (0V) level. It can be realized by programming.

Experimental Procedures
Step 1: Build the circuit.
For C Language Users:
Step 2: Go to the folder of the code.
If you use a monitor, you’re recommended to take the following steps.
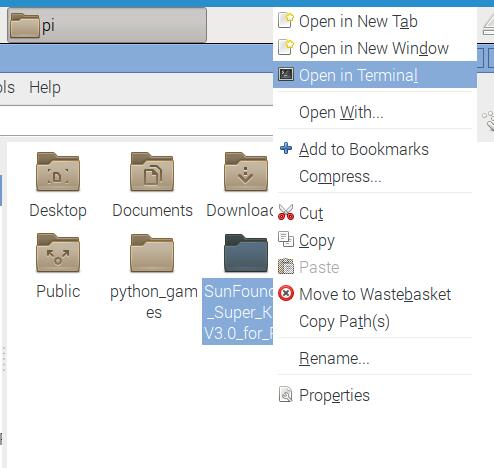
Go to /home/pi/ and find the folder SunFounder_Super_Kit_V3.0_for_Raspberry_Pi .
Find C in the folder, right-click on it and select Open in Terminal.
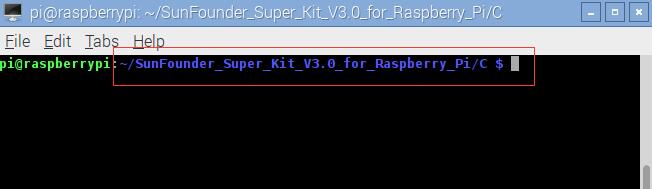
Then a window will pop up as shown below. So now you’ve entered the path of the code 01_blinkLed.c
In the lessons later, we will show how to get into the folder of the code in command way, not with the display. You only need to find out the code file and right click Open in Terminal. You can back to lesson 1 to check if you forgot. Certainly, the terminal can be opened if you’re using display, and then use cd command directly to go to the code path.
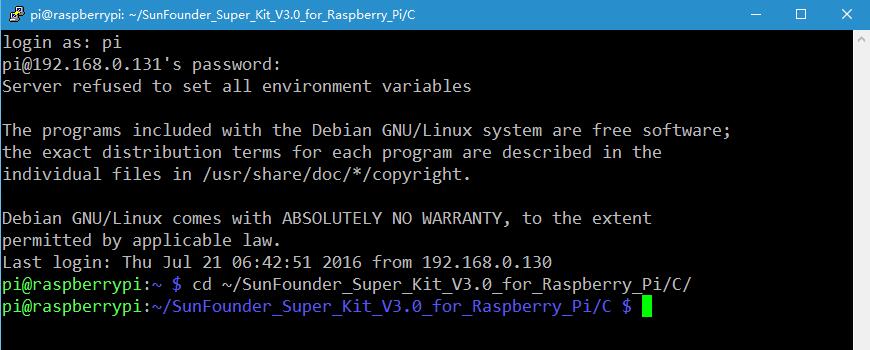
If you log into the Raspberry Pi remotely, use “cd” to change directory:
cd /home/pi/SunFounder_Super_Kit_V3.0_for_Raspberry_Pi/C
Note
Change directory to the path of the code in this experiment via cd.
In either way, you now are in the folder C. The subsequent procedures under the two methods are the same. Let’s move on.
Step 3: Compile the Code.
gcc 01_blinkLed.c -o 01_blinkLed -lwiringPi
Note
gcc is GNU Compiler Collection. Here, it functions like compiling the C language file 01_blinkLed.c and outputting an executable file 01_blinkLed. In the command, -o means outputting and -lwiringPi is to load the library wiringPi (l is short for library).If you want to write your own C code and compile to run it, you need to master gcc.
Since the gcc command is too long, you can use make to test the experimental effect of the kit to make the process quicker and more convenient.
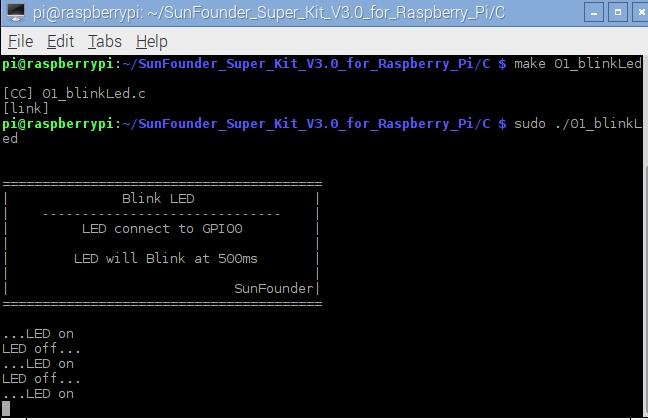
make 01_blinkLed
Note
The make command will compile according to the rules in the Makefile. Two files will be generated after compiling: “*.o” and an executable file.
We use makefile, in essence, is to write the compilation method of gcc into the automated script. If you have written your own program in C language, you need to write and modify the makefile so as to use make command to compile your C code.
Step 4: Run the executable file output in the previous step:
sudo ./01_blinkLed
Note
To control the GPIO, you need to access to led with the permission of superuser (sudo is not needed to control the GPIO for the raspbian system after 2016-5-27), namely, by the command sudo. In the command “./” indicates the current directory. The whole command is to run the 01_blinkLed in the current directory.
If it does not work after running, or there is an error prompt: “wiringPi.h: No such file or directory”, please refer to C code is not working?.
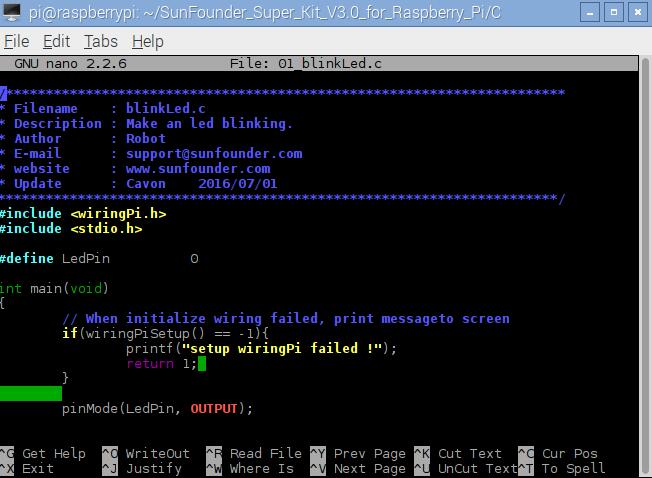
If you want to view the code 01_blinkLed.c, press Ctrl + C to stop running the code. Then type the following command to open it:
nano 01_blinkLed.c
Note
nano is a text editor tool. The command is to open the code file 01_edblinkLed.c by this tool.
Code
#include <wiringPi.h>
#include <stdio.h>

#define LedPin              0

int main(void)
{
    // When initialize wiring failed, print messageto screen
    if(wiringPiSetup() == -1){
        printf("setup wiringPi failed !");
        return 1;
    }

    pinMode(LedPin, OUTPUT);

    printf("\n");
    printf("\n");
    printf("========================================\n");
    printf("|              Blink LED               |\n");
    printf("|    ------------------------------    |\n");
    printf("|         LED connect to GPIO0         |\n");
    printf("|                                      |\n");
    printf("|        LED will Blink at 500ms       |\n");
    printf("|                                      |\n");
    printf("|                            SunFounder|\n");
    printf("========================================");
    printf("\n");
    printf("\n");

    while(1){
        // LED on
        digitalWrite(LedPin, LOW);
        printf("...LED on\n");
        delay(500);
        // LED off
        digitalWrite(LedPin, HIGH);
        printf("LED off...\n");
        delay(500);
    }

    return 0;
}
Code Explanation
#include <wiringPi.h>
// The hardware drive library designed for the C language of Raspberry Pi.
// Adding this library is convenient for hardware initialization, I/O ports, PWM outputs, etc.

#include <stdio.h>
/* Standard I/O library. The pintf function used for
printing the data displayed on the screen is realized by this library.
There are many other performance functions for you to explore.*/

#define LedPin 0
/* Pin B17 of the T_Extension Board is corresponding to
the pin0 in wiringPi, namely, GPIO 0 of the raspberry Pi. Assign GPIO 0
to LedPin, LedPin represents GPIO 0 in the code later.*/

pinMode(LedPin, OUTPUT) // Set LedPin as output to write value to it.

digitalWrite(LedPin, LOW)
/* Set GPIO0 as 0V (low level). Since the
cathode of LED is connected to GPIO0, thus the LED will light up if
GPIO0 is set low. On the contrary, set GPIO0 as high level, digitalWrite
(LedPin, HIGH): LED will go out.*/
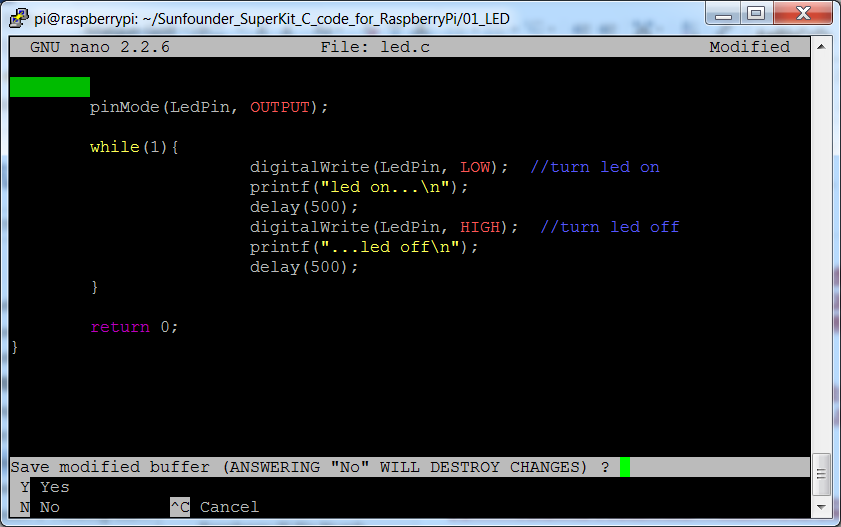
Press Ctrl+X to exit. If you have modified the code, there will be a prompt asking whether to save the changes or not. Type in Y (save) or N (don’t save). Then press Enter to exit. Repeat Step 3 and Step 4 to see the effect after modifying.
For Python Users:
Step 2: Go to the folder of the code and run it.
Open the downloaded folder SunFounder_Super_Kit_V3.0_for_Raspberry_Pi/Python and you can see them.
If you use a monitor, you’re recommended to take the following steps.
Find 01_blinkLed.py and double click it to open. Now you’re in the file.
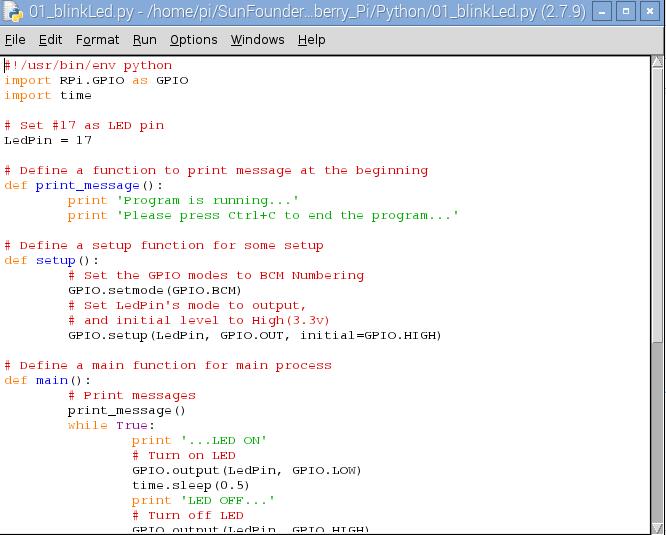
Click Run -> Run Module in the window and the following contents will appear.
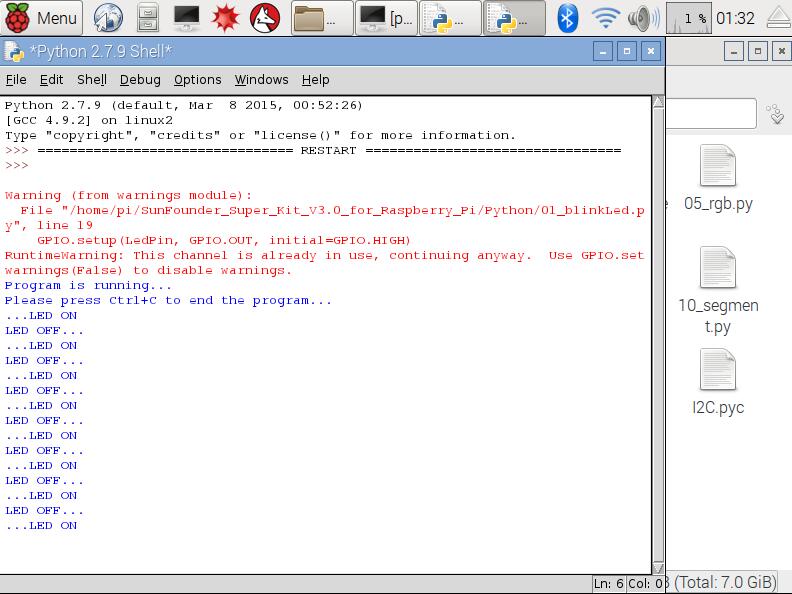
To stop it from running, just click the X button on the top right to close it and then you’ll back to the code details. If you modify the code, before clicking Run Module (F5) you need to save it first. Then you can see the results.
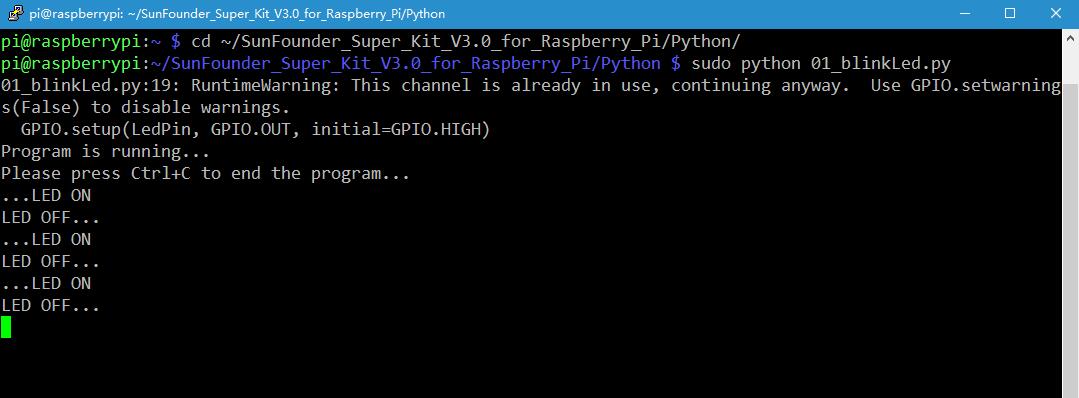
If you want to log into the Raspberry Pi remotely, type in the command:
cd /home/pi/SunFounder_Super_Kit_V3.0_for_Raspberry_Pi/Python
Run the code:
sudo python3 01_blinkLed.py
Note
Here sudo – superuser do, and python means to run the file by Python.
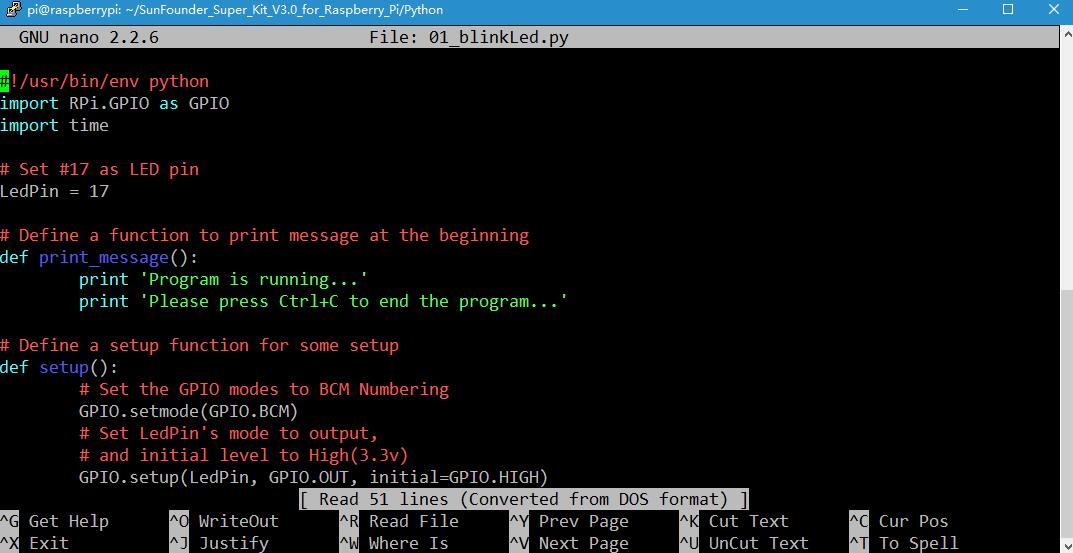
If you want to view the code 01_blinkLed.py, press Ctrl + C to stop running the code. Then type the following command to open it:
nano 01_blinkLed.py
Note
nano is a text editor tool. The command is to open the code file 01_blinkLed.c by this tool.
Code
import RPi.GPIO as GPIO
import time
from sys import version_info

if version_info.major == 3:
    raw_input = input

# Set #17 as LED pin
LedPin = 17

# Define a function to print message at the beginning
def print_message():
    print ("========================================")
    print ("|              Blink LED               |")
    print ("|    ------------------------------    |")
    print ("|         LED connect to B17           |")
    print ("|                                      |")
    print ("|        LED will Blink at 500ms       |")
    print ("|                                      |")
    print ("|                            SunFounder|")
    print ("========================================\n")
    print ("Program is running...")
    print ("Please press Ctrl+C to end the program...")
    #raw_input ("Press Enter to begin\n")

# Define a setup function for some setup
def setup():
    # Set the GPIO modes to BCM Numbering
    GPIO.setmode(GPIO.BCM)
    # Set LedPin's mode to output,
    # and initial level to High(3.3v)
    GPIO.setup(LedPin, GPIO.OUT, initial=GPIO.HIGH)

# Define a main function for main process
def main():
    # Print messages
    print_message()
    while True:
        print ("...LED ON")
        # Turn on LED
        GPIO.output(LedPin, GPIO.LOW)
        time.sleep(0.5)
        print ("LED OFF...")
        # Turn off LED
        GPIO.output(LedPin, GPIO.HIGH)
        time.sleep(0.5)

# Define a destroy function for clean up everything after
# the script finished
def destroy():
    # Turn off LED
    GPIO.output(LedPin, GPIO.HIGH)
    # Release resource
    GPIO.cleanup()

# If run this script directly, do:
if __name__ == '__main__':
    setup()
    try:
        main()
    # When 'Ctrl+C' is pressed, the child program
    # destroy() will be  executed.
    except KeyboardInterrupt:
        destroy()
Code Explanation
#!/usr/bin/env python3:

"""When the system detects this, it will search the installation path of
python in the env setting, then call the corresponding interpreter to
complete the operation. It’s to prevent the user not installing the
python onto the /usr/bin default path."""

import RPi.GPIO as GPIO
# import RPI.GPIO package, thus python code control GPIO easily with it.

import time
# import time package, for time delay function in the following program.

LedPin = 17
# LED connects to the B17 of the T-shape extension board, namely, the GPIO 0 of the Raspberry Pi.

# Define a setup function for some setup
def setup():

    GPIO.setmode(GPIO.BCM) # Set the GPIO modes to BCM Numbering

    # Set LedPin's mode to output, and initial level to High (3.3v)

    GPIO.setup(LedPin, GPIO.OUT, initial=GPIO.HIGH)

# Define a main function for main process

def main():

    # Print messages

    print_message()

    while True:

        print ("...LED ON")

        # Turn on LED

        GPIO.output(LEDPin, GPIO.LOW)

        # delay 0.5 second, which is equals to the delay in C language, using
        second as the unit,

        time.sleep(0.5)

        print ("LED OFF...")

        # Turn off LED

        GPIO.output(LedPin, GPIO.HIGH)

        time.sleep(0.5)

# Define a destroy function for clean up everything after the script finished

def destroy():

    # Turn off LED

    GPIO.output(LedPin, GPIO.HIGH)

    # Release resource

    GPIO.cleanup()

# If run this script directly, do:

if __name__ == '__main__':

    setup()

    try:

        main()

    # When 'Ctrl+C' is pressed, the child program destroy () will be executed.

    except KeyboardInterrupt:

        destroy()
Press Ctrl+X to exit. If you have modified the code, there will be a prompt asking whether to save the changes or not. Type in Y (save) or N (don’t save).
Then press Enter to exit. Type in nano 01_blinkLed.py again to see the effect after the change.
Run the code to make it work. It will be like below:

Further Exploration
If you want the LED to speed up the blinking, just change the delay time. For example, change the time to delay (200) (for C) or time.sleep(0.2) (for python) in the program, recompile and run, and then you will see the LED blink faster.
Summary
Raspberry Pi packages many low-level detail designs, which ease your way to explore your own apps. Maybe that is the charm of Raspberry Pi. Now you have already learnt how to use the Raspberry Pi GPIO to blink an LED. Keep moving to the next contents.
FAQ
If you haven’t modified the code, you do not need to run make 01_blinkLed again.
make 01_blinkLed
Or a message will appear: make: ’01_blinkLed’ is up to date.

It will not appear only when you run the make command after having changed the code and saved it.
tips: For any TECHNICAL questions, add a topic under FORUM section on our website www.sunfounder.com and we’ll reply as soon as possible.