Light Play 1.0
Note
🌟 Welcome to the SunFounder Facebook Community! Whether you’re into Raspberry Pi, Arduino, or ESP32, you’ll find inspiration, help ideas here.
✅ Be the first to get free learning resources.
✅ Stay updated on new products & exclusive giveaways.
✅ Share your creations and get real feedback.
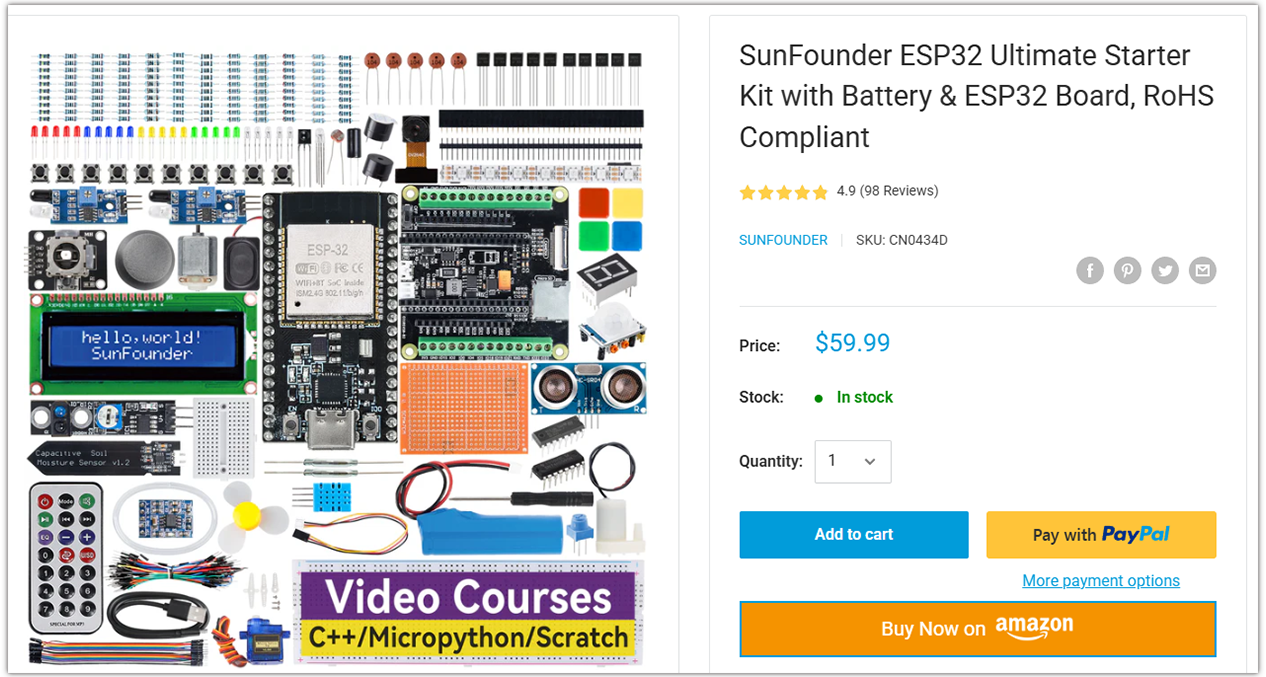
Kit purchase
Looking for parts? Check out our all-in-one kits below — packed with components, beginner-friendly guides, and tons of fun.
Name |
Includes ESP32 board |
PURCHASE LINK |
|---|---|---|
ESP32 Ultimate Starter Kit |
ESP32 WROOM 32E + |
|
Universal Maker Sensor Kit |
Course Introduction
In this lesson, you will learn how to use Arduino Nano ESP32 along with buttons, LEDs, and resistors to create a light show.
Pressing the button will switch between different lighting modes.
Note
If this is your first time working with an ESP32 project, we recommend downloading and reviewing the basic materials first.
Required Components
In this project, we need the following components:
SN |
COMPONENT INTRODUCTION |
QUANTITY |
PURCHASE LINK |
|---|---|---|---|
1 |
Arduino Nano ESP32 |
1 |
|
2 |
USB Type-C cable |
1 |
|
3 |
Breadboard |
1 |
|
4 |
Wires |
Several |
|
5 |
1kΩ resistor |
Several |
|
6 |
Button |
3 |
|
7 |
LED |
Several |
Wiring
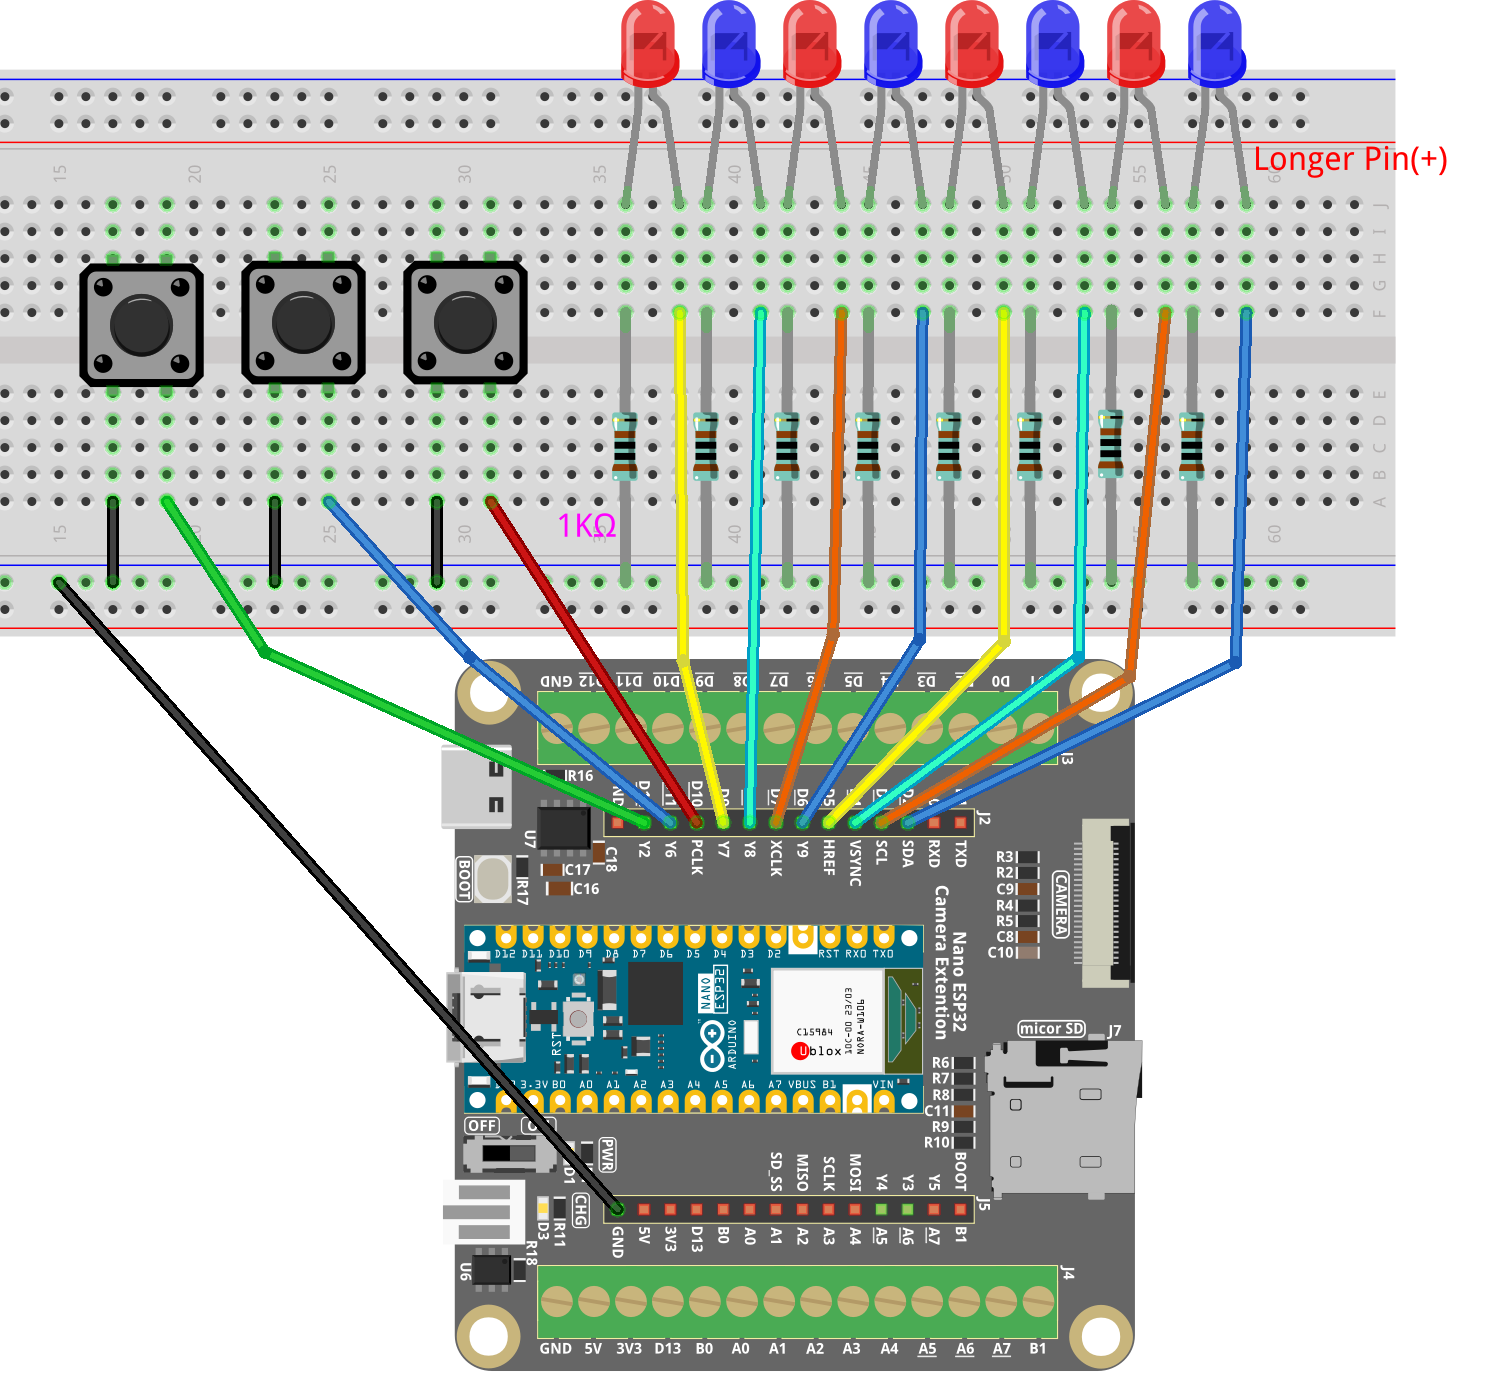
Common Connections:
LED
Connect the LEDs cathode to a 1kΩ resistor then to the negative power bus on the breadboard, and the LEDs anode to D2 to D9 on the ESP32.
Red Button
Connect to breadboard’s negative power bus.
Connect to D10 on the ESP32.
Blue Button
Connect to breadboard’s negative power bus.
Connect to D11 on the ESP32.
Green Button
Connect to breadboard’s negative power bus.
Connect to D12 on the ESP32.
Writing the Code
Note
You can copy this code into Arduino IDE.
Don’t forget to select the board(Arduino Nano ESP32) and the correct port before clicking the Upload button.
// Arduino Nano ESP32 version (use Dx labels)

// LED pins (8 LEDs connected to D2 ~ D9)
const int ledPins[8] = {D2, D3, D4, D5, D6, D7, D8, D9};

// Button pins
const int redButton   = D10;
const int blueButton  = D11;
const int greenButton = D12;

// Variables to track previous button states
bool prevRedPressed = false;
bool prevBluePressed = false;
bool prevGreenPressed = false;

void setup() {
  // Set all LED pins as outputs and turn them off
  for (int i = 0; i < 8; i++) {
    pinMode(ledPins[i], OUTPUT);
    digitalWrite(ledPins[i], LOW);
  }

  // Set buttons as input with internal pull-up resistors
  pinMode(redButton, INPUT_PULLUP);
  pinMode(blueButton, INPUT_PULLUP);
  pinMode(greenButton, INPUT_PULLUP);

  Serial.begin(115200); // Debug output for ESP32
}

void loop() {
  handleRedButton();    // Play red light sequence
  handleBlueButton();   // Play blue LED flowing animation
  handleGreenButton();  // Play full pattern sequence
}

// --- Red button: Runs a 6-step light show pattern ---
void handleRedButton() {
  bool isPressed = (digitalRead(redButton) == LOW);
  if (isPressed && !prevRedPressed) {
    Serial.println("Red button pressed -> 6-step pattern");
    runRedSequence();
    delay(300); // Simple debounce
  }
  prevRedPressed = isPressed;
}

void runRedSequence() {
  // Step 1: All LEDs on
  setAll(HIGH);
  delay(1000);

  // Step 2: Only blue LEDs on (even indices)
  for (int i = 0; i < 8; i++)
    digitalWrite(ledPins[i], (i % 2 == 0) ? HIGH : LOW);
  delay(1000);

  // Step 3: Only red LEDs on (odd indices)
  for (int i = 0; i < 8; i++)
    digitalWrite(ledPins[i], (i % 2 == 1) ? HIGH : LOW);
  delay(1000);

  // Step 4: All LEDs on
  setAll(HIGH);
  delay(1000);

  // Step 5: Only blue LEDs on again
  for (int i = 0; i < 8; i++)
    digitalWrite(ledPins[i], (i % 2 == 0) ? HIGH : LOW);
  delay(1000);

  // Step 6: Turn all LEDs off
  setAll(LOW);
}

// --- Blue button: Flowing LED animation, back and forth x2 ---
void handleBlueButton() {
  bool isPressed = (digitalRead(blueButton) == LOW);
  if (isPressed && !prevBluePressed) {
    Serial.println("Blue button pressed -> flowing animation");

    for (int round = 0; round < 2; round++) {
      // Forward flow
      for (int i = 0; i < 8; i++) {
        lightOneOnly(i);
        delay(100);
      }
      // Backward flow
      for (int i = 6; i >= 0; i--) {
        lightOneOnly(i);
        delay(100);
      }

      clearAll();
      delay(100); // Small gap between rounds
    }

    delay(300);
  }
  prevBluePressed = isPressed;
}

// Lights only one LED at the specified index
void lightOneOnly(int index) {
  for (int i = 0; i < 8; i++) {
    digitalWrite(ledPins[i], (i == index) ? HIGH : LOW);
  }
}

// --- Green button: Four full LED pattern cycles ---
void handleGreenButton() {
  bool isPressed = (digitalRead(greenButton) == LOW);
  if (isPressed && !prevGreenPressed) {
    Serial.println("Green button pressed -> full sequence");

    // Pattern 1: Light up and off from left to right
    for (int i = 0; i < 8; i++) {
      digitalWrite(ledPins[i], HIGH);
      delay(100);
    }
    for (int i = 0; i < 8; i++) {
      digitalWrite(ledPins[i], LOW);
      delay(100);
    }

    // Pattern 2: Right to left on and off
    for (int i = 7; i >= 0; i--) {
      digitalWrite(ledPins[i], HIGH);
      delay(100);
    }
    for (int i = 7; i >= 0; i--) {
      digitalWrite(ledPins[i], LOW);
      delay(100);
    }

    // Pattern 3: Left to right on, right to left off
    for (int i = 0; i < 8; i++) {
      digitalWrite(ledPins[i], HIGH);
      delay(100);
    }
    for (int i = 7; i >= 0; i--) {
      digitalWrite(ledPins[i], LOW);
      delay(100);
    }

    // Pattern 4: Right to left on, left to right off
    for (int i = 7; i >= 0; i--) {
      digitalWrite(ledPins[i], HIGH);
      delay(100);
    }
    for (int i = 0; i < 8; i++) {
      digitalWrite(ledPins[i], LOW);
      delay(100);
    }

    clearAll(); // Make sure all LEDs are off
    delay(300);
  }
  prevGreenPressed = isPressed;
}

// Turns all LEDs on or off
void setAll(int state) {
  for (int i = 0; i < 8; i++) {
    digitalWrite(ledPins[i], state);
  }
}

// Turns off all LEDs
void clearAll() {
  setAll(LOW);
}