Flame Monitor 1.0
Note
🌟 Welcome to the SunFounder Facebook Community! Whether you’re into Raspberry Pi, Arduino, or ESP32, you’ll find inspiration, help ideas here.
✅ Be the first to get free learning resources.
✅ Stay updated on new products & exclusive giveaways.
✅ Share your creations and get real feedback.
Kit purchase
Looking for parts? Check out our all-in-one kits below — packed with components, beginner-friendly guides, and tons of fun.

Name |
Includes ESP32 board |
PURCHASE LINK |
|---|---|---|
ESP32 Ultimate Starter Kit |
ESP32 WROOM 32E + |
|
Universal Maker Sensor Kit |
Course Introduction
In this lesson, you’ll learn how to use a Flame Sensor and an OLED Display with the Arduino Nano ESP32. The OLED shows the flame intensity in real time and alerts with “FIRE!” when a flame is detected.
Note
If this is your first time working with an ESP32 project, we recommend downloading and reviewing the basic materials first.
Required Components
In this project, we need the following components:
SN |
COMPONENT INTRODUCTION |
QUANTITY |
PURCHASE LINK |
|---|---|---|---|
1 |
Arduino Nano ESP32 |
1 |
|
2 |
USB Type-C cable |
1 |
|
3 |
Breadboard |
1 |
|
4 |
Wires |
Several |
|
5 |
Flame Sensor Module |
1 |
|
6 |
OLED Display Module |
1 |
Wiring
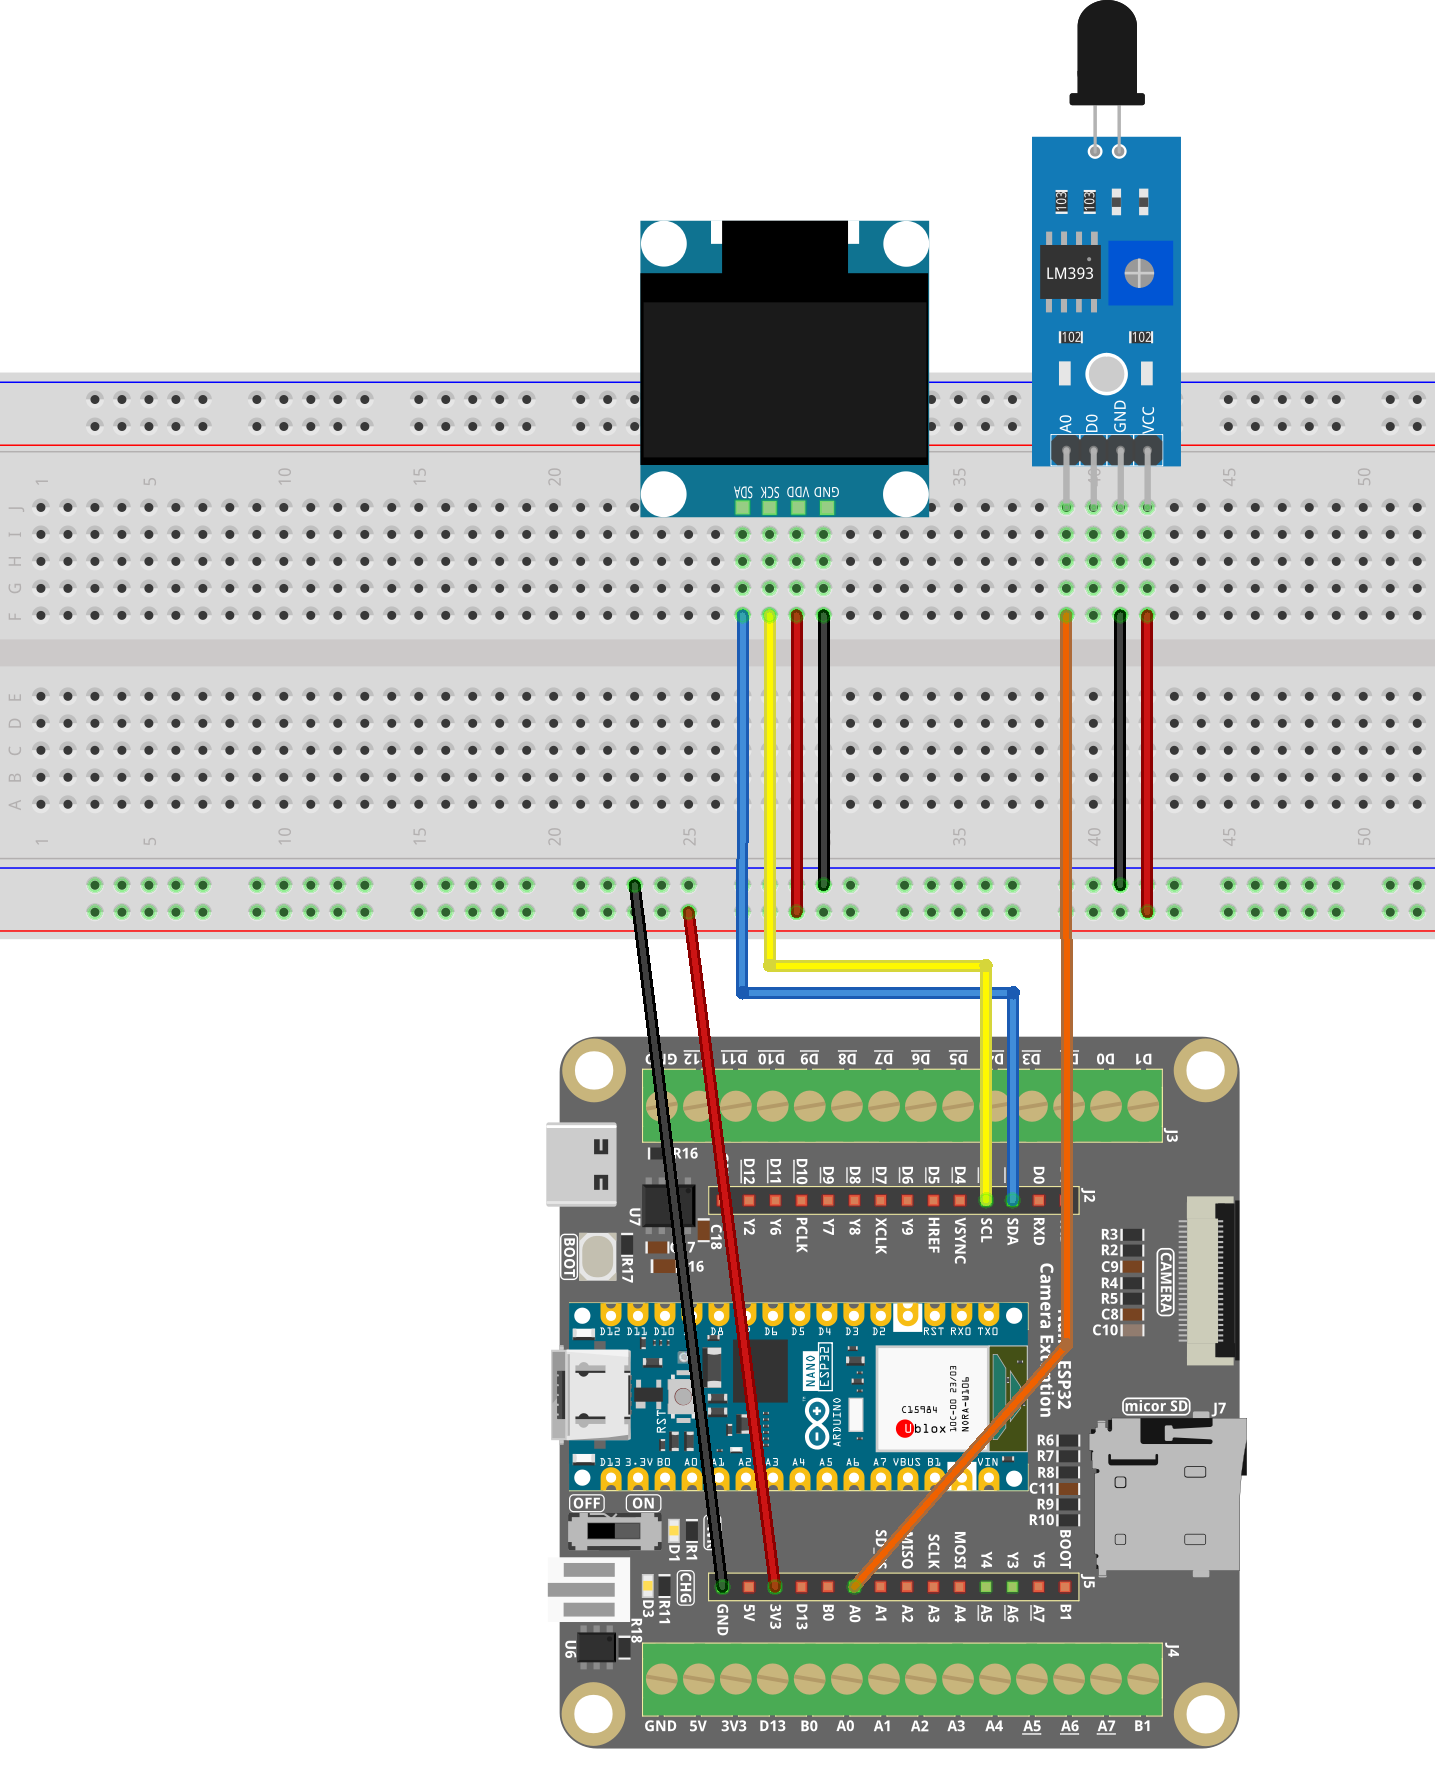
Common Connections:
Flame Sensor Module
A0: Connect to A0 on the ESP32.
GND: Connect to GND on the ESP32 Extension Board.
VCC: Connect to 3.3V on the ESP32 Extension Board.
OLED Display Module
SDA: Connect to D2 on the Arduino.
SCK: Connect to D3 on the Arduino.
GND: Connect to GND on the ESP32 Extension Board.
VCC: Connect to 3.3V on the ESP32 Extension Board.
Writing the Code
Note
You can copy this code into Arduino IDE.
To install the library, use the Arduino Library Manager and search for Adafruit SSD1306 and Adafruit GFX and install it.
Don’t forget to select the board(Arduino Nano ESP32) and the correct port before clicking the Upload button.
#include <Wire.h>
#include <Adafruit_GFX.h>
#include <Adafruit_SSD1306.h>

#define SCREEN_WIDTH 128
#define SCREEN_HEIGHT 64
#define OLED_RESET -1
#define SCREEN_ADDRESS 0x3C

Adafruit_SSD1306 display(SCREEN_WIDTH, SCREEN_HEIGHT, &Wire, OLED_RESET);

// Flame sensor analog pin (Nano ESP32)
#define FLAME_PIN A0

// ESP32 ADC parameters
const int ADC_BITS = 12;          // 0~4095
const int ADC_MAX  = 4095;

// Threshold for fire detection (adjust after checking Serial values)
const int FIRE_THRESHOLD = 1200;

void setup() {
  Serial.begin(115200);
  delay(200);
  Serial.println("Flame Sensor with OLED test (Nano ESP32)");

#if defined(ARDUINO_ARCH_ESP32)
  analogReadResolution(ADC_BITS);       // 0~4095
  analogSetAttenuation(ADC_11db);       // better range/stability
#endif

  // I2C init
  // Option 1 (recommended if you wired OLED to D2/D3):
  Wire.begin(D2, D3);   // SDA = D2, SCL = D3
  // Option 2 (use board default I2C pins):
  // Wire.begin();

  // Initialize OLED
  if (!display.begin(SSD1306_SWITCHCAPVCC, SCREEN_ADDRESS)) {
    Serial.println("SSD1306 allocation failed");
    while (true) delay(1000);
  }

  display.clearDisplay();
  display.setTextColor(SSD1306_WHITE);
}

void loop() {
  // Read raw ADC value from flame sensor
  int rawValue = analogRead(FLAME_PIN);  // 0~4095 on ESP32

  // Invert value: higher means stronger flame signal (depending on sensor module)
  int flameValue = ADC_MAX - rawValue;

  // Fire detection based on threshold
  bool fireDetected = (flameValue > FIRE_THRESHOLD);

  // Serial debug output
  Serial.print("raw=");
  Serial.print(rawValue);
  Serial.print("  flame=");
  Serial.print(flameValue);
  Serial.print("  status=");
  Serial.println(fireDetected ? "FIRE" : "SAFE");

  // OLED display output
  display.clearDisplay();

  display.setTextSize(1);
  display.setCursor(0, 0);
  display.println("Flame Intensity:");

  display.setTextSize(2);
  display.setCursor(0, 12);
  display.print(flameValue);

  display.setTextSize(1);
  display.setCursor(0, 40);
  display.println("Status:");

  display.setTextSize(2);
  display.setCursor(0, 50);
  display.print(fireDetected ? "FIRE!" : "SAFE");

  display.display();

  delay(500);
}