Note
Hello, welcome to the SunFounder Raspberry Pi & Arduino & ESP32 Enthusiasts Community on Facebook! Dive deeper into Raspberry Pi, Arduino, and ESP32 with fellow enthusiasts.
Why Join?
Expert Support: Solve post-sale issues and technical challenges with help from our community and team.
Learn & Share: Exchange tips and tutorials to enhance your skills.
Exclusive Previews: Get early access to new product announcements and sneak peeks.
Special Discounts: Enjoy exclusive discounts on our newest products.
Festive Promotions and Giveaways: Take part in giveaways and holiday promotions.
👉 Ready to explore and create with us? Click [here] and join today!
14. Random Colors
Sometimes, life needs a dash of surprise. When you’re feeling indecisive, let randomness take the reins. This lesson will guide you on how to make an RGB LED light up in random colors, perfect for when you want to add an unpredictable sparkle to your projects.
Building the Circuit
Components Needed
1 * Arduino Uno R3 |
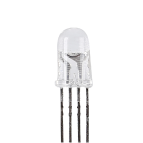
1 * RGB LED |
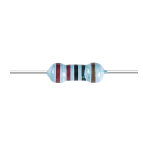
3 * 220Ω Resistor |
Jumper Wires |
|
|
|
|
1 * USB Cable |
1 * Breadboard |
||
|
|


This lesson uses the same circuit as Lesson 12.

Code Creation
In the previous lessons, you’ve controlled the RGB LED to display your desired colors. But sometimes, you may not need it to show a specific color; instead, you might want it to display a random color, much like stage lights. How can this be done?
Know random() functions
In the physical world, randomness abounds, but in programming, so-called “random” numbers are usually computed through a deterministic algorithm. This algorithm typically requires a starting point known as a “seed,” making these numbers predictable and thus called “pseudo-random.” The “pseudo” prefix indicates that these numbers seem random but are actually patterned.
Interestingly, on an Arduino Uno R3, we can use physical measurements from the real world as seeds. During your measurements with a multimeter, you might notice minor fluctuations in the circuit’s voltage and current values. These fluctuations can provide unpredictability to our random numbers.
Arduino’s approach to randomness involves several functions:
randomSeed();: Initializing the random number generator’s seed value. This function ensures that the starting point of the random number sequence varies with each program run, thus producing different sequences.- Parameters
seed: A value used to initialize the random number generator. This unsigned long value sets the starting point of the random sequence.
- Returns
None.
long random(long max);: Generating a random number within a specified range.- Parameters
max: The upper limit of the random number (maxitself not included), meaning the random number will be between 0 (inclusive) andmax-1(inclusive).- Returns
A long type number between 0 and max-1.
long random(long min, long max);: Generating a random number within a specified range.- Parameters
min: The lower limit of the random number (inclusive).max: The upper limit of the random number (maxitself not included), meaning the random number will be between min (inclusive) and max-1 (inclusive).- Returns
A long type number between min and max-1.
Writing the Code
Open the sketch you saved earlier,
Lesson13_PWM_Color_Mixing.Hit “Save As…” from the “File” menu, and rename it to
Lesson14_Random_Colors. Click “Save”.Only call
randomSeed()once invoid setup()to initialize the seed. Avoid using a fixed seed value, as this would cause the same sequence of random numbers to be generated every time the program runs.We use
analogRead(A0)to read the value from an unconnected analog pin. As this pin is not connected, it picks up noise, which varies with each reading, providing a good seed forrandomSeed().
void setup() {
    // Set up code to run once:
    pinMode(9, OUTPUT);   // Set Blue pin of RGB LED as output
    pinMode(10, OUTPUT);  // Set Green pin of RGB LED as output
    pinMode(11, OUTPUT);  // Set Red pin of RGB LED as output

    // Initialize random seed based on an unconnected analog pin
    // This ensures a different sequence of random numbers on each reset
    randomSeed(analogRead(A0));
}
Now in
void loop(), remove the original code. Use therandom()function to generate random values stored in the variablesredValue,greenValue, andblueValue.
void loop(){
    // Generate random values for each color component
    int redValue = random(0, 256);   // Random value between 0 and 255
    int greenValue = random(0, 256); // Random value between 0 and 255
    int blueValue = random(0, 256);  // Random value between 0 and 255
}
Input the generated RGB values into the
setColor()function, allowing the RGB LED to emit the color. Also, use adelay()function to determine how long the color is displayed.
void loop() {
    // Generate random values for each color component between 0 and 255
    int redValue = random(0, 256);    // Generate a random red value
    int greenValue = random(0, 256);  // Generate a random green value
    int blueValue = random(0, 256);   // Generate a random blue value

    // Apply the random color values to the RGB LED
    setColor(redValue, greenValue, blueValue);
    delay(1000);  // Wait for 1 second
}
Your complete code is now ready. You can upload it to the Arduino Uno R3, and you will see the RGB LED display a random color every second.
void setup() {
    // put your setup code here, to run once:
    pinMode(9, OUTPUT);   // Set Blue pin of RGB LED as output
    pinMode(10, OUTPUT);  // Set Green pin of RGB LED as output
    pinMode(11, OUTPUT);  // Set Red pin of RGB LED as output

    // Initialize random seed based on an unconnected analog pin
    // This ensures a different sequence of random numbers on each reset
    randomSeed(analogRead(A0));
}

void loop() {
    // Generate random values for each color component between 0 and 255
    int redValue = random(0, 256);    // Generate a random red value
    int greenValue = random(0, 256);  // Generate a random green value
    int blueValue = random(0, 256);   // Generate a random blue value

    // Apply the random color values to the RGB LED
    setColor(redValue, greenValue, blueValue);
    delay(1000);  // Wait for 1 second
}

// Function to set the color of the RGB LED
void setColor(int red, int green, int blue) {
    // Write PWM value for red, green, and blue to the RGB LED
    analogWrite(11, red);
    analogWrite(10, green);
    analogWrite(9, blue);
}
Finally, remember to save your code and tidy up your workspace.
Question
If you change the code from
randomSeed(analogRead(A0))torandomSeed(0), how will the colors of the RGB LED change, and why?What are some situations where randomness is used to solve problems in everyday life, aside from randomly picking colors for decoration and choosing lottery numbers?
Summary
By the end of this lesson, you will not only have learned about randomness in programming and how to manipulate it to create vibrant, unexpected visual displays but also appreciated the simple beauty of randomness in everyday life. Programming can be as unpredictable as life itself, and with the right tools, you can harness that unpredictability in creative and functional ways.