Note
Hello, welcome to the SunFounder Raspberry Pi & Arduino & ESP32 Enthusiasts Community on Facebook! Dive deeper into Raspberry Pi, Arduino, and ESP32 with fellow enthusiasts.
Why Join?
Expert Support: Solve post-sale issues and technical challenges with help from our community and team.
Learn & Share: Exchange tips and tutorials to enhance your skills.
Exclusive Previews: Get early access to new product announcements and sneak peeks.
Special Discounts: Enjoy exclusive discounts on our newest products.
Festive Promotions and Giveaways: Take part in giveaways and holiday promotions.
👉 Ready to explore and create with us? Click [here] and join today!
1.1.7 I2C LCD1602
Introduction
LCD1602 is a character type liquid crystal display, which can display 32 (16*2) characters at the same time.
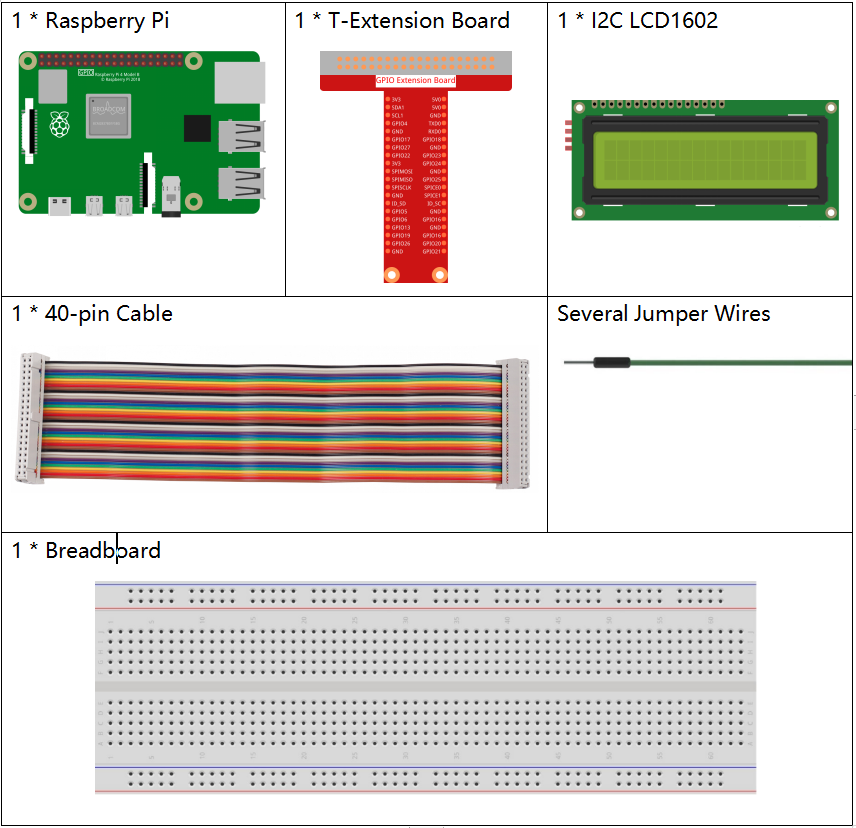
Required Components
In this project, we need the following components.
It’s definitely convenient to buy a whole kit, here’s the link:
Name |
ITEMS IN THIS KIT |
LINK |
|---|---|---|
Raphael Kit |
337 |
You can also buy them separately from the links below.
COMPONENT INTRODUCTION |
PURCHASE LINK |
|---|---|
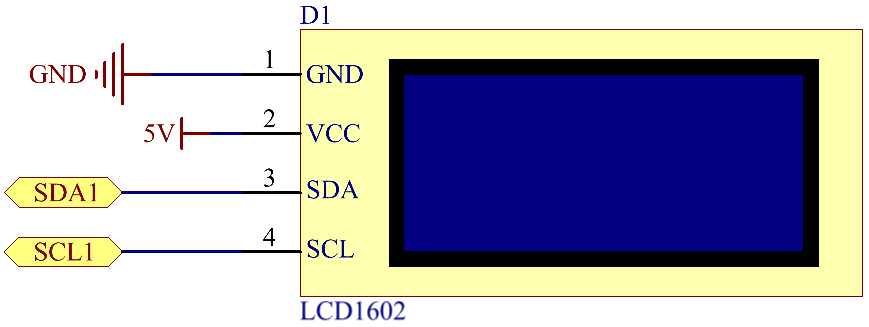
Schematic Diagram
T-Board Name |
physical |
SDA1 |
Pin 3 |
SCL1 |
Pin 5 |
Experimental Procedures
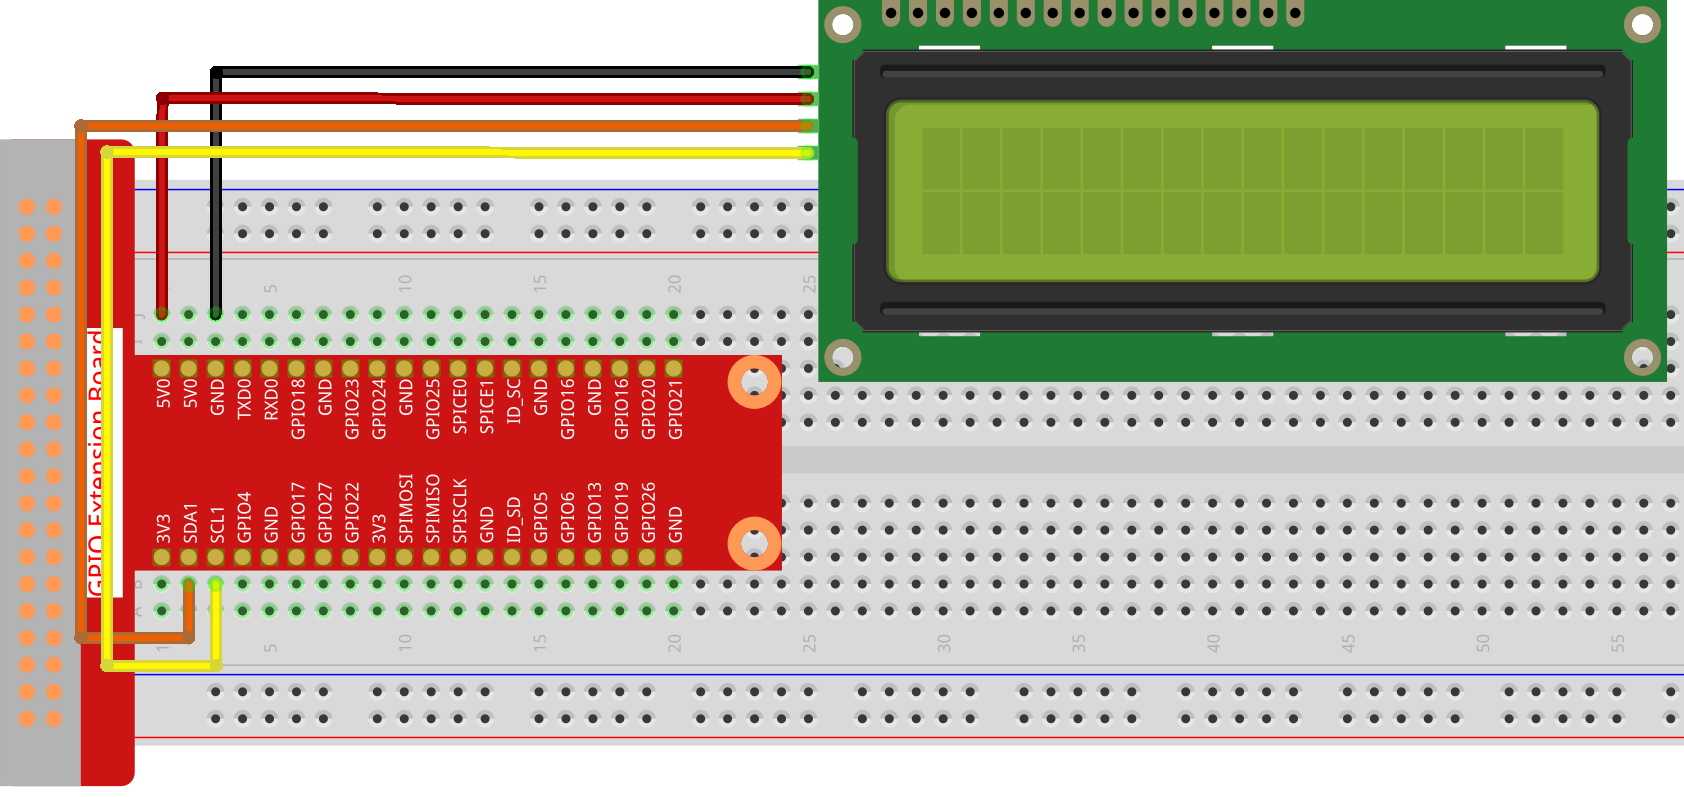
Step 1: Build the circuit.
Step 2: Setup I2C (see I²C Configuration. If you have set I2C, skip this step.)
Step 3: Change directory.
cd ~/raphael-kit/c/1.1.7/
Step 4: Compile.
gcc 1.1.7_Lcd1602.c -lwiringPi
Step 5: Run.
sudo ./a.out
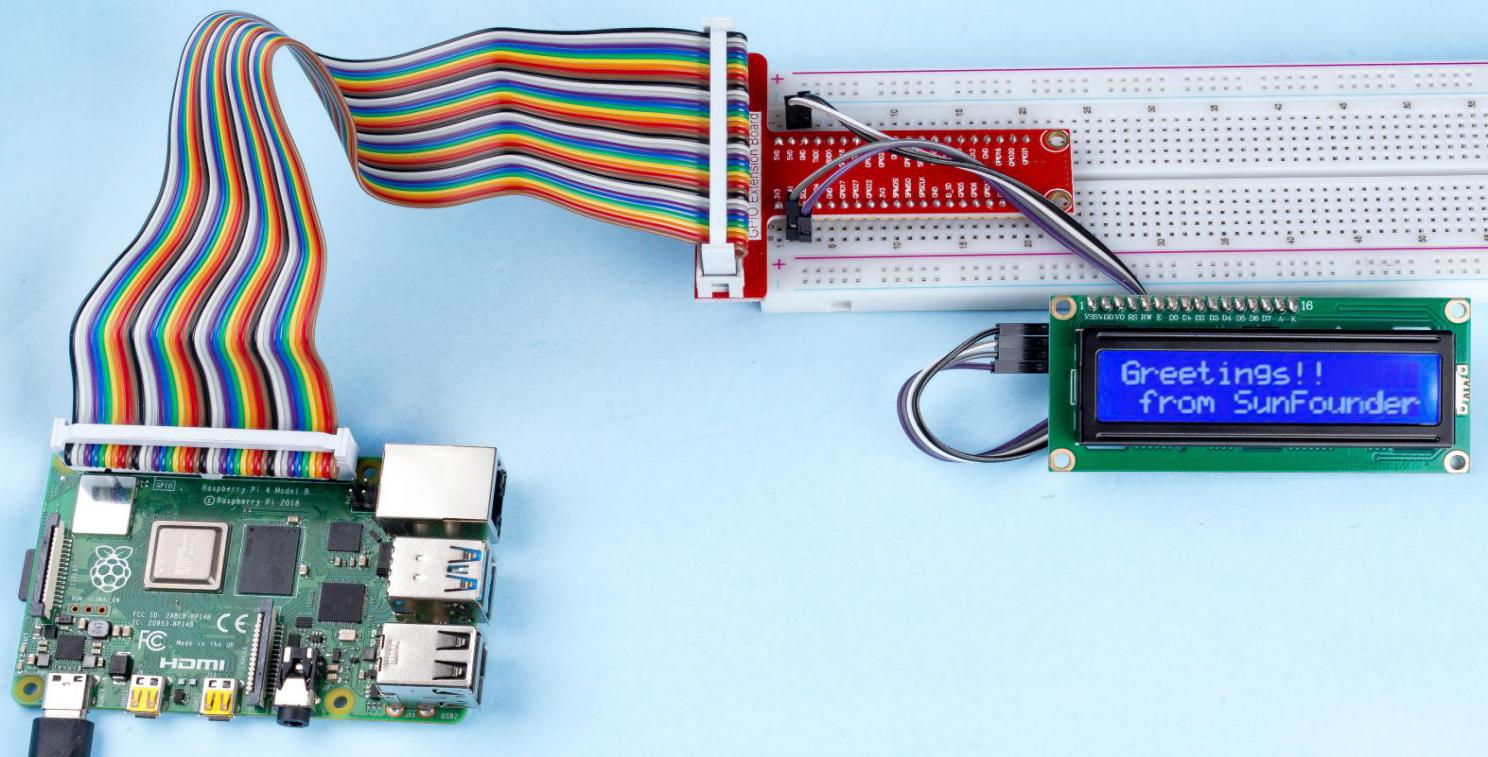
After the code runs, you can see Greetings!, From SunFounder displaying on the LCD.
Note
If there is an error prompt
wiringPi.h: No such file or directory, please refer to Install and Check the WiringPi.If you get
Unable to open I2C device: No such file or directoryerror, you need to refer to I²C Configuration to enable I2C and check if the wiring is correct.If the code and wiring are fine, but the LCD still does not display content, you can turn the potentiometer on the back to increase the contrast.
Code
Code Explanation
void write_word(int data){……}
void send_command(int comm){……}
void send_data(int data){……}
void init(){……}
void clear(){……}
void write(int x, int y, char data[]){……}
These functions are used to control I2C LCD1602 open source code. They allow us to easily use I2C LCD1602.
Among these functions, init() is used for initialization, clear() is used to clear the screen, write() is used to write what is displayed, and other functions support the above functions.
fd = wiringPiI2CSetup(LCDAddr);
This function initializes the I2C system with the specified device symbol. The prototype of the function:
int wiringPiI2CSetup(int devId);
Parameters devId is the address of the I2C device, it can be found through the i2cdetect command(see Appendix) and the devId of I2C LCD1602 is generally 0x27.
void write(int x, int y, char data[]){}
In this function, data[] is the character to be printed on the LCD, and the parameters x and y determine the printing position (line y+1, column x+1 is the starting position of the character to be printed).
Phenomenon Picture