I2C Configuration
Step 1: Enable the I2C port of your Raspberry Pi (If you have enabled it, skip this; if you do not know whether you have done that or not, please continue).
sudo raspi-config
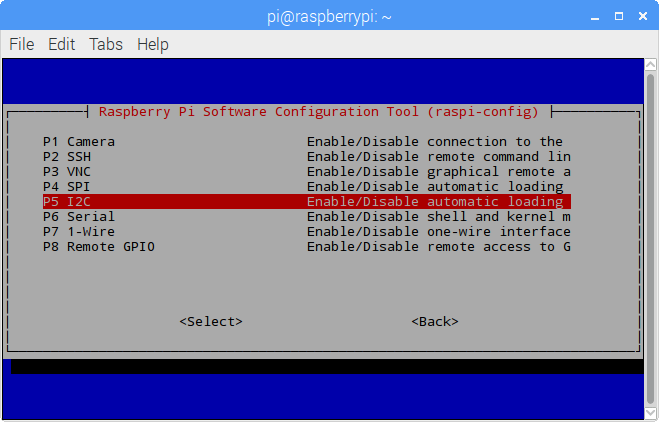
3 Interfacing options
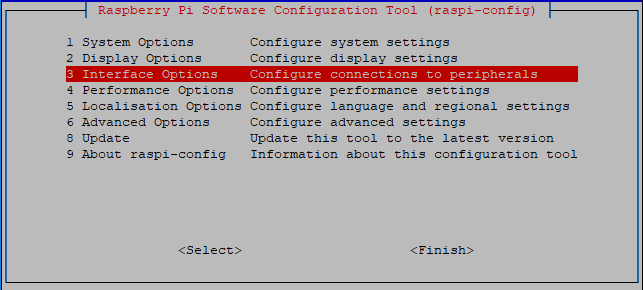
P5 I2C
<Yes>, then <Ok> -> <Finish>

Step 2: Check whether the i2c modules are loaded and active.
lsmod | grep i2c
Then the following codes will appear (the number may be different), if it does not appear, please reboot the Raspberry Pi with sudo reboot.
i2c_dev                     6276    0
i2c_bcm2708                 4121    0
Step 3: Install i2c-tools.
sudo apt-get install i2c-tools
Step 4: Check the address of the I2C device.
i2cdetect -y 1 # For Raspberry Pi 2 and higher version
i2cdetect -y 0 # For Raspberry Pi 1
pi@raspberrypi ~ $ i2cdetect -y 1
    0  1  2  3   4  5  6  7  8  9   a  b  c  d  e  f
00:           -- -- -- -- -- -- -- -- -- -- -- -- --
10: -- -- -- -- -- -- -- -- -- -- -- -- -- -- -- --
20: -- -- -- -- -- -- -- -- -- -- -- -- -- -- -- --
30: -- -- -- -- -- -- -- -- -- -- -- -- -- -- -- --
40: -- -- -- -- -- -- -- -- 48 -- -- -- -- -- -- --
50: -- -- -- -- -- -- -- -- -- -- -- -- -- -- -- --
60: -- -- -- -- -- -- -- -- -- -- -- -- -- -- -- --
70: -- -- -- -- -- -- -- --
If there is an I2C device connected, the address of the device will be displayed.
Step 5:
For C language users: Install libi2c-dev.
sudo apt-get install libi2c-dev
For Python users:
Activating the Virtual Environment.
Note
Before activation, you need to ensure that you have created a virtual environment, please refer to: Creating a Virtual Environment.
Each time you restart the Raspberry Pi, or open a new terminal, you will need to run the following command again to activate the virtual environment.
source myenv/bin/activate
Once the virtual environment is activated, you will see the environment name before the command line prompt, indicating you are working within the virtual environment.
Install smbus for I2C.
sudo pip3 install smbus2
Exiting the Virtual Environment.
When you have completed your work and wish to exit the virtual environment, simply run:
deactivate
This will return you to the system’s global Python environment.