Note
Hello, welcome to the SunFounder Raspberry Pi & Arduino & ESP32 Enthusiasts Community on Facebook! Dive deeper into Raspberry Pi, Arduino, and ESP32 with fellow enthusiasts.
Why Join?
Expert Support: Solve post-sale issues and technical challenges with help from our community and team.
Learn & Share: Exchange tips and tutorials to enhance your skills.
Exclusive Previews: Get early access to new product announcements and sneak peeks.
Special Discounts: Enjoy exclusive discounts on our newest products.
Festive Promotions and Giveaways: Take part in giveaways and holiday promotions.
👉 Ready to explore and create with us? Click [here] and join today!
Lesson 17 LCD1602
Introduction
In this lesson, we will learn how to use an LCD1602 to display characters and strings. LCD1602, or 1602 character-type liquid crystal display, is a kind of dot matrix module to show letters, numbers, and characters and so on. It’s composed of 5x7 or 5x11 dot matrix positions; each position can display one character. Now let’s check more details!
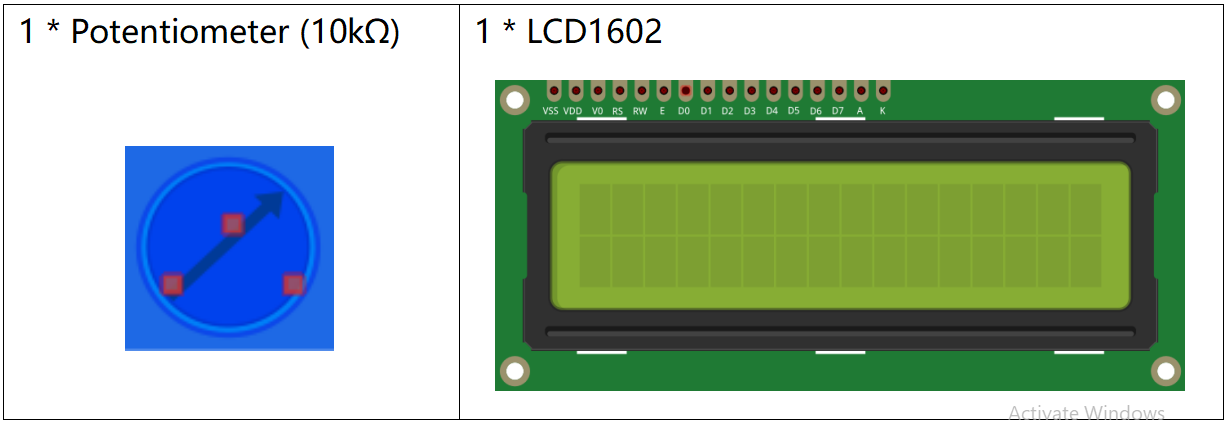
Newly Added Components
Principle
Generally, LCD1602 has parallel ports, that is, it would control several pins at the same time. LCD1602 can be categorized into eight-port and four-port connections. If the eight-port connection is used, then all the digital ports of the Raspberry Pi are almost completely occupied. If you want to connect more sensors, there will be no ports available. Therefore, the four-port connection is used here for better application.

Pins of LCD1602 and their Functions
VSS: connected to ground.
VDD: connected to a +5V power supply.
VO: to adjust the contrast.
RS: A register select pin that controls where in the LCD’s memory you are writing data to. You can select either the data register, which holds what goes on the screen, or an instruction register, which is where the LCD’s controller looks for instructions on what to do next.
R/W: A Read/Write pin to select between reading and writing mode.
E: An enabling pin that reads the information when High level (1) is received. The instructions are run when the signal changes from High level to Low level.
D0-D7: to read and write data.
A and K: Pins that control the LCD backlight. Connect K to GND and A to 3.3v. Open the backlight and you will see clear characters in a comparatively dark environment.
Schematic Diagram
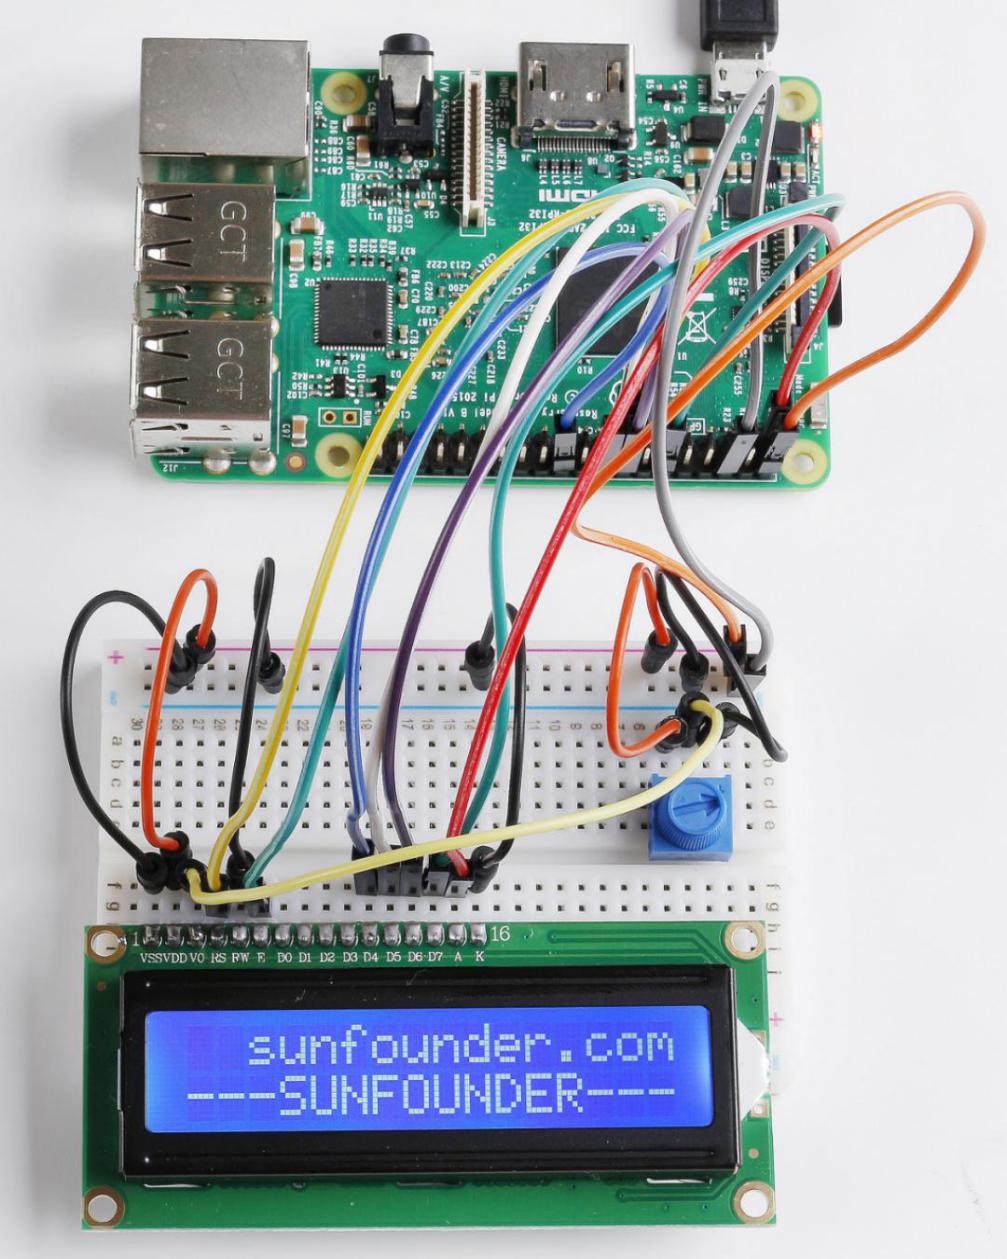
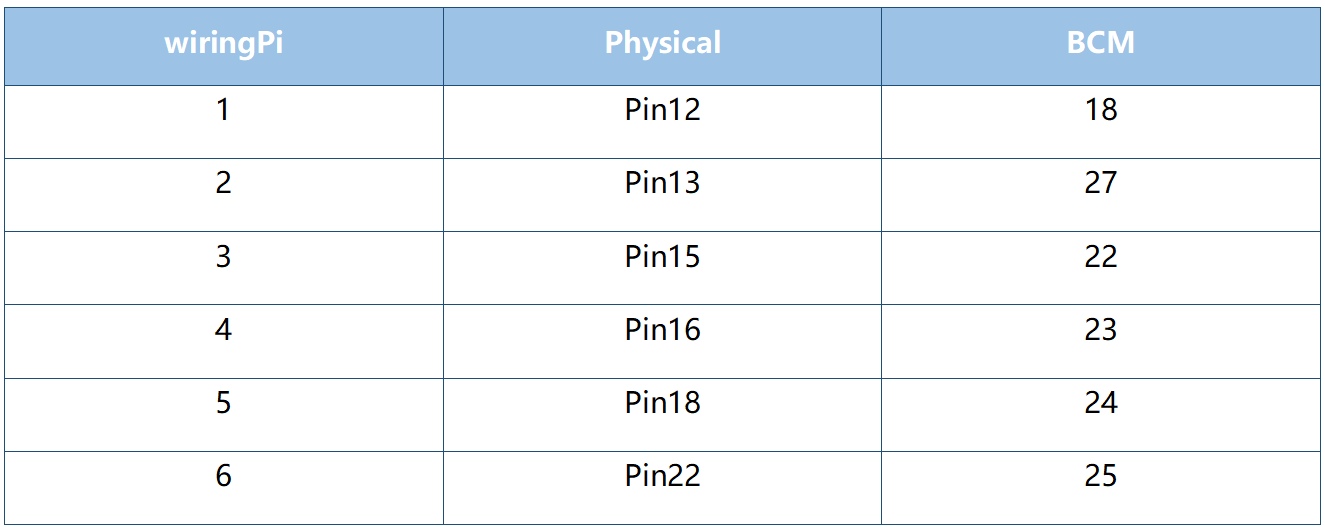
Connect K to GND and A to 3.3 V, and then the backlight of the LCD1602 will be turned on. Connect VSS to GND and the LCD1602 to the power source. Connect VO to the middle pin of the potentiometer - with it you can adjust the contrast of the screen display. Connect RS to Pin 13 and R/W pin to GND. Connect E to Pin 15 and the characters displayed on the LCD1602 are controlled by D4-D7. For programming, it is optimized by calling function libraries.

Build the Circuit
Note
Make sure the pins are connected correctly. Otherwise, characters will not be displayed properly. You may need to adjust the potentiometer till the LCD1602 can display clearly.

For C Language Users
Command
1. Go to the folder of the code.
cd /home/pi/electronic-kit/for-raspberry-pi/c/Lesson_17_LCD1602
2. Compile the code.
gcc 17_Lcd1602.c -lwiringPiDev -lwiringPi
Note
In order to use the LCD driver in the wiringPi devLib, you need to use -lwiringPiDev at compile time.
3. Run the executable file.
sudo ./a.out
You may see the “SunFounder” and “hello, world” appear one by one on the LCD.
Note
If it does not work after running, or there is an error prompt: "wiringPi.h: No such file or directory", please refer to C code is not working?.
Code
#include <stdio.h>
#include <stdlib.h>
#include <wiringPi.h>
#include <lcd.h>

const unsigned char Buf[] = "---SUNFOUNDER---";
const unsigned char myBuf[] = "  sunfounder.com";

int main(void)
{
    int fd;
    int i;

    if(wiringPiSetup() == -1){
        exit(1);
    }

    fd = lcdInit(2,16,4,2,3, 0,0,0,0,6,5,4,1); //see /usr/local/include/lcd.h
    printf("%d", fd);
    if (fd == -1){
        printf("lcdInit 1 failed\n") ;
        return 1;
    }

    delay(1000);
    lcdClear(fd);
    lcdPosition(fd, 0, 0);
    lcdPuts(fd, "Welcome To--->");
    lcdPosition(fd, 0, 1);
    lcdPuts(fd, "sunfounder.com");
    delay(1000);
    lcdClear(fd);

    while(1){
        lcdClear(fd);
        for(i=0; i<16; i++){
            lcdPosition(fd, i, 0);
            lcdPutchar(fd, *(myBuf+i));
            delay(100);
        }
        for(i=0;i<sizeof(Buf)-1;i++){
            lcdPosition(fd, i, 1);
            lcdPutchar(fd, *(Buf+i));
            delay(200);
        }
        delay(500);
    }
    return 0;
}
Code Explanation
#include <lcd.h>
This is a library that integrates lcd1602 functional functions, in which functions are defined such as lcdClear(), lcdPosition(), lcdPuts(), and so on. These functions can be called directly after importing into the library.
18.    fd = lcdInit(2,16,4,2,3, 0,0,0,0,6,5,4,1); //see /usr/local/include/lcd.h
19.    printf("%d", fd);
20.    if (fd == -1){
21.        printf("lcdInit 1 failed\n") ;
22.    return 1;
Initialize the lcd1602. The prototype of lcdInit() is as follows:
int lcdInit (int rows, int cols, int bits, int rs, int strb, int d0, int d1, int d2, int d3, int d4, int d5, int d6, int d7) ;
This is the main initialisation function and must be called before you use any other LCD functions.
Rows and cols are the rows and columns on the display (e.g. 2, 16 or 4,20). Bits is the number of bits wide on the interface (4 or 8). The rs and strb represent the pin numbers of the display RS pin and Strobe (E) pin. The parameters d0 through d7 are the pin numbers of the 8 data pins connected from the Pi to the display. Only the first 4 are used if you are running the display in 4-bit mode.
The return value is the ‘handle’ to be used for all subsequent calls to the lcd library when dealing with that LCD, or -1 to indicate a fault. (Usually incorrect parameters)
26. lcdClear(fd);
This function is used to clear the lcd screen. After calling this function, all information displayed on the screen will be cleared.
27. lcdPosition(fd, 0, 0);
Set the position of the cursor at row 0 and col 0 (in fact it’s the first line and first column) for subsequent text entry.
The prototype of lcdpostion function is as follows:
lcdPosition (int handle, int x, int y) ;
Set the position of the cursor for subsequent text entry. x is the column and 0 is the left-most edge. y is the line and 0 is the top line.
28. lcdPuts(fd, "Welcome To--->");
Display “Welcome To—>” at the specified location of LCD1602.
36.        for(i=0; i<16; i++){
37.            lcdPosition(fd, i, 0);
38.            lcdPutchar(fd, *(myBuf+i));
39.            delay(100);
40.        }
Use the lcdPosition() function to place the cursor at col i and row 0(the top line ) for subsequent text entry. Then the characters in the array myBuf [] are displayed one by one to the LCD1602.
* is the address of myBuf, the real address of characters stored in memory. After calling lcdPutchar(fd, *(myBuf+ I)), the program will find the real address of the character, read the information stored in the address, and display it on the LCD screen.
For Python Language Users
Command
1. Go to the folder of the code.
cd /home/pi/electronic-kit/for-raspberry-pi/python
2. Run the code.
sudo python3 17_Lcd1602.py
You may see the “SunFounder” and “hello, world” appear one by one on the LCD.
Code
Note
You can Modify/Reset/Copy/Run/Stop the code below. But before that, you need to go to source code path like electronic-kit/for-raspberry-pi/python. After modifying the code, you can run it directly to see the effect.
#!/usr/bin/env python3

from time import sleep

class LCD:
    # commands
    LCD_CLEARDISPLAY                = 0x01
    LCD_RETURNHOME              = 0x02
    LCD_ENTRYMODESET                = 0x04
    LCD_DISPLAYCONTROL              = 0x08
    LCD_CURSORSHIFT                 = 0x10
    LCD_FUNCTIONSET                 = 0x20
    LCD_SETCGRAMADDR                = 0x40
    LCD_SETDDRAMADDR                = 0x80

    # flags for display entry mode
    LCD_ENTRYRIGHT          = 0x00
    LCD_ENTRYLEFT           = 0x02
    LCD_ENTRYSHIFTINCREMENT         = 0x01
    LCD_ENTRYSHIFTDECREMENT         = 0x00

    # flags for display on/off control
    LCD_DISPLAYON           = 0x04
    LCD_DISPLAYOFF          = 0x00
    LCD_CURSORON            = 0x02
    LCD_CURSOROFF           = 0x00
    LCD_BLINKON             = 0x01
    LCD_BLINKOFF            = 0x00

    # flags for display/cursor shift
    LCD_DISPLAYMOVE         = 0x08
    LCD_CURSORMOVE          = 0x00

    # flags for display/cursor shift
    LCD_DISPLAYMOVE         = 0x08
    LCD_CURSORMOVE          = 0x00
    LCD_MOVERIGHT           = 0x04
    LCD_MOVELEFT            = 0x00

    # flags for function set
    LCD_8BITMODE            = 0x10
    LCD_4BITMODE            = 0x00
    LCD_2LINE                       = 0x08
    LCD_1LINE                       = 0x00
    LCD_5x10DOTS            = 0x04
    LCD_5x8DOTS             = 0x00

    def __init__(self, pin_rs=27, pin_e=22, pins_db=[25, 24, 23, 18], GPIO = None):
        # Emulate the old behavior of using RPi.GPIO if we haven't been given
        # an explicit GPIO interface to use
        if not GPIO:
            import RPi.GPIO as GPIO
            self.GPIO = GPIO
            self.pin_rs = pin_rs
            self.pin_e = pin_e
            self.pins_db = pins_db

            self.used_gpio = self.pins_db[:]
            self.used_gpio.append(pin_e)
            self.used_gpio.append(pin_rs)

            self.GPIO.setwarnings(False)
            self.GPIO.setmode(GPIO.BCM)
            self.GPIO.setup(self.pin_e, GPIO.OUT)
            self.GPIO.setup(self.pin_rs, GPIO.OUT)

            for pin in self.pins_db:
                self.GPIO.setup(pin, GPIO.OUT)

        self.write4bits(0x33) # initialization
        self.write4bits(0x32) # initialization
        self.write4bits(0x28) # 2 line 5x7 matrix
        self.write4bits(0x0C) # turn cursor off 0x0E to enable cursor
        self.write4bits(0x06) # shift cursor right

        self.displaycontrol = self.LCD_DISPLAYON | self.LCD_CURSOROFF | self.LCD_BLINKOFF

        self.displayfunction = self.LCD_4BITMODE | self.LCD_1LINE | self.LCD_5x8DOTS
        self.displayfunction |= self.LCD_2LINE

        """ Initialize to default text direction (for romance languages) """
        self.displaymode =  self.LCD_ENTRYLEFT | self.LCD_ENTRYSHIFTDECREMENT
        self.write4bits(self.LCD_ENTRYMODESET | self.displaymode) #  set the entry mode

        self.clear()

    def begin(self, cols, lines):
        if (lines > 1):
            self.numlines = lines
            self.displayfunction |= self.LCD_2LINE
            self.currline = 0

    def home(self):
        self.write4bits(self.LCD_RETURNHOME) # set cursor position to zero
        self.delayMicroseconds(3000) # this command takes a long time!

    def clear(self):
        self.write4bits(self.LCD_CLEARDISPLAY) # command to clear display
        self.delayMicroseconds(3000)        # 3000 microsecond sleep, clearing the display takes a long time

    def setCursor(self, col, row):
        self.row_offsets = [ 0x00, 0x40, 0x14, 0x54 ]

        if ( row > self.numlines ):
            row = self.numlines - 1 # we count rows starting w/0

        self.write4bits(self.LCD_SETDDRAMADDR | (col + self.row_offsets[row]))

    def noDisplay(self):
        # Turn the display off (quickly)
        self.displaycontrol &= ~self.LCD_DISPLAYON
        self.write4bits(self.LCD_DISPLAYCONTROL | self.displaycontrol)

    def display(self):
        # Turn the display on (quickly)
        self.displaycontrol |= self.LCD_DISPLAYON
        self.write4bits(self.LCD_DISPLAYCONTROL | self.displaycontrol)

    def noCursor(self):
        # Turns the underline cursor on/off
        self.displaycontrol &= ~self.LCD_CURSORON
        self.write4bits(self.LCD_DISPLAYCONTROL | self.displaycontrol)

    def cursor(self):
        # Cursor On
        self.displaycontrol |= self.LCD_CURSORON
        self.write4bits(self.LCD_DISPLAYCONTROL | self.displaycontrol)

    def noBlink(self):
        # Turn on and off the blinking cursor
        self.displaycontrol &= ~self.LCD_BLINKON
        self.write4bits(self.LCD_DISPLAYCONTROL | self.displaycontrol)

    def noBlink(self):
        # Turn on and off the blinking cursor
        self.displaycontrol &= ~self.LCD_BLINKON
        self.write4bits(self.LCD_DISPLAYCONTROL | self.displaycontrol)

    def DisplayLeft(self):
        # These commands scroll the display without changing the RAM
        self.write4bits(self.LCD_CURSORSHIFT | self.LCD_DISPLAYMOVE | self.LCD_MOVELEFT)

    def scrollDisplayRight(self):
        # These commands scroll the display without changing the RAM
        self.write4bits(self.LCD_CURSORSHIFT | self.LCD_DISPLAYMOVE | self.LCD_MOVERIGHT);

    def leftToRight(self):
        # This is for text that flows Left to Right
        self.displaymode |= self.LCD_ENTRYLEFT
        self.write4bits(self.LCD_ENTRYMODESET | self.displaymode);

    def rightToLeft(self):
        # This is for text that flows Right to Left
        self.displaymode &= ~self.LCD_ENTRYLEFT
        self.write4bits(self.LCD_ENTRYMODESET | self.displaymode)

    def autoscroll(self):
        # This will 'right justify' text from the cursor
        self.displaymode |= self.LCD_ENTRYSHIFTINCREMENT
        self.write4bits(self.LCD_ENTRYMODESET | self.displaymode)

    def noAutoscroll(self):
        # This will 'left justify' text from the cursor
        self.displaymode &= ~self.LCD_ENTRYSHIFTINCREMENT
        self.write4bits(self.LCD_ENTRYMODESET | self.displaymode)

    def write4bits(self, bits, char_mode=False):
        # Send command to LCD
        self.delayMicroseconds(1000) # 1000 microsecond sleep
        bits=bin(bits)[2:].zfill(8)
        self.GPIO.output(self.pin_rs, char_mode)
        for pin in self.pins_db:
            self.GPIO.output(pin, False)
        for i in range(4):
            if bits[i] == "1":
                self.GPIO.output(self.pins_db[::-1][i], True)
        self.pulseEnable()
        for pin in self.pins_db:
            self.GPIO.output(pin, False)
        for i in range(4,8):
            if bits[i] == "1":
                self.GPIO.output(self.pins_db[::-1][i-4], True)
        self.pulseEnable()

    def delayMicroseconds(self, microseconds):
        seconds = microseconds / float(1000000)     # divide microseconds by 1 million for seconds
        sleep(seconds)

    def pulseEnable(self):
        self.GPIO.output(self.pin_e, False)
        self.delayMicroseconds(1)           # 1 microsecond pause - enable pulse must be > 450ns
        self.GPIO.output(self.pin_e, True)
        self.delayMicroseconds(1)           # 1 microsecond pause - enable pulse must be > 450ns
        self.GPIO.output(self.pin_e, False)
        self.delayMicroseconds(1)           # commands need > 37us to settle

    def message(self, text):
        # Send string to LCD. Newline wraps to second line
        for char in text:
            if char == '\n':
                self.write4bits(0xC0) # next line
            else:
                self.write4bits(ord(char),True)

    def destroy(self):
        self.GPIO.cleanup(self.used_gpio)

def print_msg():
    print ("========================================")
    print ("|                LCD1602               |")
    print ("|    ------------------------------    |")
    print ("|         D4 connect to BCM25          |")
    print ("|         D5 connect to BCM24          |")
    print ("|         D6 connect to BCM23          |")
    print ("|         D7 connect to BCM18          |")
    print ("|         RS connect to BCM27          |")
    print ("|         CE connect to BCM22          |")
    print ("|          RW connect to GND           |")
    print ("|                                      |")
    print ("|           Control LCD1602            |")
    print ("|                                      |")
    print ("|                            SunFounder|")
    print ("========================================\n")
    print ('Program is running...')
    print ('Please press Ctrl+C to end the program...')
    #input ("Press Enter to begin\n")

def main():
    global lcd
    print_msg()
    lcd = LCD()
    line0 = "  sunfounder.com"
    line1 = "---SUNFOUNDER---"

    lcd.clear()
    lcd.message("Welcome to --->\n  sunfounder.com")
    sleep(3)

    msg = "%s\n%s" % (line0, line1)
    while True:
        lcd.begin(0, 2)
        lcd.clear()
        for i in range(0, len(line0)):
            lcd.setCursor(i, 0)
            lcd.message(line0[i])
            sleep(0.1)
        for i in range(0, len(line1)):
            lcd.setCursor(i, 1)
            lcd.message(line1[i])
            sleep(0.1)
        sleep(1)

if __name__ == '__main__':
    try:
        main()
    except KeyboardInterrupt:
        lcd.clear()
        lcd.destroy()
Note
Because the source code contains so many definitions, we only list few code here. Please download the complete code from the address marked in the document.
Code Explanation
1.     line0 = "  sunfounder.com"
2.     line1 = "---SUNFOUNDER---"
Define 2 lines of characters that will be displayed on the LCD 1602.
1. lcd.message("Welcome to --->\n sunfounder.com")
On LCD1602, “Welcome to —>n sunfounder.com” pops up.
1. lcd.begin(0, 2)
Initializes the LCD screen and specifies the dimensions (width and height) of the display. begin() function needs to be called before any other LCD library commands.
1. lcd.clear()
This function is used to clear the lcd screen. After calling this function, all information displayed on the screen will be cleared.
1. lcd.setCursor(i, 0)
Set the position of the cursor at col i and row 0 (the first line) for subsequent text entry.
1. lcd.message(line0[i])
The characters in the array line0[] will be displayed at the specified location one by one.
Phenomenon Picture