Lesson 36 Thermostatic Water Tank
Introduction
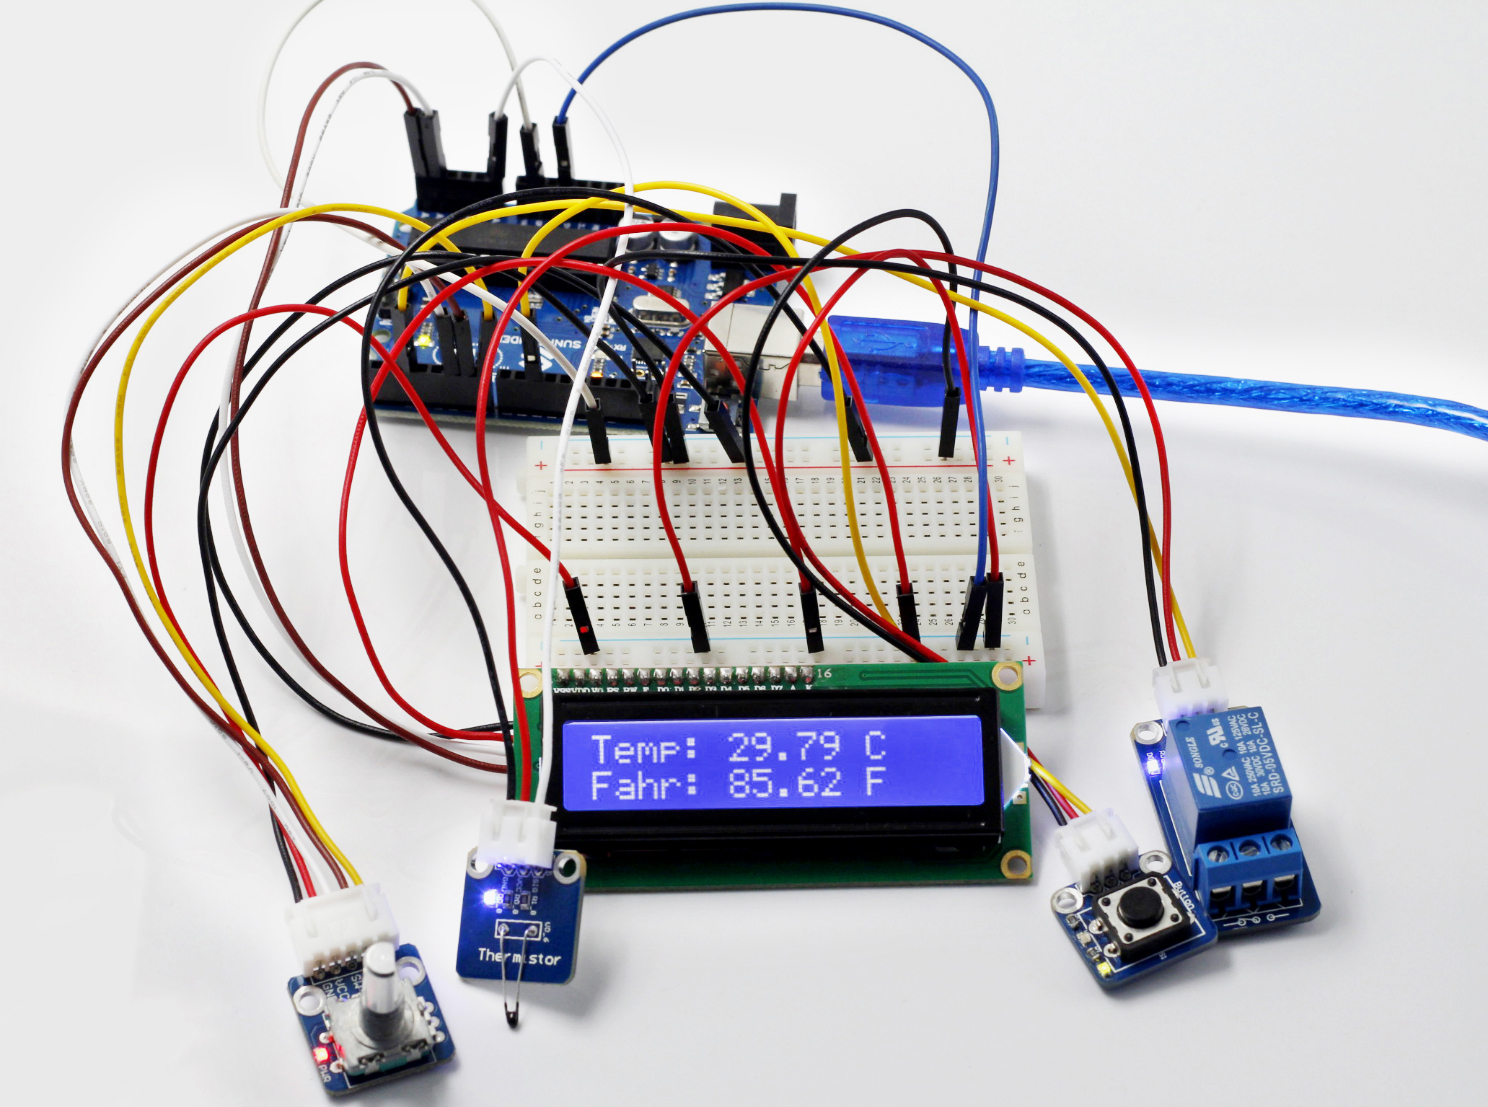
After having learnt so many modules independently, let’s combine these modules together to make some funny interactive works. In this lesson, we will use a Rotary Encoder module, a Thermistor module, a Relay module, a Button module and an I2C LCD1602, all of which we have learnt previously, to assemble a Thermostatic Water Tank. The tank can be used in the test department of medical organizations and colleges, scientific research, chemical industry, printing and dyeing industry to distil, dry, inspissate and heat chemical medicines and cultivate biological products in constant temperature, as well as to boil and disinfect equipment.
Components
1 * SunFounder Uno board
1 * USB data cable
1 * Rotary Encoder module
1 * Thermistor module
1 * I2C LCD1602
1 * Relay module
1 * Button module
3 * 3-Pin anti-reverse cable
1 * 5-Pin anti-reverse cable
1 * 4-Pin anti-reverse cable
2 * Dupont wire (M to M)
1 * Breadboard
Principle
How a thermostatic water tank works
Set a temperature value for the tank. When the temperature is lower than that set, the tank gets heated and is power off till the temperature reaches the set value. Thus, the tank can keep a constant temperature all the time.
Based on the principle, in this experiment, use an LCD screen and a thermistor module to both display value of the current temperature and the value set. Also use a rotary encoder to allow the set temperature value adjustable.
When the temperature is lower than that set, the normally open contact of the relay is closed and the characters on the LCD blur. Touch the thermistor with fingers and the temperature gets higher. When it reaches or is higher than the value set, the contact is open and the characters will become clear again.
For more about each component in the experiment, please see the previous experiments.
Experimental Procedures
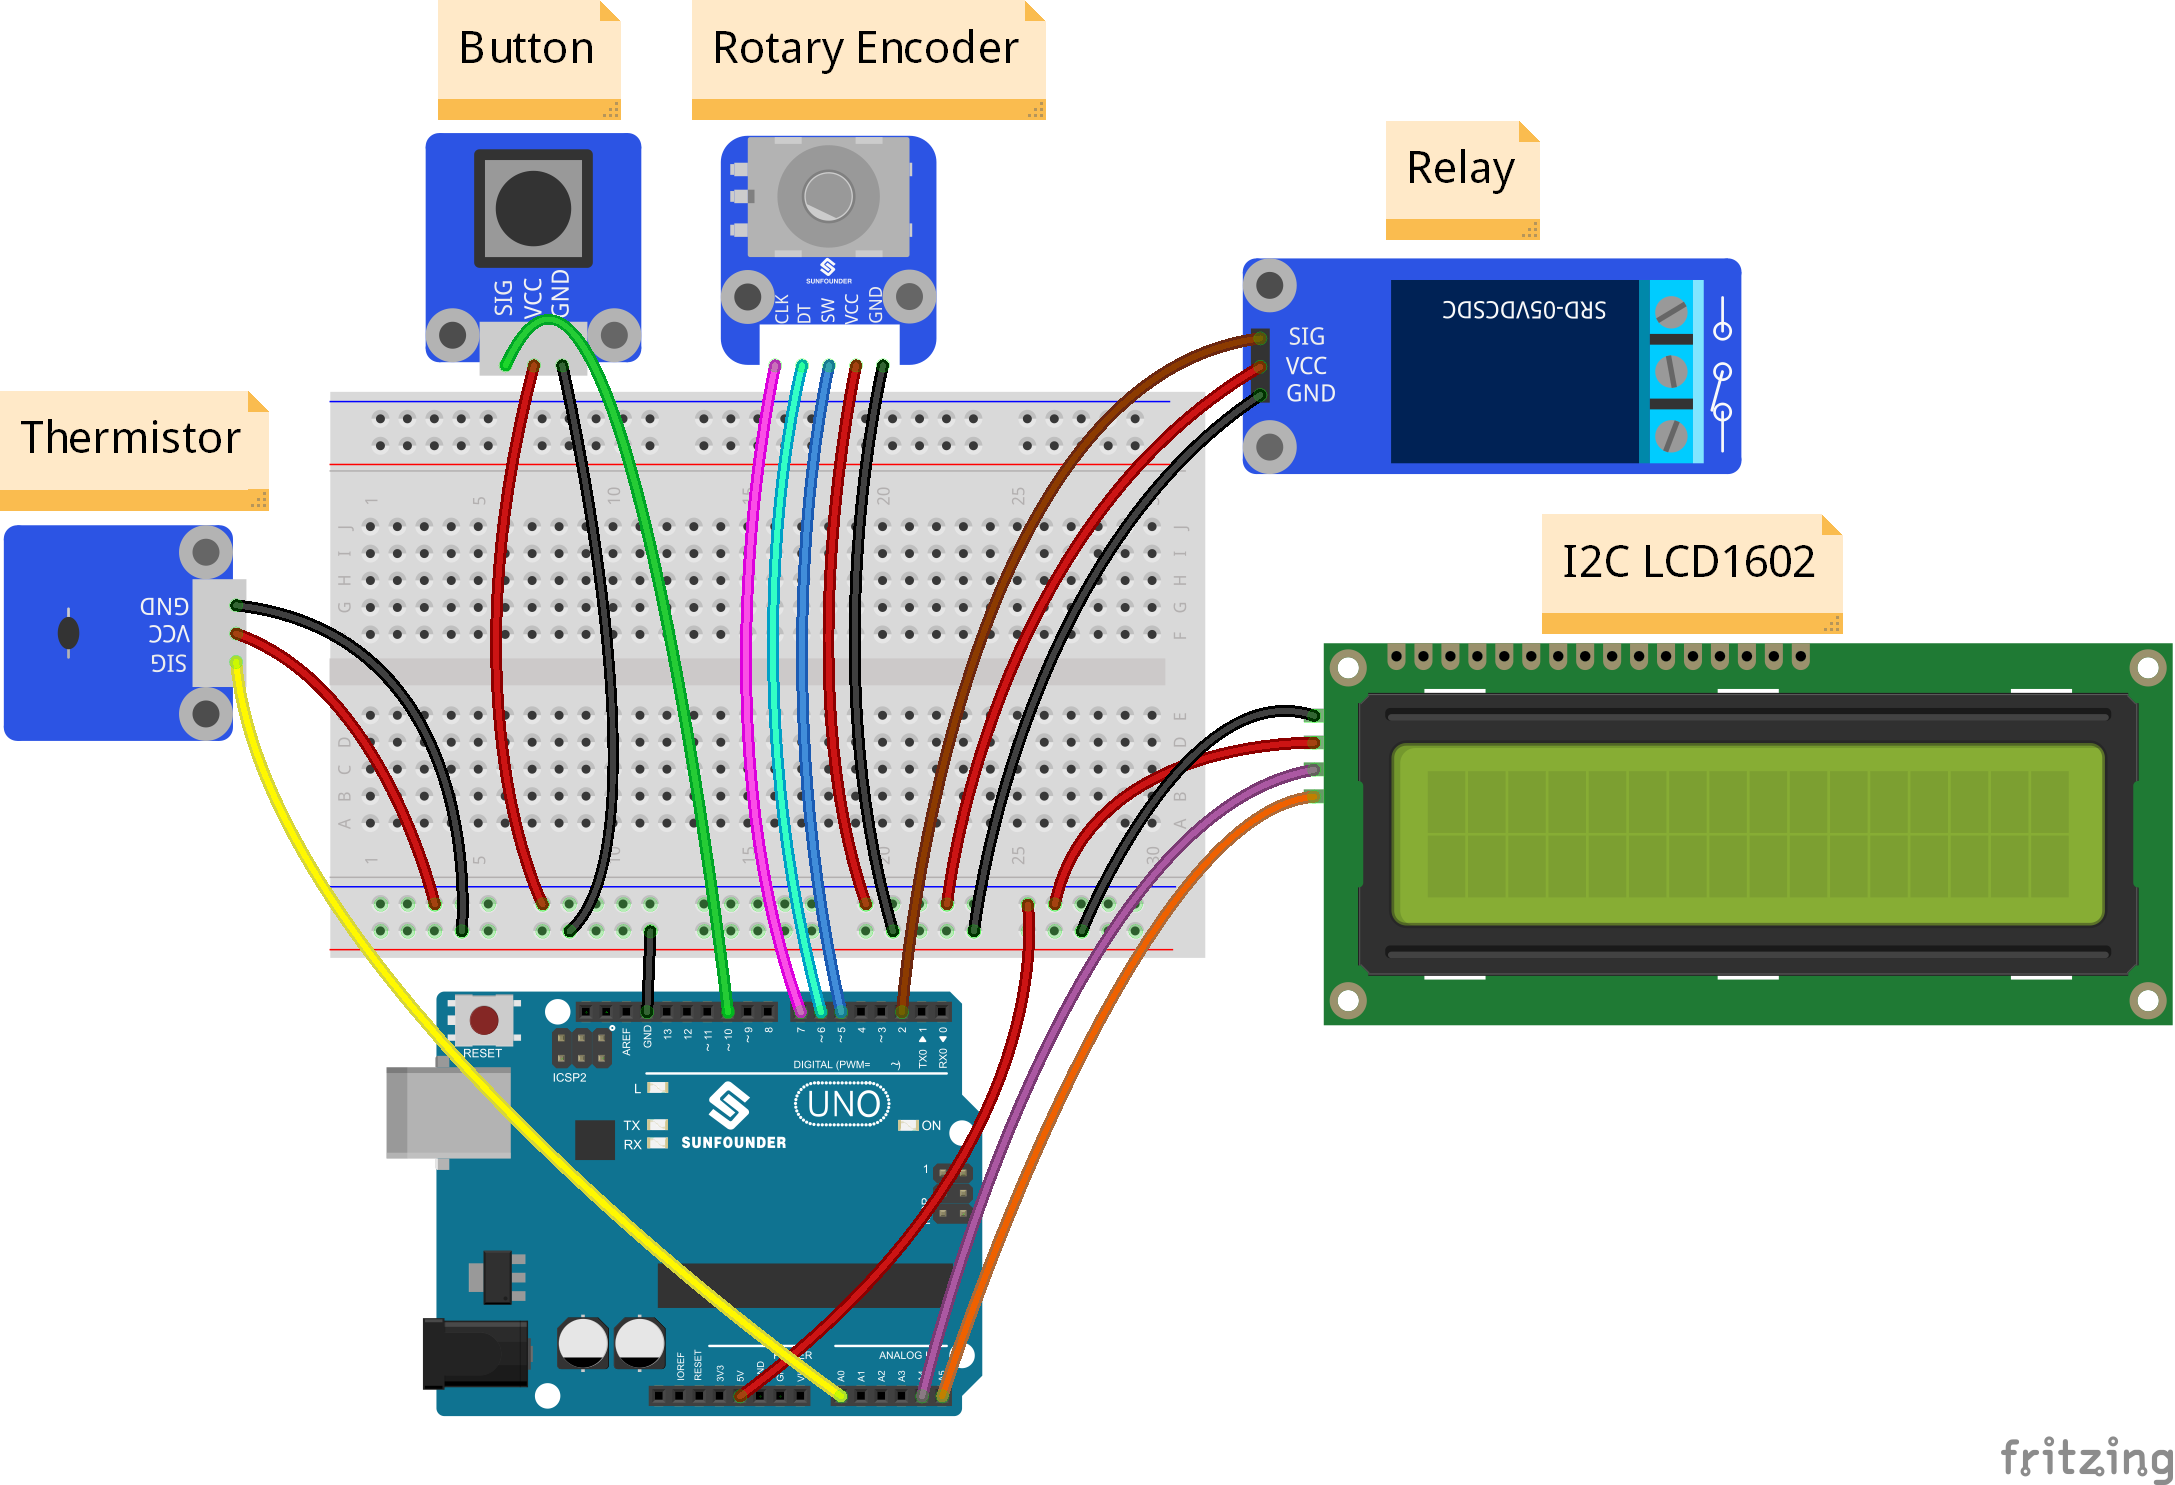
Step 1: Build the circuit
The wiring between the Button module and SunFounder Uno board:
Button |
SunFounder Uno |
SIG |
10 |
VCC |
5V |
GND |
GND |
The wiring between the Thermistor module and SunFounder Uno is as shown below:
Thermistor |
SunFounder Uno |
SIG |
A0 |
VCC |
5V |
GND |
GND |
The wiring between the Rotary Encoder module and SunFounder Uno:
Rotary Encoder |
SunFounder Uno |
CLK |
7 |
DT |
6 |
SW |
5 |
VCC |
5V |
GND |
GND |
The wiring between the Relay module and SunFounder Uno:
Relay |
SunFounder Uno |
SIG |
2 |
VCC |
5V |
GND |
GND |
The wiring between the I2C LCD1602 module and SunFounder Uno:
I2C LCD1602 |
SunFounder Uno |
VCC |
5V |
GND |
GND |
SDA |
A4 |
SCL |
A5 |
Step 2: Open the code file
Step 3: Select correct Board and Port
Step 4: Upload the sketch to the SunFounder Uno board
Code
Now, after the startup, the LCD1602 first displays Thermostatic Water Tank and then the value of the current temperature. Press the button on the Button module to enter setup mode. Then rotate the Rotary Encoder to change the threshold of the temperature value. After setting a value, like 30℃, you can press the switch on the Rotary Encoder module to confirm.
If the current temperature is lower than 30℃ (the threshold you just set), the normally open contact of the relay is closed. Thus, the characters on the LCD become blurred and the LED on the SunFounder Uno goes out. Touch the thermistor. Then the value displayed on the LCD will increase and at last the LED on the Uno board will light up. Release your fingers and the value of temperature displayed on the LCD will decrease. When the value reaches the threshold, the contact is open, characters on the LCD blurred, and LED out.