Get Started
Note
Before starting your own project, you must download the file Sensor Kit V2.0 for Arduino.zip on our official website by visiting LEARN -> Sensor Kit V2.0 for Arduino and unzip it.
Besides, a visual programming language software-Mixly is also provided. It can help you to complete the lessons quicker and easier. Mixly is a graphical programming software with some blocks embedded in. You can program by dragging and dropping blocks to combine together like building blocks, thus enabling a complete process of the same sketch in IDE. Download the file: How to use Sensor Kit with Mixly.zip on our official website by visiting LEARN -> Get Tutorials -> Sensor Kit V2.0 for Arduino and unzip it.
SunFounder Arduino Board
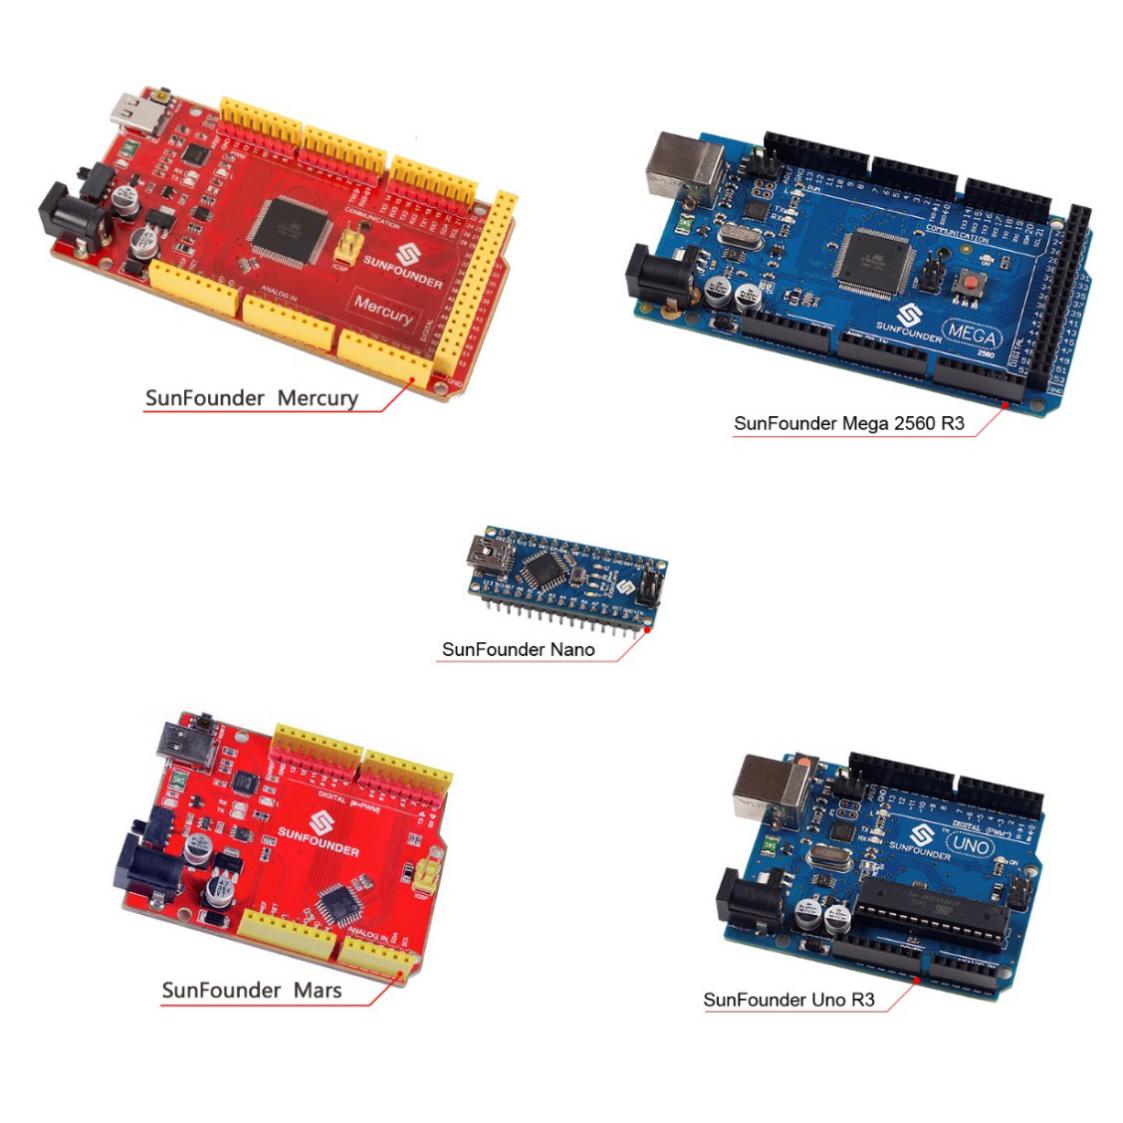
Now, SunFounder has five Arduino boards: SunFounder Uno R3 Board, Mega 2560 Board, Nano Board, SunFounder Mars Board and SunFounder Mercury Board. The Uno Board and the Mars Board share the same kind of pins at the same position. And the pins of the first half part on the Mega 2560 are the same as those on the Uno. The difference lies in that on the Mega 2560 board, the I2C pin (SDA) and pin SCL don’t correspond to pin A4 and A5 but to pin 20 and 21. On the other hand, the Nano and the Uno also share the same kind of pins at the same position. Though the Nano is in a smaller size, making it applicable for projects.
The following is the parameters of the four boards:
Board Parameters |
Uno R3 |
Mars |
Nano |
Mega 2560 |
Mercury |
Mic rocontroller |
AT mega328P |
AT mega328P |
AT mega328P |
ATm ega2560 |
AT mega2560 |
USB connection |
Type B |
Type C |
Mini-B |
Type B |
Type C |
U SB-to-Serial Chip |
MEGA16U2 |
FT232R |
PL2303 |
M EGA16U2 |
FT232R |
Power jack? |
Y |
Y |
N |
Y |
Y |
Operating Voltage |
5V |
5V |
5V |
5V |
5V |
Input Voltage |
7-12V |
7-12V |
7-12V |
7-12V |
7-12V |
Digital I/O Pins |
14 (of which 6 provide PWM output) |
14 (of which 6 provide PWM output) |
14 (of which 6 provide PWM output) |
54 (of which 15 provide PWM output) |
54 (of which 15 provide PWM output) |
Analog Input Pins |
6 |
6 |
8 |
16 |
16 |
DC Current per I/O Pin |
20 mA |
20mA |
20 mA |
20 mA |
20 mA |
Install Arduino IDE
The code in this kit is written based on Arduino, so you need to install the IDE first. Skip it if you have done this.
Now go to arduino.cc and click DOWNLOAD. On the page, check the software list on the right side under Download the Arduino Software.
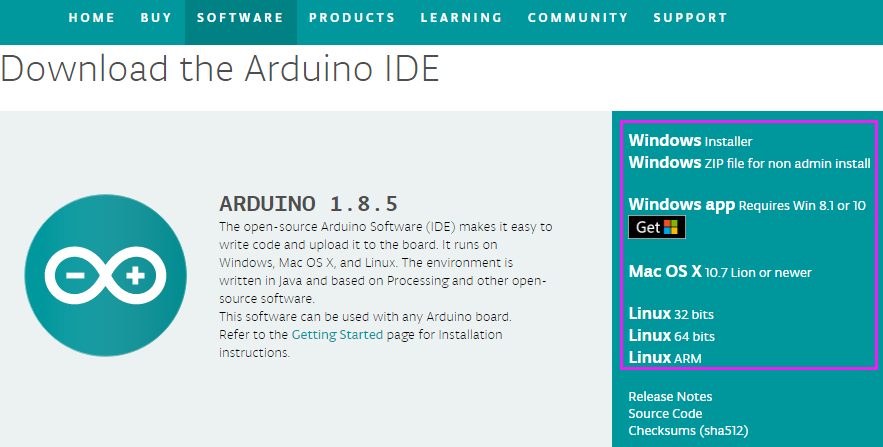
Find the one that suits your operation system and click to download. There are two versions of Arduino for Windows: Installer or ZIP file. You’re recommended to download the former. Just download the package, and run the executable file to start installation. It will download the driver needed to run Arduino IDE. After downloading, follow the prompts to install. For the details of installing steps, you can refer to the guide on Learning->Getting Started with Arduino, scroll down and see Install the Arduino Software.
After installing, you will see Arduino icon on your desktop and double click to open it.

Plug in the Board
Connect the control board to your computer with a USB cable. If you use Uno, Mega2560 or Mars as the control board, the system will automatically install the driver when you plug it in. After a while, a prompt will show up at the bottom right corner telling you which port the board locates at.
Add libraries
What is Library?
A library, gathering some function definitions and header files, usually contains two files: .h (header file, including function statement, Macro definition, constructor definition, etc.) and .cpp (execution file, with function implementation, variable definition, and so on). When you need to use a function in some library, you just need to add a header file (e.g. #include <LiquidCrystal_I2C.h>), and then call that function. This can make your code more concise. If you don’t want to use the library, you can also write that function definition directly. Though as a result, the code will be long and inconvenient to read.
How to add libraries?
Some libraries are already built in the Arduino IDE, when some others may need to be added. So now let’s see how to add one. There are two methods for that.
Method 1
Directly import the library in Arduino IDE (take LiquidCrystal_I2C as an example below). The advantage of this method is easy to understand and operate, but on the other hand, only one library can be imported at a time. So it is inconvenient when you need to add quite a lot of libraries.
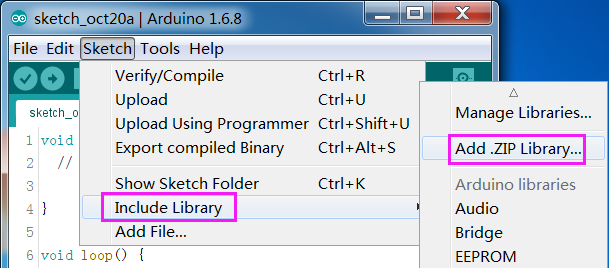
Step 1: Select Sketch -> Include Library -> Add ZIP Library.
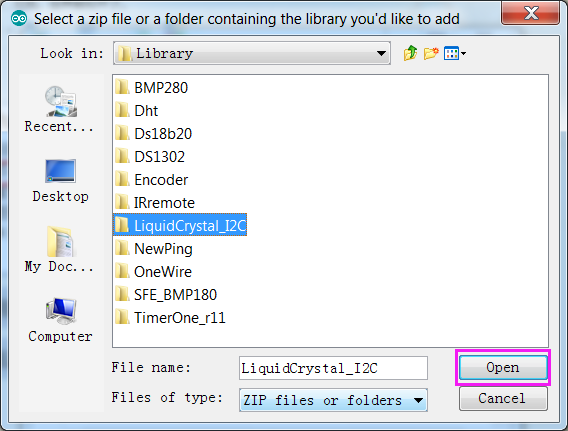
Step 2: Find Sensor Kit V2.0 for ArduinoLibraryLiquidCrystal_I2C, Click Open.
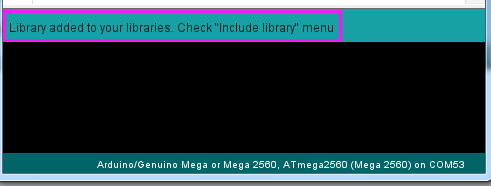
Step 3: When you see “Library added to your libraries. Check “Include library” menu”, it means you have added the library successfully. Please use the same method to add other libraries then.
Method 2
Directly copy the library to libraries/Arduino path. This method can copy all libraries and add them at a time, but the drawback is that it is difficult to find libraries/Arduino.
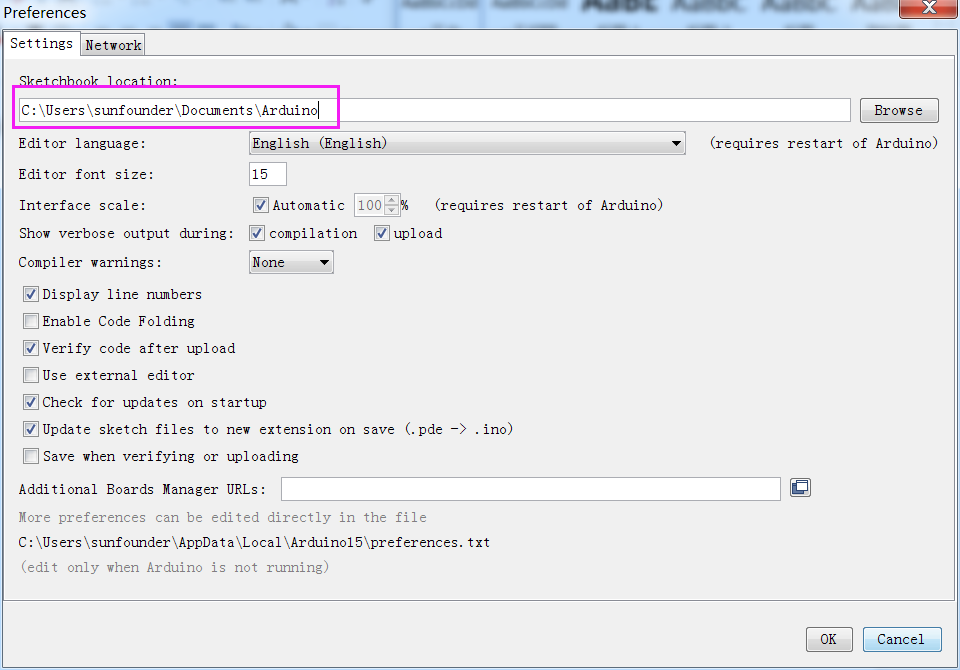
Step 1: Click File -> Preferences and on the pop-up window you can see the path of the libraries folder in the textbox as shown below.
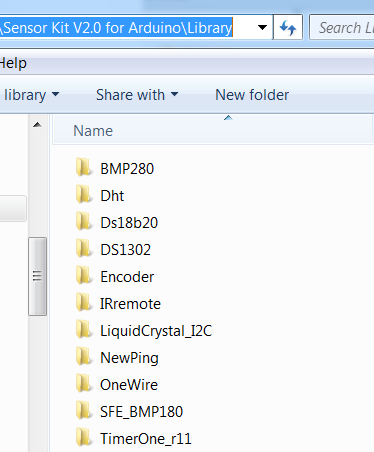
Step 2: Copy all Libraries in the path Sensor Kit V2.0 for ArduinoLibrary\.
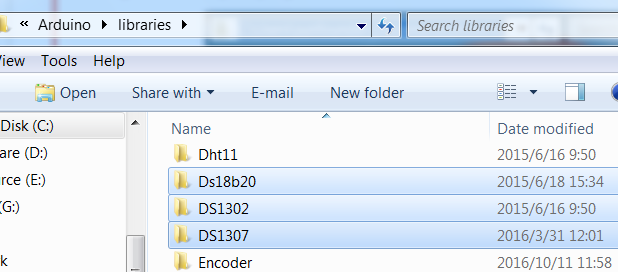
Step 3: Go to the path above and you will see there is a Libraries folder, click to open it.
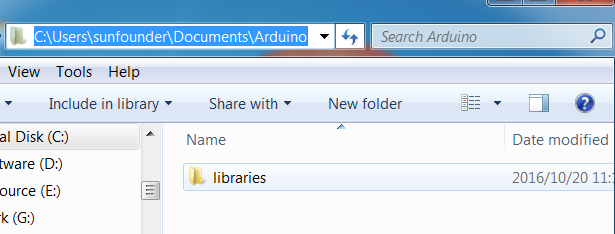
Step 4: Paste the libraries copied to the folder. Then you can see them in libraries.
For more details about Arduino IDE, go to Learning->Getting started->Foundation on the arduino.cc and click Arduino Software (IDE) on the page:
http://www.arduino.cc/en/Guide/Environment.
If your sketch fails the upload, on the same page click Troubleshooting
http://www.arduino.cc/en/Guide/Troubleshooting.
Note
If your computer is running on the Windows XP system, the new version IDE will prompt errors when running the code. You are recommended to download the Arduino 1.0.5 or Arduino 1.0.6. Or you can also upgrade your Window system.
All the experiments in this kit are done with SunFounder Uno R3 board, but they are also compatible with SunFounder Mega 2560, SunFounder Mars, SunFounder Nano and all official Arduino Boards. All the code included in this kit works with these boards.
So what does COMPATIBLE mean here? It means you can use any of the three boards to do the same experiment with the same wiring. Simply put, if the wire is connected to Pin 12 of Uno in the user manual, likewise, you can connect it to Pin 12 on any other official Arduino boards you are using. Then open the corresponding sketch and upload them.
Now let’s begin!