Nota
Hola, ¡bienvenido a la comunidad de entusiastas de SunFounder Raspberry Pi, Arduino y ESP32 en Facebook! Sumérgete más en Raspberry Pi, Arduino y ESP32 con otros entusiastas.
¿Por qué unirse?
Soporte experto: Resuelve problemas post-venta y desafíos técnicos con la ayuda de nuestra comunidad y equipo.
Aprende y comparte: Intercambia consejos y tutoriales para mejorar tus habilidades.
Previsualizaciones exclusivas: Obtén acceso anticipado a nuevos anuncios de productos y adelantos.
Descuentos especiales: Disfruta de descuentos exclusivos en nuestros productos más nuevos.
Promociones y sorteos festivos: Participa en sorteos y promociones de temporada.
👉 ¿Listo para explorar y crear con nosotros? Haz clic en [Aquí] y únete hoy mismo!
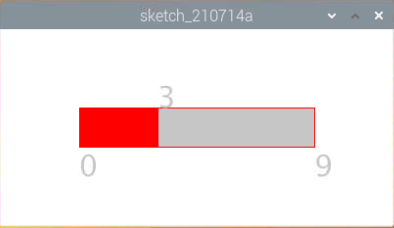
Arrastra Número
Vamos a dibujar una barra deslizante para controlar el Display de 7 segmentos.
Componentes requeridos
En este proyecto, necesitamos los siguientes componentes.
Es definitivamente conveniente comprar un kit completo, aquí está el enlace:
Nombre |
ARTÍCULOS EN ESTE KIT |
ENLACE |
|---|---|---|
Raphael Kit |
337 |
También puedes comprarlos por separado desde los siguientes enlaces.
INTRODUCCIÓN DE COMPONENTES |
ENLACE DE COMPRA |
|---|---|
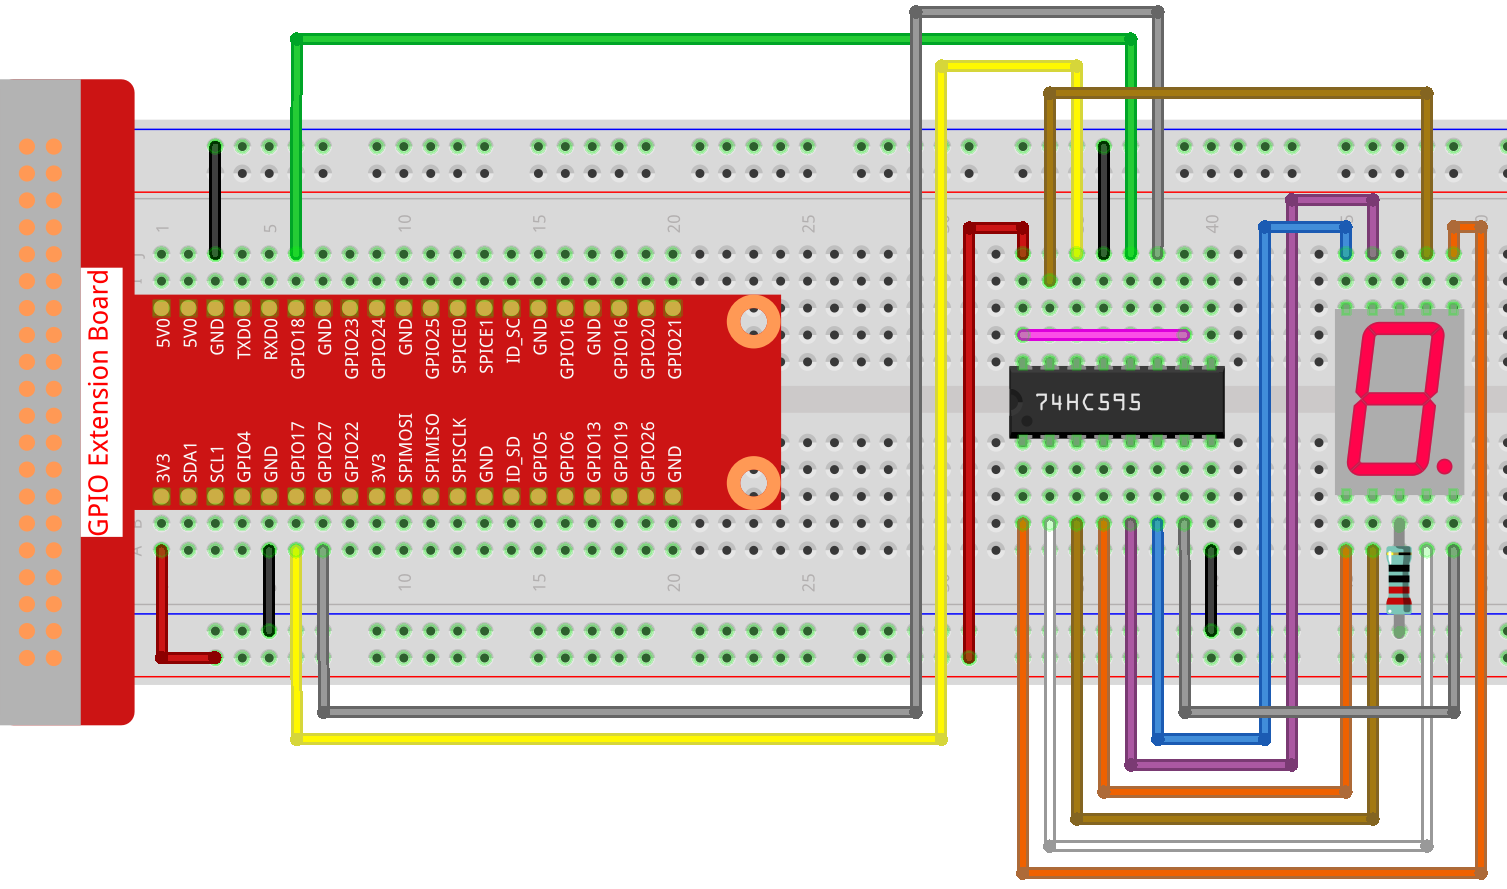
Cableado
Boceto
import processing.io.*;

int number = 0;
int levelRange=9;
Slider mySlider;

int SDI=17;   //serial data input
int RCLK=18;  //memory clock input(STCP)
int SRCLK =27;   //shift register clock input(SHCP)


int[] SegCode= {0x3f,0x06,0x5b,0x4f,0x66,0x6d,0x7d,0x07,0x7f,0x6f,0x77,0x7c,0x39,0x5e,0x79,0x71};

void hc595_shift(int dat){
int i;

for(i=0;i<8;i++){
    int n=(0x80 & (dat << i));
    if ( n==0){
    GPIO.digitalWrite(SDI, 0);
    } else {
    GPIO.digitalWrite(SDI, 1);
    }
    GPIO.digitalWrite(SRCLK, 1);
    delay(1);
    GPIO.digitalWrite(SRCLK, 0);
}

    GPIO.digitalWrite(RCLK, 1);
    delay(1);
    GPIO.digitalWrite(RCLK, 0);
}

void setup() {
    size(400, 200);
    frameRate(50);
    mySlider = new Slider(width * 0.2,height * 0.4,width * 0.8,height * 0.6,0,levelRange,number);
    GPIO.pinMode(SDI, GPIO.OUTPUT);
    GPIO.pinMode(RCLK, GPIO.OUTPUT);
    GPIO.pinMode(SRCLK, GPIO.OUTPUT);

    GPIO.digitalWrite(SDI, 0);
    GPIO.digitalWrite(RCLK, 0);
    GPIO.digitalWrite(SRCLK, 0);
}

void draw() {

    background(255);
    mySlider.show();
    hc595_shift(SegCode[number]);
}

void mouseDragged(){
    number = mySlider.dragPoint(mouseX,mouseY);
}


class Slider{
    float slotPointAX;
    float slotPointBX;
    float slotPointAY;
    float slotPointBY;
    float linePoint;
    float depth;
    int maxRange;
    int minRange;
    int value;

    Slider(float ax, float ay, float bx, float by, int min, int max, int v){
        slotPointAX = ax;
        slotPointAY = ay;
        slotPointBX = bx;
        slotPointBY = by;
        maxRange = max;
        minRange = min;
        value = v;
        linePoint = slotPointAX;// + map(value, minRange, maxRange, slotPointAX, slotPointBX);
        depth = (slotPointBY - slotPointAY)*0.75;
    }

    void show(){
        rectMode(CORNERS);
        fill(200);
        stroke(255,0,0);
        rect(slotPointAX, slotPointAY, slotPointBX, slotPointBY);
        fill(255,0,0);
        rect(slotPointAX, slotPointAY, linePoint, slotPointBY);
        fill(200);
        textSize(depth);
        text(minRange, slotPointAX, slotPointBY+depth);
        text(maxRange, slotPointBX, slotPointBY+depth);
        text(value, linePoint, slotPointAY);
    }

    int dragPoint(float mx, float my){
        if(mx>=slotPointAX && mx<=slotPointBX && my>=slotPointAY && my<=slotPointBY){
            value = int(map(mx,slotPointAX,slotPointBX,minRange,maxRange));
            linePoint = map(value,minRange,maxRange,slotPointAX,slotPointBX);
        }
        return value;
    }
}
¿Cómo funciona?
Este proyecto integra el control deslizante y la pantalla de 7 segmentos del proyecto anterior. Para conocer los puntos específicos, consulta Mostrar Número y Metrónomo.