Note
Hello, welcome to the SunFounder Raspberry Pi & Arduino & ESP32 Enthusiasts Community on Facebook! Dive deeper into Raspberry Pi, Arduino, and ESP32 with fellow enthusiasts.
Why Join?
Expert Support: Solve post-sale issues and technical challenges with help from our community and team.
Learn & Share: Exchange tips and tutorials to enhance your skills.
Exclusive Previews: Get early access to new product announcements and sneak peeks.
Special Discounts: Enjoy exclusive discounts on our newest products.
Festive Promotions and Giveaways: Take part in giveaways and holiday promotions.
👉 Ready to explore and create with us? Click [here] and join today!
2.2 Breathing LED
Now use another method to control the brightness of the LED. Unlike the previous project, here the brightness of the LED is made to slowly diminish until it disappears.
When the sprite on the stage is clicked, the brightness of the LED slowly increases and then goes out instantly.
You Will Learn
Set the output value of the PWM pin
Create variables
Change the brightness of the sprite
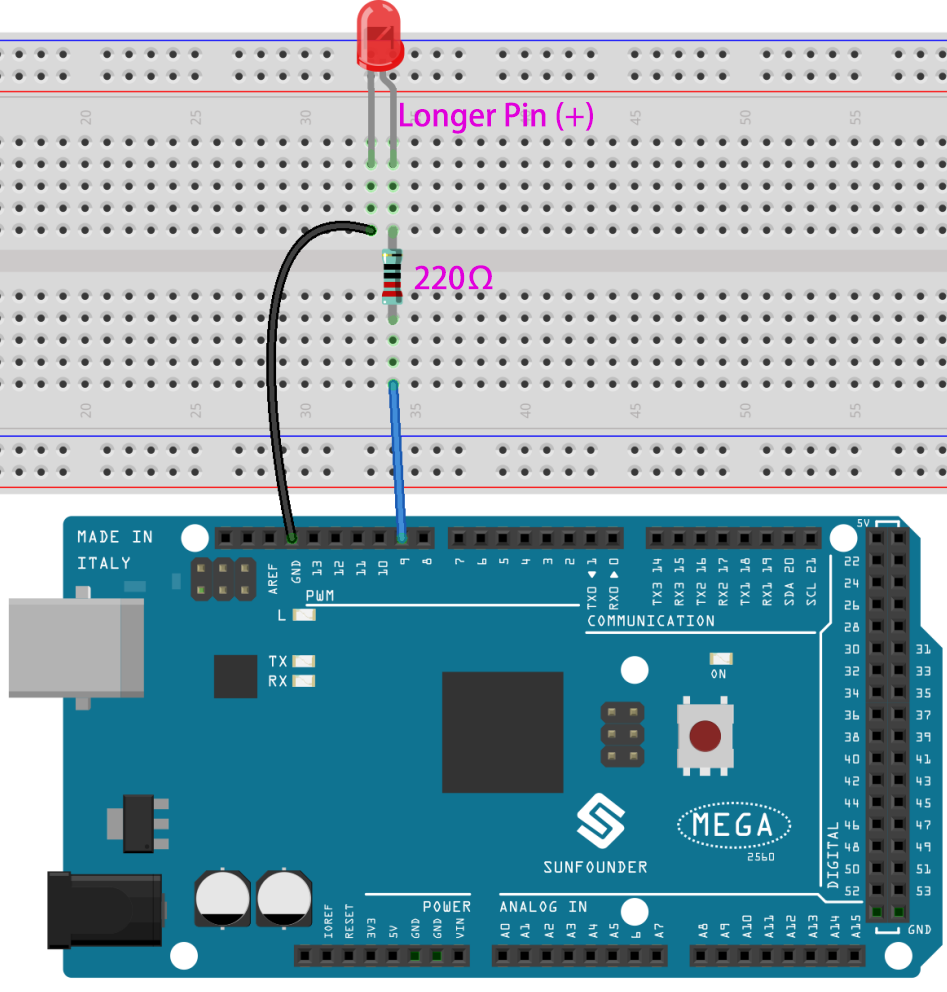
Build the Circuit
This project uses the same circuit as the previous project 2.1 Table Lamp, but instead of using HIGH/LOW to make the LEDs light up or turn off, this project uses the PWM - Wikipedia signal to slowly light up or dim down the LED.
The PWM signal range is 0-255, on the Arduno Uno board, 3, 5, 6, 9, 10, 11 can output PWM signal; on the Mega2560, 2 - 13, 44 - 46 can output PWM signal.
Programming
1. Select a sprite
Delete the default sprite, click the Choose a Sprite button in the lower right corner of the sprite area, enter button3 in the search box, and then click to add it.
2. Creating a variable.
Create a variable called pwm to store the value of the pwm change.
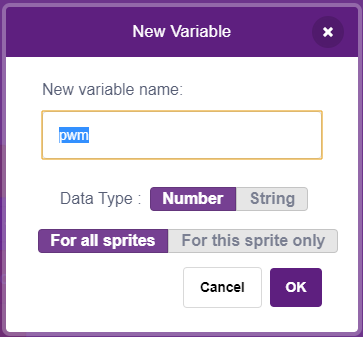
Click on the Variables palette and select Make a Variable.
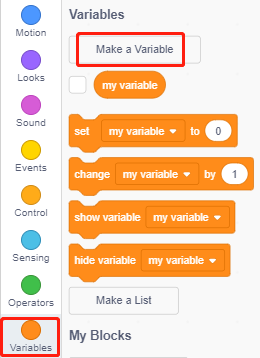
Enter the name of the variable, it can be any name, but it is recommended to describe its function. The data type is number and For all sprites.
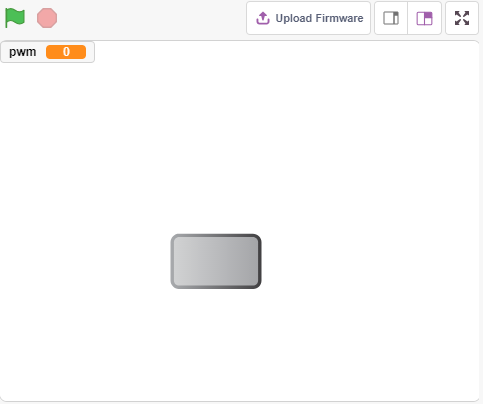
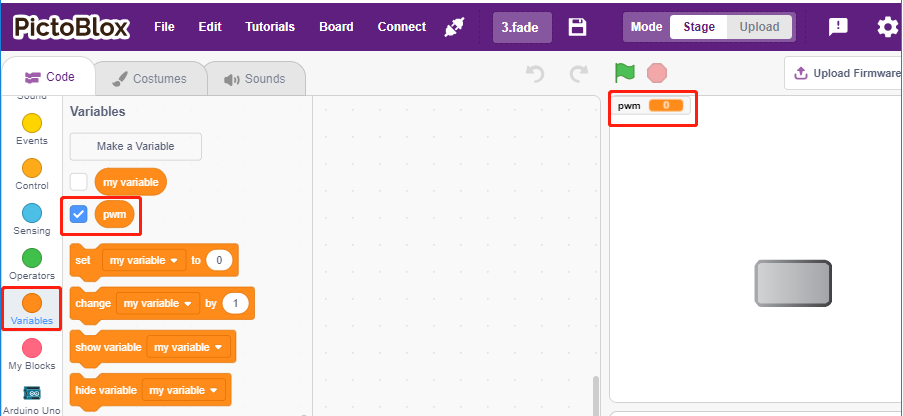
Once created, you will see pwm inside the Variables palette and in the checked state, which means this variable will appear on the stage. You can try unchecking it to see if pwm is still present on the stage.
3. Set the initial state
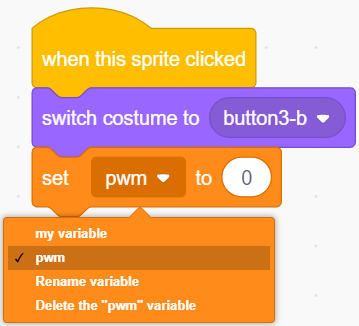
When the button3 sprite is clicked, switch the costume to button-b (clicked state), and set the initial value of the variable pwm to 0.
[set pwm to 0]: from Variables palette, used to set the value of the variable.
4. Make the LED brighter and brighter
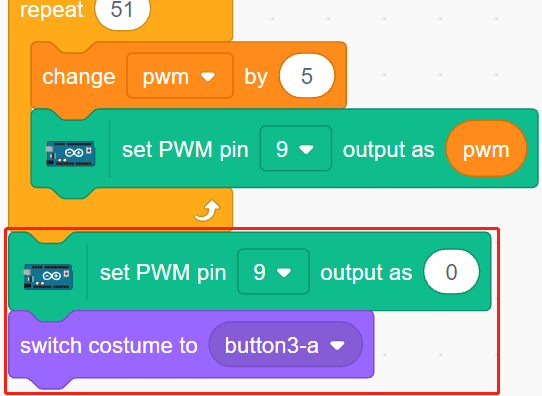
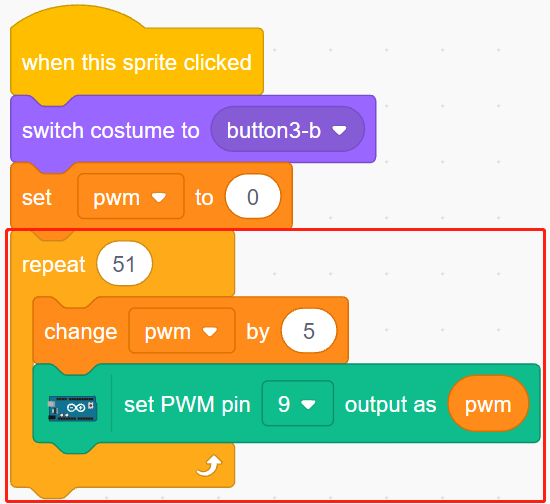
Since the range of pwm is 255, so by [repeat] block, the variable pwm is accumulated to 255 by 5, and then put into [set PWM pin] block, so you can see the LED slowly light up.
[change pwm by 5]: from Variables palette, let the variable change a specific number each time. It can be a positive or negative number, positive is increasing each time, negative is decreasing each time, for example, here the variable pwm is increased by 5 each time.
[set PWM pin]: from the Arduino Uno palette, used to set the output value of the pwm pin.
Finally, switch the costume of button3 back to button-a and make the PWM pin value 0, so that the LED will light up slowly and then turn off again.