Note
Hello, welcome to the SunFounder Raspberry Pi & Arduino & ESP32 Enthusiasts Community on Facebook! Dive deeper into Raspberry Pi, Arduino, and ESP32 with fellow enthusiasts.
Why Join?
Expert Support: Solve post-sale issues and technical challenges with help from our community and team.
Learn & Share: Exchange tips and tutorials to enhance your skills.
Exclusive Previews: Get early access to new product announcements and sneak peeks.
Special Discounts: Enjoy exclusive discounts on our newest products.
Festive Promotions and Giveaways: Take part in giveaways and holiday promotions.
👉 Ready to explore and create with us? Click [here] and join today!
2.15 GAME - Star-Crossed
In the next projects, we will play some fun mini-games in PictoBlox.
Here we use Joystick module to play a Star-Crossed game.
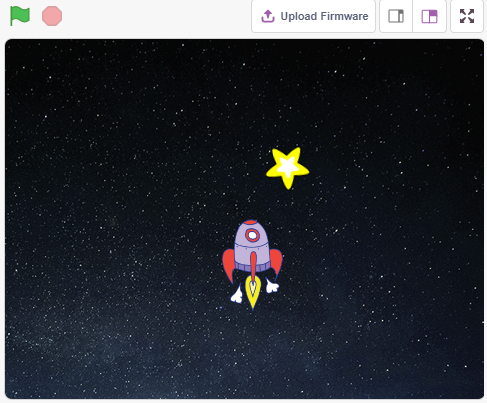
After the script is run, stars will appear randomly on the stage, you need to use Joystick to control Rocketship to avoid the stars, if you touch it, the game will be over.
You Will Learn
How Joystick module works
Set the x and y coordinates of the sprite
Build the Circuit
A joystick is an input device consisting of a stick that pivots on a base and reports its angle or direction to the device it is controlling. Joysticks are often used to control video games and robots.
In order to communicate a full range of motion to the computer, a joystick needs to measure the stick’s position on two axes – the X-axis (left to right) and the Y-axis (up and down).
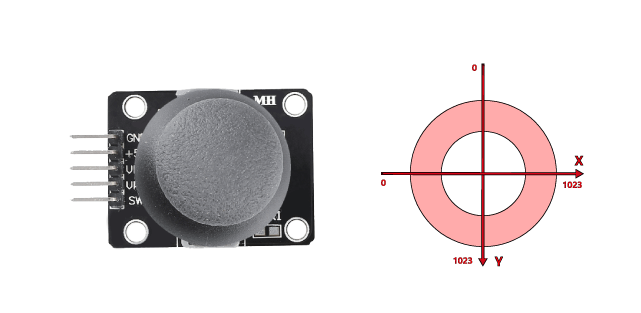
The motion coordinates of the joystick are shown in the following figure.
Note
The x coordinate is from left to right, the range is 0-1023.
y coordinate is from top to bottom, range is 0-1023.
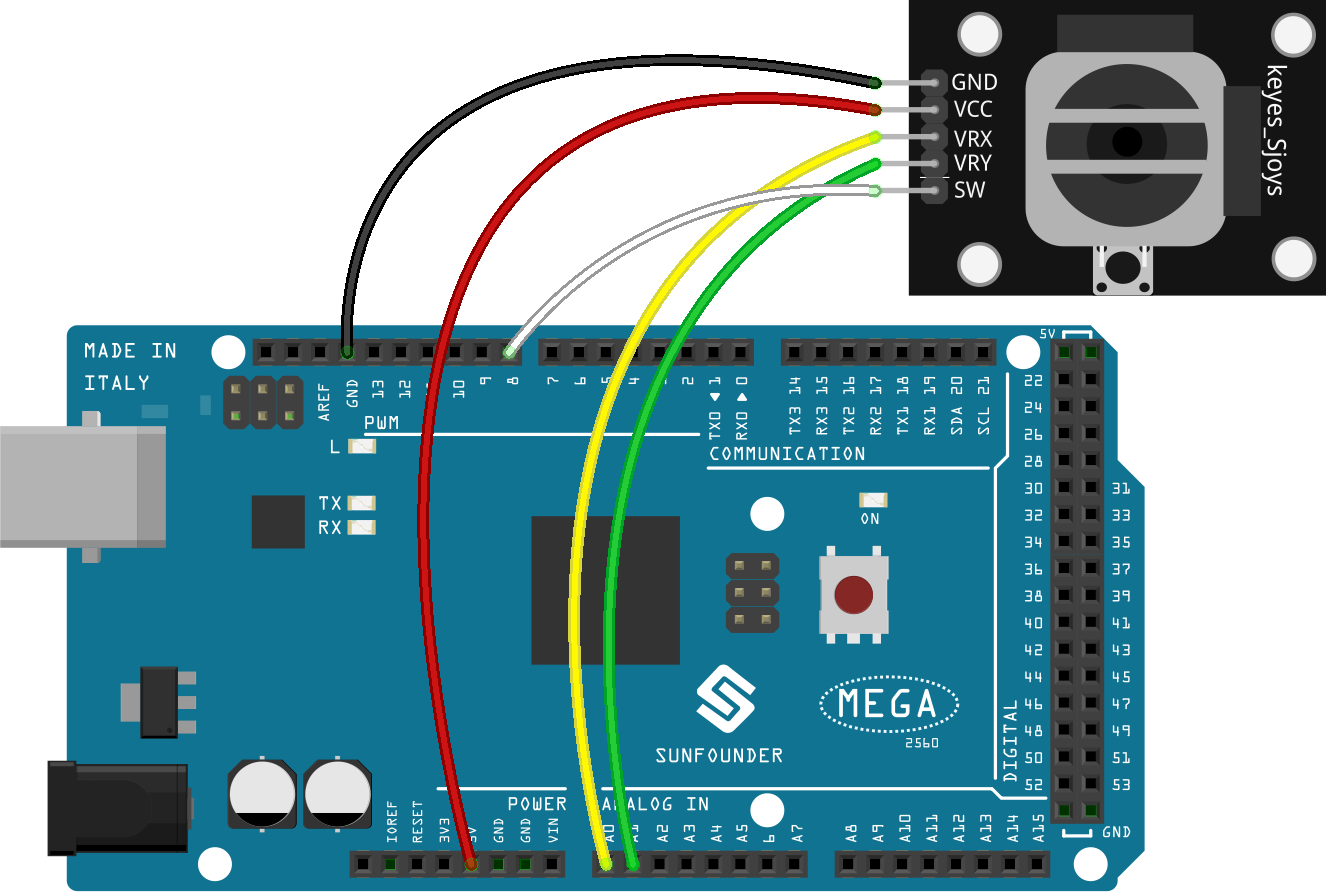
Now build the circuit according to the following diagram.
Programming
The whole script is to achieve the effect that when the green flag is clicked, the Stars sprite moves in a curve on the stage and you need to use the joystick to move the Rocketship, so that it will not be touched by the Star sprite.
1. Add sprites and backdrops
Delete the default sprite, and use the Choose a Sprite button to add the Rocketship sprite and the Star sprite. Note that the Rocket sprite size is set to 50%.
Now add the Stars backdrop by Choose a Backdrop.
2. Scripting for Rocketship
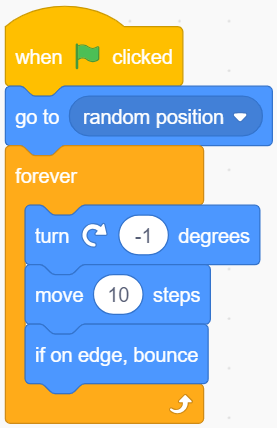
The Rocketship sprite is to achieve the effect that it will appear at a random position and then be controlled by the joystick to move it up, down, left, and right.
The workflow is as follows.
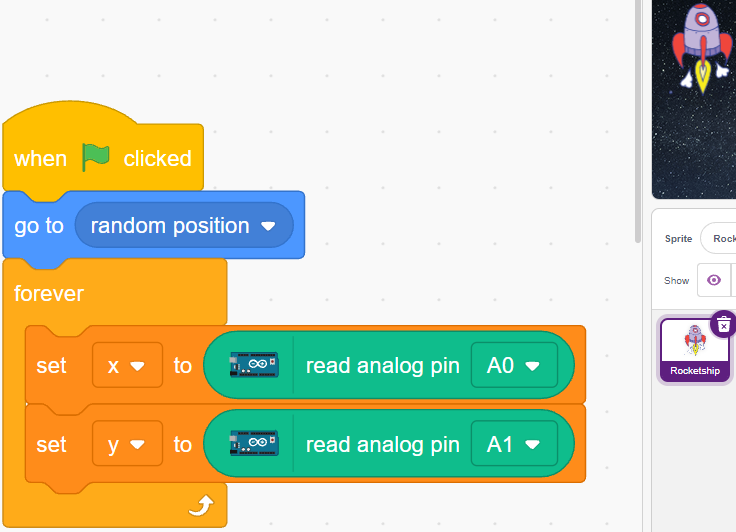
When the green flag is clicked, have the sprite go to a random location and create 2 variables x and y, which store the values read from A0 (VRX of Joystick) and A1 (VRY of Joystick), respectively. You can let the script run, toggling the joystick up and down, left and right, to see the range of values for x and y.
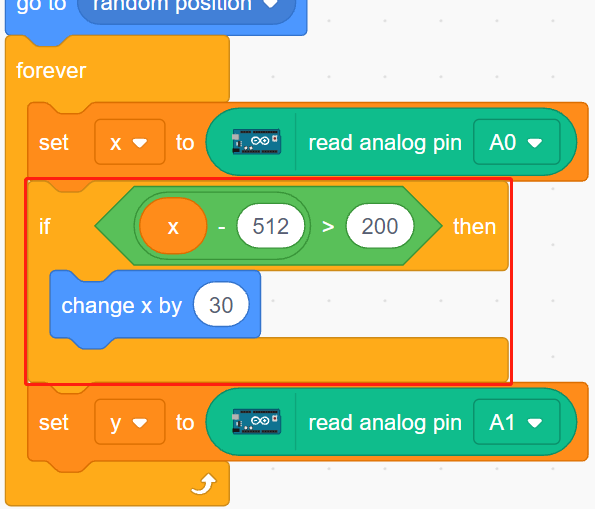
The value of A0 is in the range 0-1023 (the middle is about 512). Use
x-512>200to determine if Joystick is toggling to the right, and if so, make the x coordinate of the sprite +30 (to move the sprite to the right).
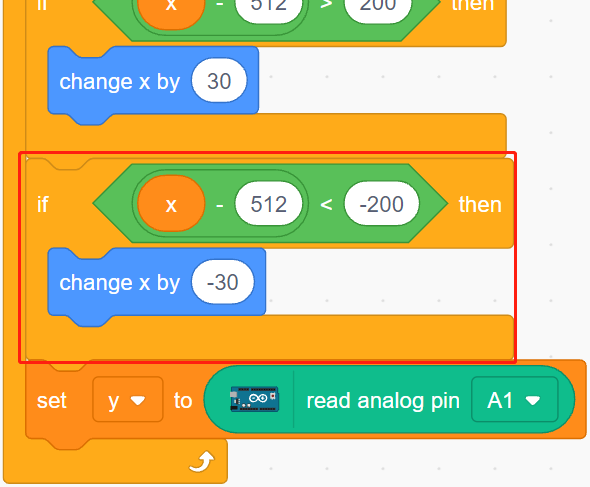
If the Joystick is toggled to the left (
x-512<-200), let the x coordinate of the sprite be -30 (let the sprite move to the left).
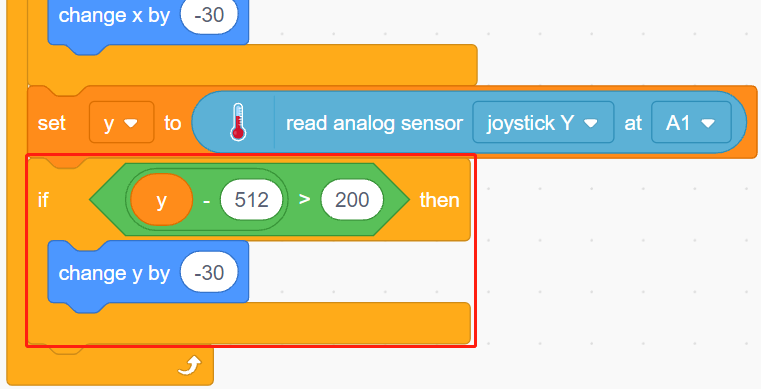
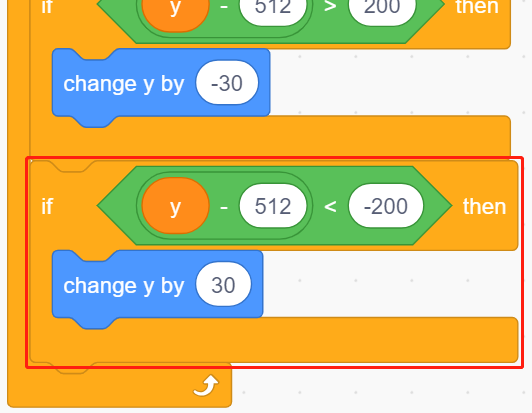
Since the Joystick’s y coordinate is from up (0) to down (1023), and the sprite’s y coordinate is from down to up. So in order to move the Joystick upwards and the sprite upwards, the y-coordinate must be -30 in the script.
If the joystick is flicked down, the y-coordinate of the sprite is +30.
3. Scripting for Star
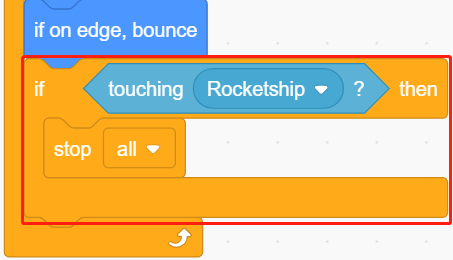
The effect to be achieved by the Star sprite is to appear at a random location, and if it hits Rocketship, the script stops running and the game ends.
When the green flag is clicked and the sprite goes to a random location, the [turn degrees] block is to make the Star sprite move forward with a bit of an angle change so you can see that it is moving in a curve and if on edge, bounce.
If the sprite touches the Rocketship sprite while it’s moving, stop the script from running.