Note
Hello, welcome to the SunFounder Raspberry Pi & Arduino & ESP32 Enthusiasts Community on Facebook! Dive deeper into Raspberry Pi, Arduino, and ESP32 with fellow enthusiasts.
Why Join?
Expert Support: Solve post-sale issues and technical challenges with help from our community and team.
Learn & Share: Exchange tips and tutorials to enhance your skills.
Exclusive Previews: Get early access to new product announcements and sneak peeks.
Special Discounts: Enjoy exclusive discounts on our newest products.
Festive Promotions and Giveaways: Take part in giveaways and holiday promotions.
👉 Ready to explore and create with us? Click [here] and join today!
2.18 GAME - Breakout Clone
Here we use the potentiometer to play a Breakout Clone game.
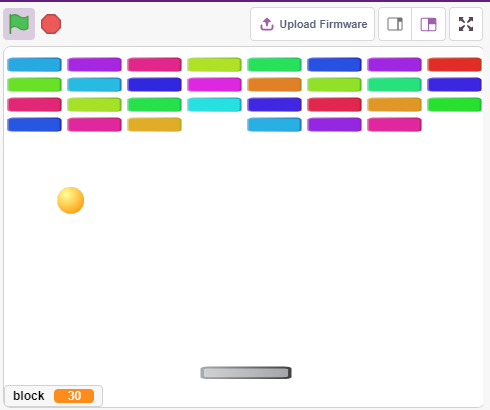
After clicking the green flag, you need to use the potentiometer to control the paddle on the stage to catch the ball so that it can go up and hit the bricks, all the bricks disappear then the game is won, if you don’t catch the ball, the game is lost.
Build the Circuit
The potentiometer is a resistive element with 3 terminals, the 2 side pins are connected to 5V and GND, and the middle pin is connected to A0. After the conversion by the ADC converter of the Arduino board, the value range is 0-1023.

Programming
There are 3 sprites on the stage.
1. Paddle sprite
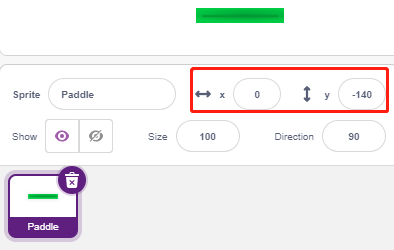
The effect to be achieved by the Paddle is that the initial position is in the middle of the bottom of the stage, and it is controlled by a potentiometer to move it to the left or to the right.
Delete the default sprite, use the Choose a Sprite button to add the Paddle sprite, and set its x and y to (0, -140).
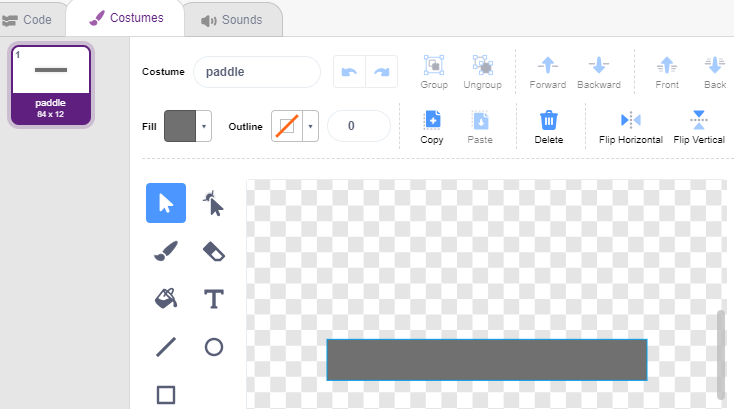
Go to the Costumes page, remove the Outline and change its color to dark gray.
Now script the Paddle sprite to set its initial position to (0, -140) when the green flag is clicked, and read the value of A0 (potentiometer) into the variable a0. Since the Paddle sprite moves from left to right on the stage at x-coordinates -195~195, you need to use the [map] block to map the variable a0 range 0~1023 to -195~195.

Now you can rotate the potentiometer to see if the Paddle can move left and right on the stage.
2. Ball sprite
The effect of the ball sprite is that it moves around the stage and bounces when it touches the edge; it bounces down if it touches the block above the stage; it bounces up if it touches the Paddle sprite during its fall; if it doesn’t, the script stops running and the game ends.
Add Ball sprite.
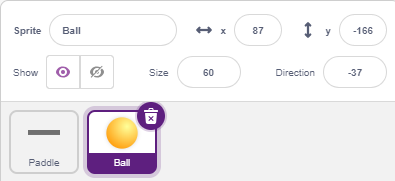
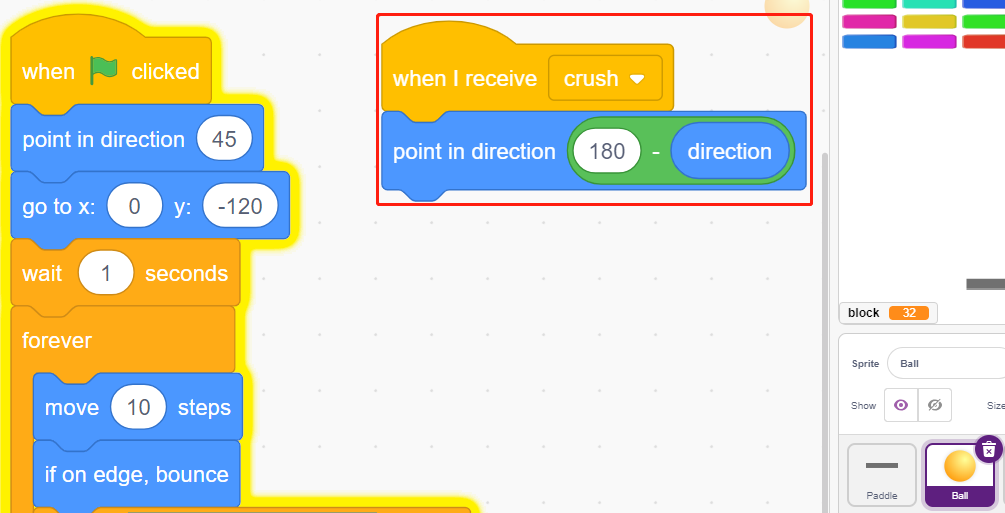
When the green flag is clicked, set the angle of the Ball sprite to 45° and set the initial position to (0, -120).

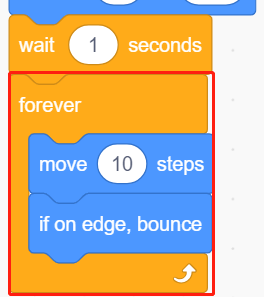
Now let the Ball sprite move around the stage and bounce when it touches the edge, and you can click on the green flag to see the effect.
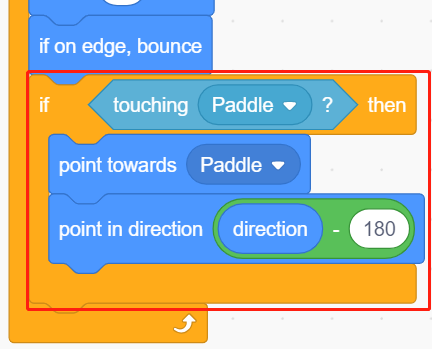
When the Ball sprite touches the Paddle sprite, do a reflection. The easy way to do this is to let the angle be directly inverted, but then you’ll find that the path of the ball is completely fixed, which is too boring. Therefore, we use the center of the two sprites to calculate and make the ball bounce in the opposite direction of the center of the baffle.

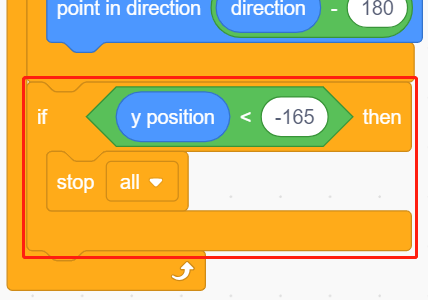
When the Ball sprite falls to the edge of the stage, the script stops running and the game ends.
3. Block1 sprite
The Block1 sprite is to appear with the effect of cloning 4x8 of itself above the stage in a random color, and deleting a clone if it is touched by the Ball sprite.
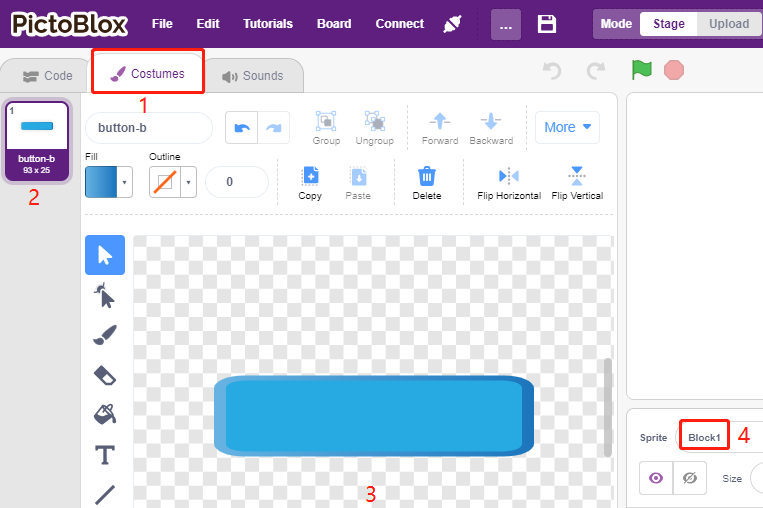
The Block1 sprite is not available in the PictoBlox library, you need to draw it yourself or modify it with an existing sprite. Here we are going to modify it with the Button3 sprite.
After adding the Button3 sprite, go to the Costumes page. Now delete button-a first, then reduce both the width and height of button-b, and change the sprite name to Block1, as shown in the following image.
Note
For the width of Block1, you can probably simulate it on the screen to see if you can put down 8 in a row, if not, then reduce the width appropriately.
In the process of shrinking the Block1 sprite, you need to keep the center point in the middle of the sprite.
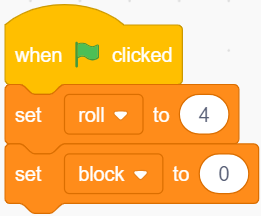
Now create 2 variables first, block to store the number of blocks and roll to store the number of rows.
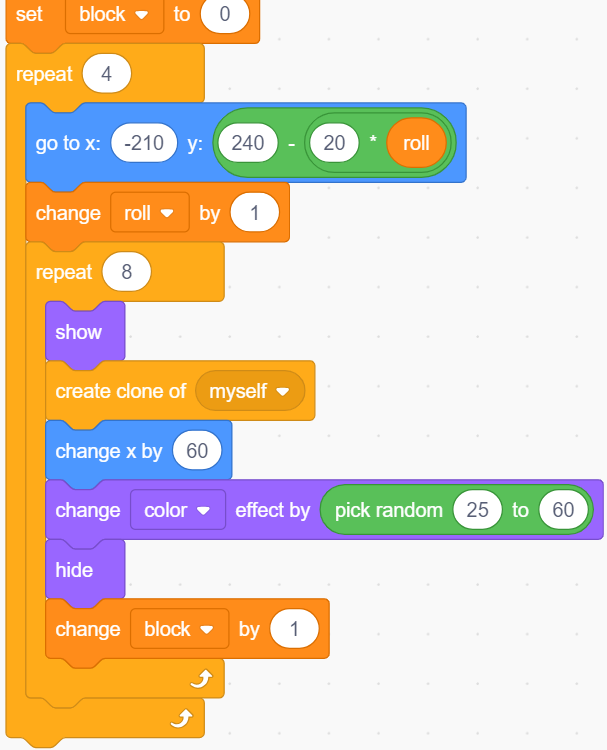
We need to make a clone of the Block1 sprite, so that it displays from left to right, top to bottom, one by one, 4x8 in total, with random colors.
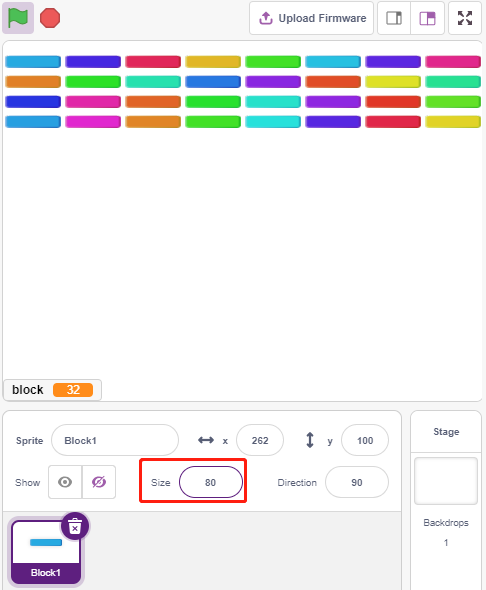
After the script is written, click on the green flag and look at the display on the stage, if it is too compact or too small, you can change the size.
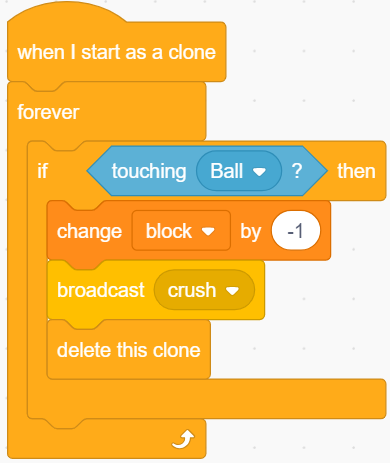
Now write the trigger event. If the cloned Block1 sprite touches the Ball sprite, delete the clone and broadcast the message crush.
Back to the Ball sprite, when the broadcast crush is received (the Ball sprite touches the clone of Block1 sprite), the Ball is popped from the opposite direction.