Note
Hello, welcome to the SunFounder Raspberry Pi & Arduino & ESP32 Enthusiasts Community on Facebook! Dive deeper into Raspberry Pi, Arduino, and ESP32 with fellow enthusiasts.
Why Join?
Expert Support: Solve post-sale issues and technical challenges with help from our community and team.
Learn & Share: Exchange tips and tutorials to enhance your skills.
Exclusive Previews: Get early access to new product announcements and sneak peeks.
Special Discounts: Enjoy exclusive discounts on our newest products.
Festive Promotions and Giveaways: Take part in giveaways and holiday promotions.
👉 Ready to explore and create with us? Click [here] and join today!
Lesson 21 Simple Creation-Answer Machine
Introduction
In quiz shows, especially entertainment activities (e.g. competitive answering activities), organizers often apply a buzzer system in order to accurately, fairly and visually determine the seat number of a responder.
Now the system can illustrate the accuracy and equity of the judgment by data, which improves the entertainment. At the same time, it is more fair and just. In this lesson, we will use some buttons, buzzers, and LEDs to make a quiz buzzer system.
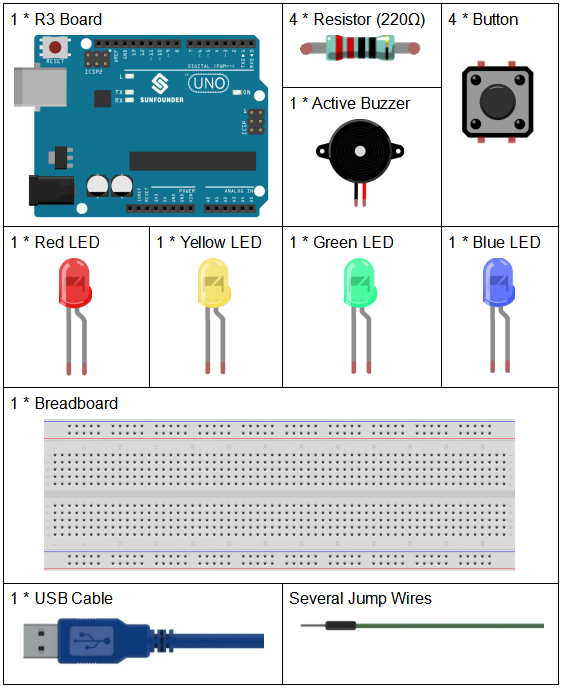
Components
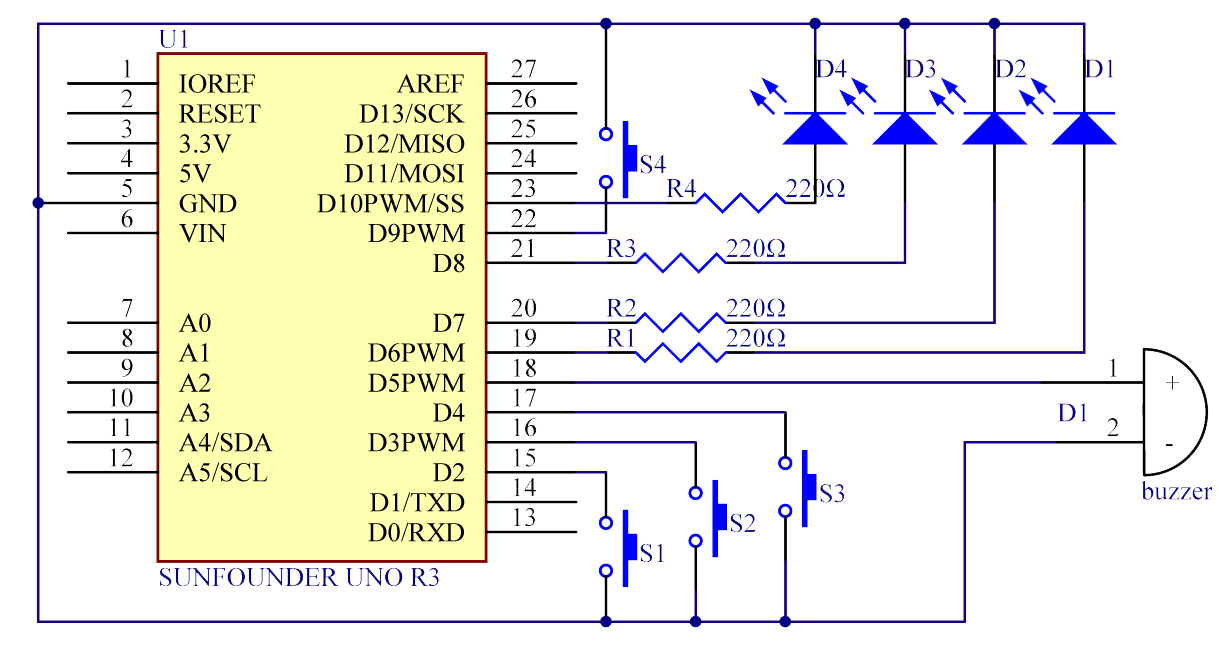
Schematic Diagram
Button 1, 2 and 3 are answer buttons, and button 4 is the reset button. If button 1 is pressed first, the buzzer will beep, the corresponding LED will light up and all the other LEDs will go out. If you want to start another round, press button 4 to reset.
Experimental Procedures
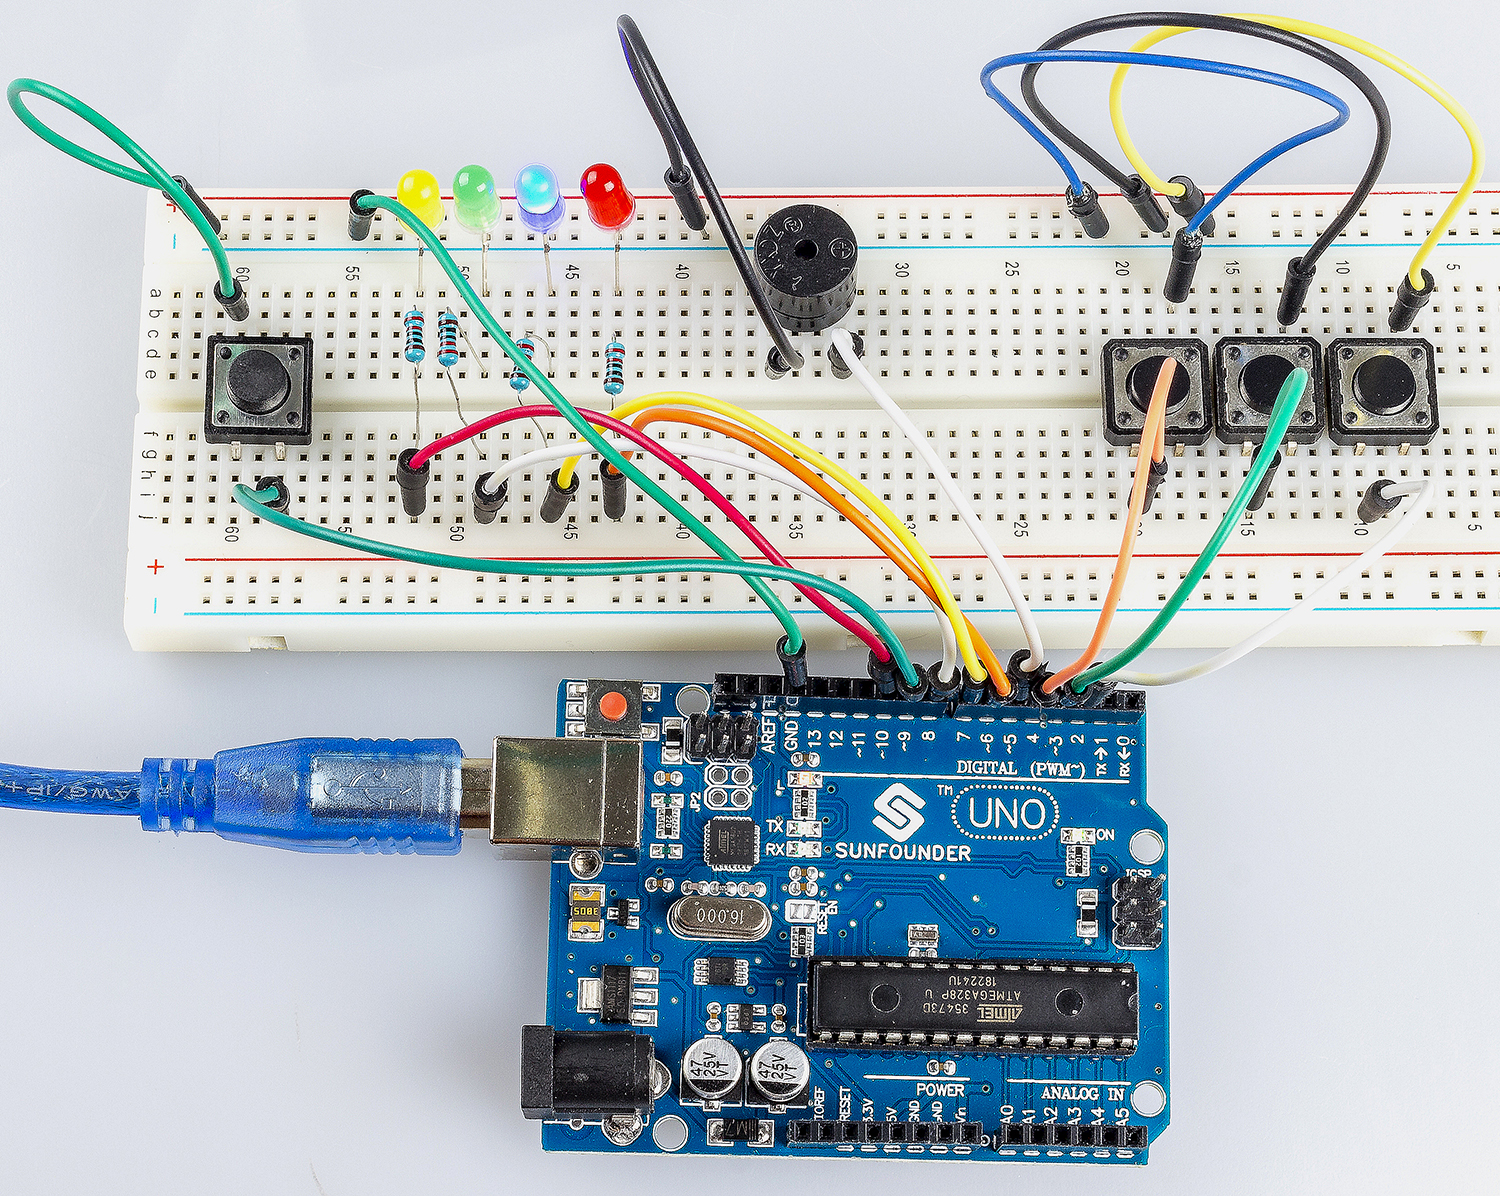
Step 1: Build the circuit.

Step 2: Open the code file.
Step 3: Select the Board and Port.
Step 4: Upload the sketch to the board.
Now, first press button 4 to start. If you press button 1 first, you will see the corresponding LED light up and the buzzer will beep. Then press button 4 again to reset before you press other buttons.
Code
Code Analysis
The code for this experiment may be a bit long. But the syntax is very simple.
This code uses 6 nested if statements.
The first if statement is used to determine if button 4 is pressed.
The second if statement is used to determine again if button 4 is pressed, which is used to prevent false touches. If it is confirmed that it is pressed, the flag will be 1 and the LED will be lit.
The third if statement is used to determine the value of flag, if it is 1 (button 4 is pressed), the value of button 1, 2 and 3 are read at this time.
The fourth - six if statements are used to determine if buttons 1, 2, and 3 are pressed, and if they are pressed, then the LED is lit and the buzzer is sounded.
Alarm() function
void Alarm()
{
for(int i=0;i<100;i++){
    digitalWrite(buzzerPin,HIGH); //the buzzer sound
    delay(2);
    digitalWrite(buzzerPin,LOW);  //without sound
    delay(2);                     //when delay time changed,the frequency changed
}
}
This function is used to set the length and frequency of the sound emitted by the buzzer.