Note
Hello, welcome to the SunFounder Raspberry Pi & Arduino & ESP32 Enthusiasts Community on Facebook! Dive deeper into Raspberry Pi, Arduino, and ESP32 with fellow enthusiasts.
Why Join?
Expert Support: Solve post-sale issues and technical challenges with help from our community and team.
Learn & Share: Exchange tips and tutorials to enhance your skills.
Exclusive Previews: Get early access to new product announcements and sneak peeks.
Special Discounts: Enjoy exclusive discounts on our newest products.
Festive Promotions and Giveaways: Take part in giveaways and holiday promotions.
👉 Ready to explore and create with us? Click [here] and join today!
Lesson 3 Controlling LED by Button
Introduction
In this experiment, we will learn how to turn on/off an LED by using an I/O port and a button. The “I/O port” refers to the INPUT and OUTPUT port. Here the INPUT port of the Uno board is used to read the output of an external device. Since the board itself has an LED (connected to Pin 13), you can use this LED to do this experiment for convenience.
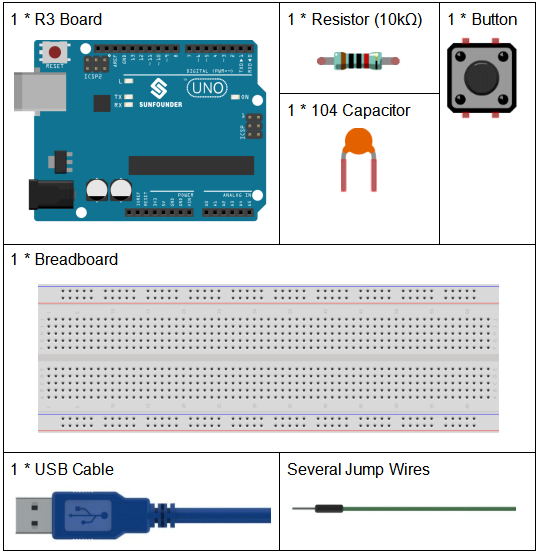
Components
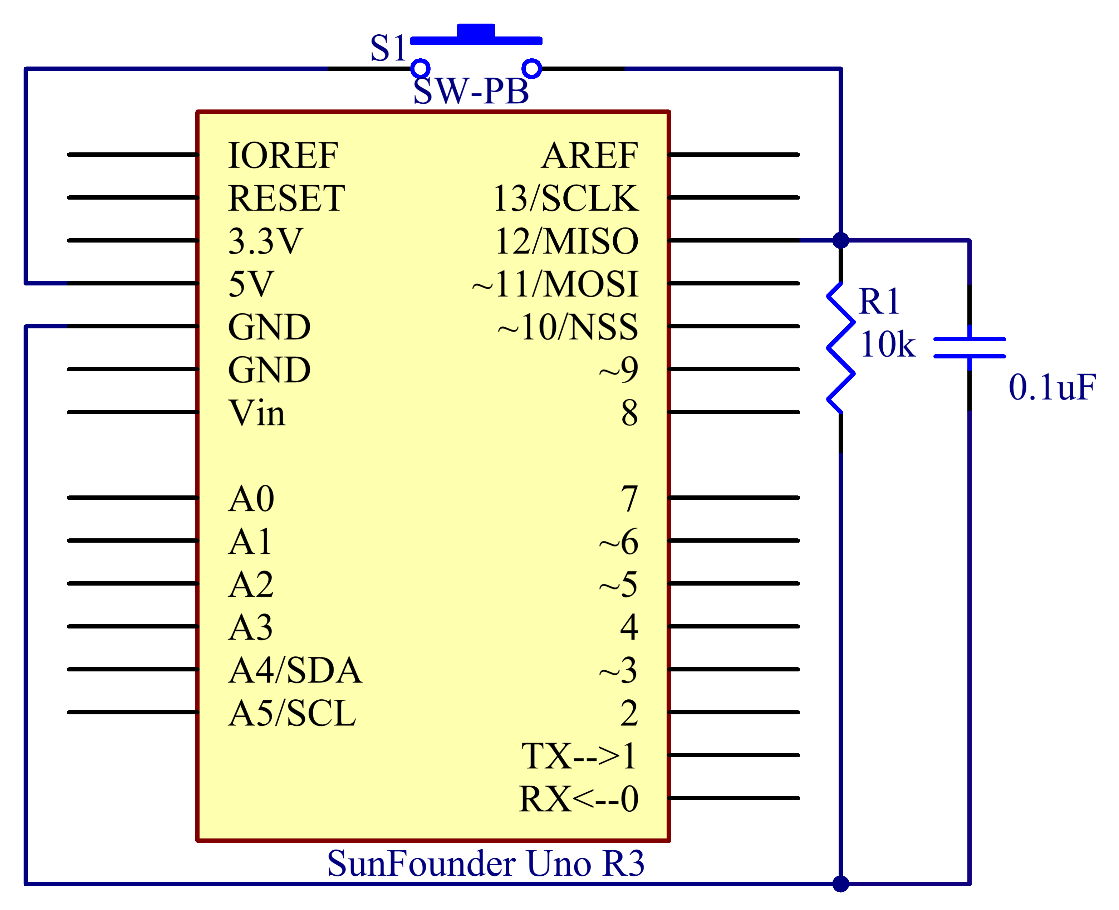
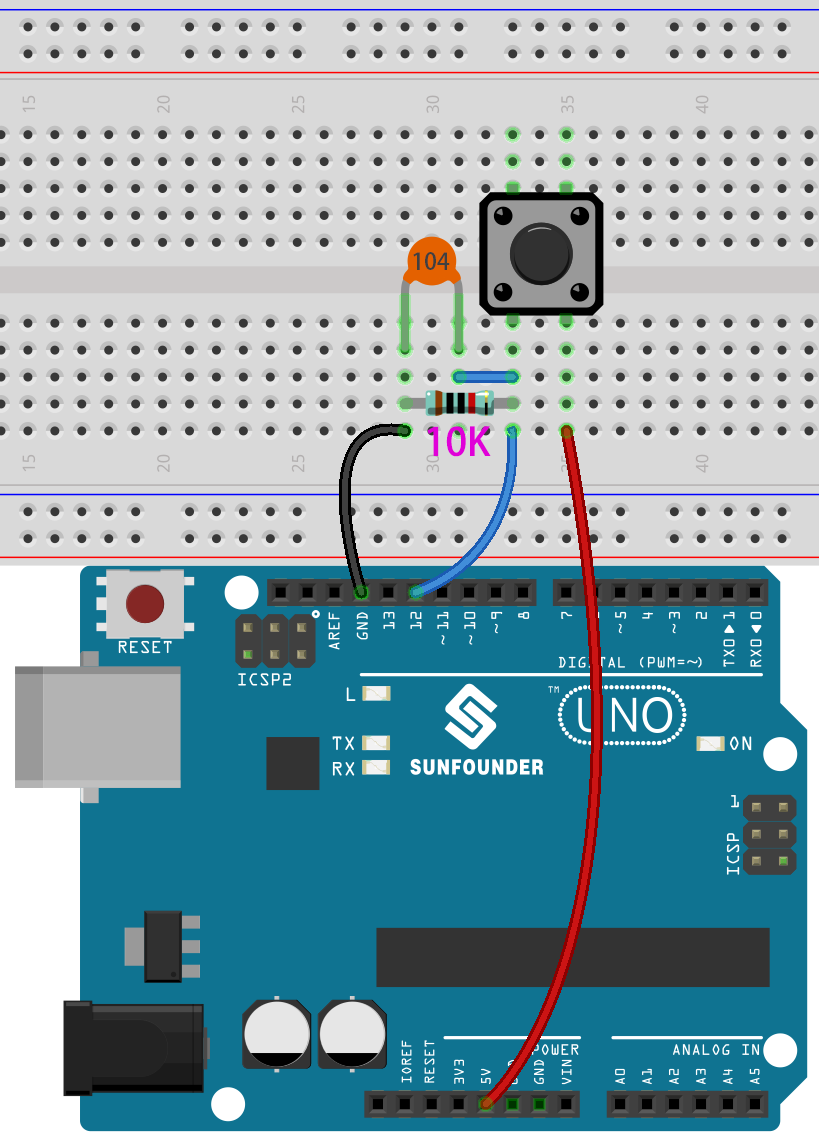
Schematic Diagram
Connect one end of the buttons to pin 12 which connects with a pull-down resistor and a 0.1uF (104) capacitor (to eliminate jitter and output a stable level when the button is working). Connect the other end of the resistor to GND and one of the pins at the other end of the button to 5V. When the button is pressed, pin 12 is 5V (HIGH) and set pin 13 (integrated with an LED) as High at the same time. Then release the button (pin 12 changes to LOW) and pin 13 is Low. So we will see the LED lights up and goes out alternately as the button is pressed and released.
Experimental Procedures
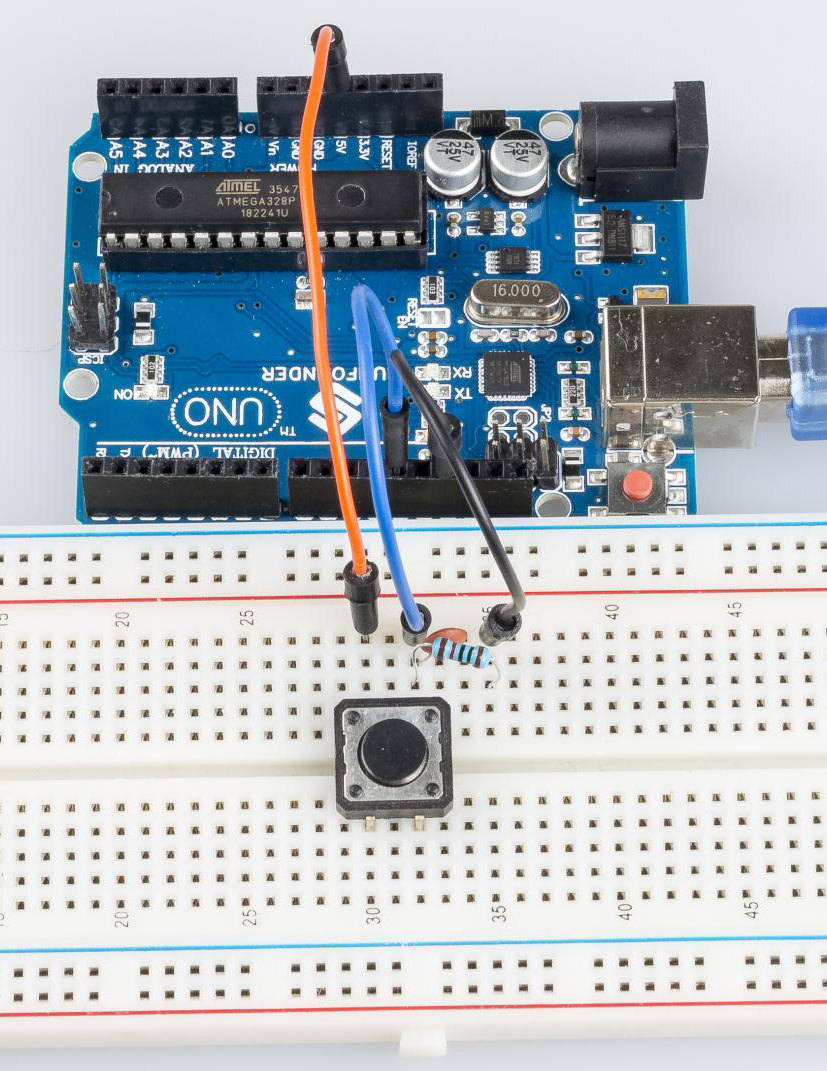
Step 1: Build the circuit.
Step 2: Open the code file.
Step 3: Select the Board and Port.
Step 4: Upload the sketch to the board.
Now, press the button, and the LED on the Uno board will light up.
Code
Code Analysis
Define variables
const int buttonPin = 12; //the button connect to pin 12

const int ledPin = 13; //the led connect to pin13

int buttonState = 0; // variable for reading the pushbutton status
Connect the button to pin 12. LED has been connected to pin 13. Define a
variable buttonState to restore the state of the button.
Set the input and output status of the pins
pinMode(buttonPin, INPUT); //initialize thebuttonPin as input

pinMode(ledPin, OUTPUT); //initialize the led pin as output
We need to know the status of the button in this experiment, so here set
the buttonPin as INPUT; to set HIGH/LOW of the LED, we set LedPin as
OUTPUT.
Read the status of the button
buttonState = digitalRead(buttonPin);
buttonPin(Pin12) is a digital pin; here is to read the value of the
button and store it in buttonState.
digitalRead (Pin): Reads the value from a specified digital pin, either HIGH or LOW.
Press the button to make the buzzer sound
if (buttonState == HIGH )

{

    digitalWrite(ledPin, HIGH); //turn the led on

}

else

{

    digitalWrite(ledPin, LOW); //turn the led off

}
In this part, when the buttonState is High level, write ledPin as
High and the LED will be turned on. As one end of the button has been
connected to 5V and the other end to pin 12, when the button is pressed,
pin 12 is 5V (HIGH). And then determine with the if(conditional); if
the conditional is true, then the LED will light up.
else means that when the if(conditional) is determined as false, run
the code in else.
Experiment Summary
You can also change the code to: when the button is pressed, if (buttonState=HIGH). The LED goes out (digitalWrite(ledPin, LOW)). When the button is released (the else), the LED lights up ((digitalWrite(ledPin, HIGH)). You only need to replace the code in if with those in else.