Lesson 10 Servo
Introduction
Servo is a type of geared motor that can only rotate 180 degrees. It is controlled by sending electrical pulses from your board. These pulses tell the servo what position it should move to.
A servo has three wires: the brown wire is GND, the red one is VCC, and the orange one is signal line.
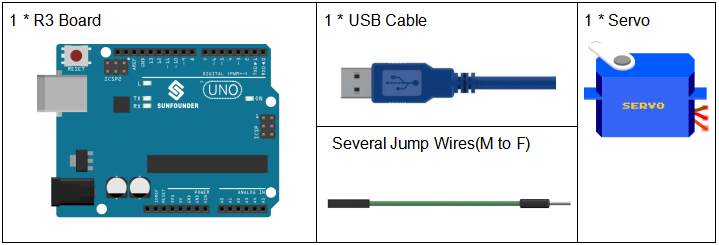
Components

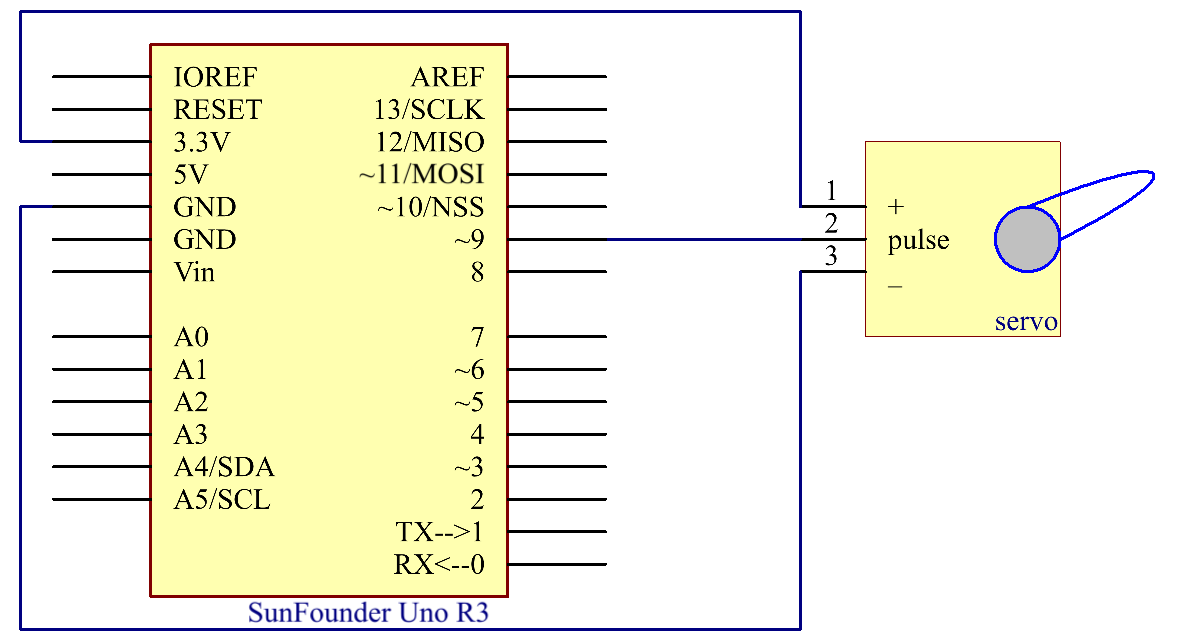
Schematic Diagram

Experimental Procedures
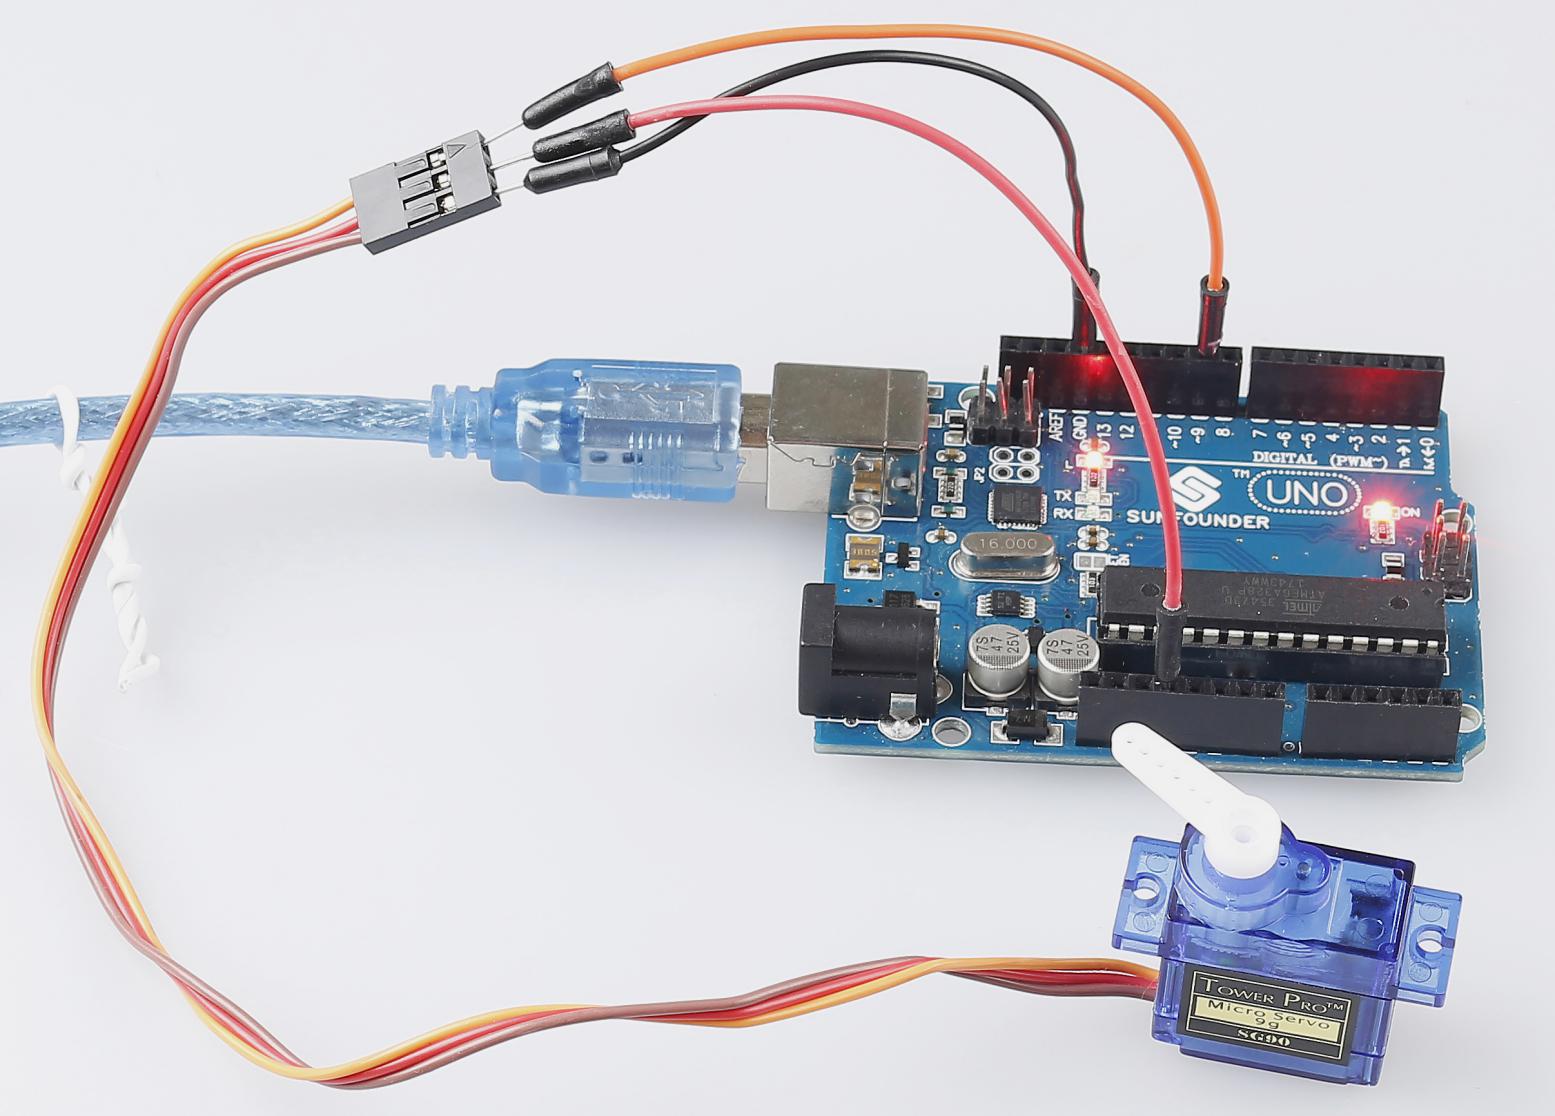
Step 1: Build the circuit (Brown to GND, Red to VCC, Orange to pin 9 of the control board)
Step 2: Open the code file.
Step 3: Select the Board and Port.
Step 4: Upload the sketch to the board.

Now, you can see the rocker arm of the servo rotate and stop at 90 degrees (15 degrees each time). And then it rotates in the opposite direction.

Code
Code Analysis
Include a library
#include <Servo.h>

Servo myservo; //create servo object to control a servo
With the Servo.h file included, you can call the functions in this
file later. Servo is a built-in library in the Arduino IDE. You can find
the Servo folder under the installation path C:Program
FilesArduinolibraries.
Initialize the servo
void setup()

{

    myservo.attach(9); //attachs the servo on pin 9 to servo object

    myservo.write(0); //back to 0 degrees

    delay(1000); //wait for a second

}
myservo.attach(): Attach the Servo variable to a pin. Initialize the servo attach to pin9.
myservo.write(): Writes a value to the servo, controlling the shaft accordingly. On a standard servo, this will set the angle of the shaft (in degrees), moving the shaft to that orientation. Here let the servo stay in the 0 angle firstly.
Servo rotate
void loop()

{

    for (int i = 0; i <= 180; i++)

    {

        myservo.write(i); //write the i angle to the servo

        delay(15); //delay 15ms

    }

    for (int i = 180; i >= 0; i--)

    {

        myservo.write(i); //write the i angle to the servo

        delay(15); //delay 15ms

    }

}
Use 2 for() statement to write 0 - 180 to the servo, so that you can see the servo rotate from 0 to 180 angle,then turn back to 0.