Note
Hello, welcome to the SunFounder Raspberry Pi & Arduino & ESP32 Enthusiasts Community on Facebook! Dive deeper into Raspberry Pi, Arduino, and ESP32 with fellow enthusiasts.
Why Join?
Expert Support: Solve post-sale issues and technical challenges with help from our community and team.
Learn & Share: Exchange tips and tutorials to enhance your skills.
Exclusive Previews: Get early access to new product announcements and sneak peeks.
Special Discounts: Enjoy exclusive discounts on our newest products.
Festive Promotions and Giveaways: Take part in giveaways and holiday promotions.
👉 Ready to explore and create with us? Click [here] and join today!
8.13 Bluetooth Environmental Monitor
The project uses an Android app built with MIT App Inventor to receive and display environmental data from a Raspberry Pi Pico 2 W board. The Raspberry Pi Pico 2 W collects temperature and humidity data using a DHT11 sensor. Once collected, the data is transmitted via Bluetooth. Upon receiving the data, the app displays it on the screen.
The Android application will be developed using MIT App Inventor, a free online platform. This project provides an excellent opportunity to learn about interfacing Arduino with smartphones.
1. Build the Circuit
Required Components
In this project, we need the following components.
It’s definitely convenient to buy a whole kit, here’s the link:
Name |
ITEMS IN THIS KIT |
LINK |
|---|---|---|
Pico 2 W Starter Kit |
450+ |
You can also buy them separately from the links below.
SN |
COMPONENT |
QUANTITY |
LINK |
|---|---|---|---|
1 |
1 |
||
2 |
Micro USB Cable |
1 |
|
3 |
1 |
||
4 |
Several |
||
5 |
1 |
- |

2. Create the Android App
You will develop the Android application using MIT App Inventor, a free web application ideal for beginners in Android development. It offers intuitive drag-and-drop features for creating functional applications.
Follow these steps to get started:
Go to Get Started with MIT App Inventor, and click “online tool” to login. You will need a Google account to register with MIT App Inventor.

After logging in, navigate to Projects -> Import project (.aia) from my computer. Subsequently, upload the
ble_environmental_monitor_picow.aiafile located in the following path:pico-2w-kit/micropython/iot/8.13-environmental_monitor.Alternatively, you can download the file directly:
ble_environmental_monitor_picow.aia
Once uploaded, the app template will appear in the MIT App Inventor interface. This pre-configured template can be customized after you become familiar with the platform.
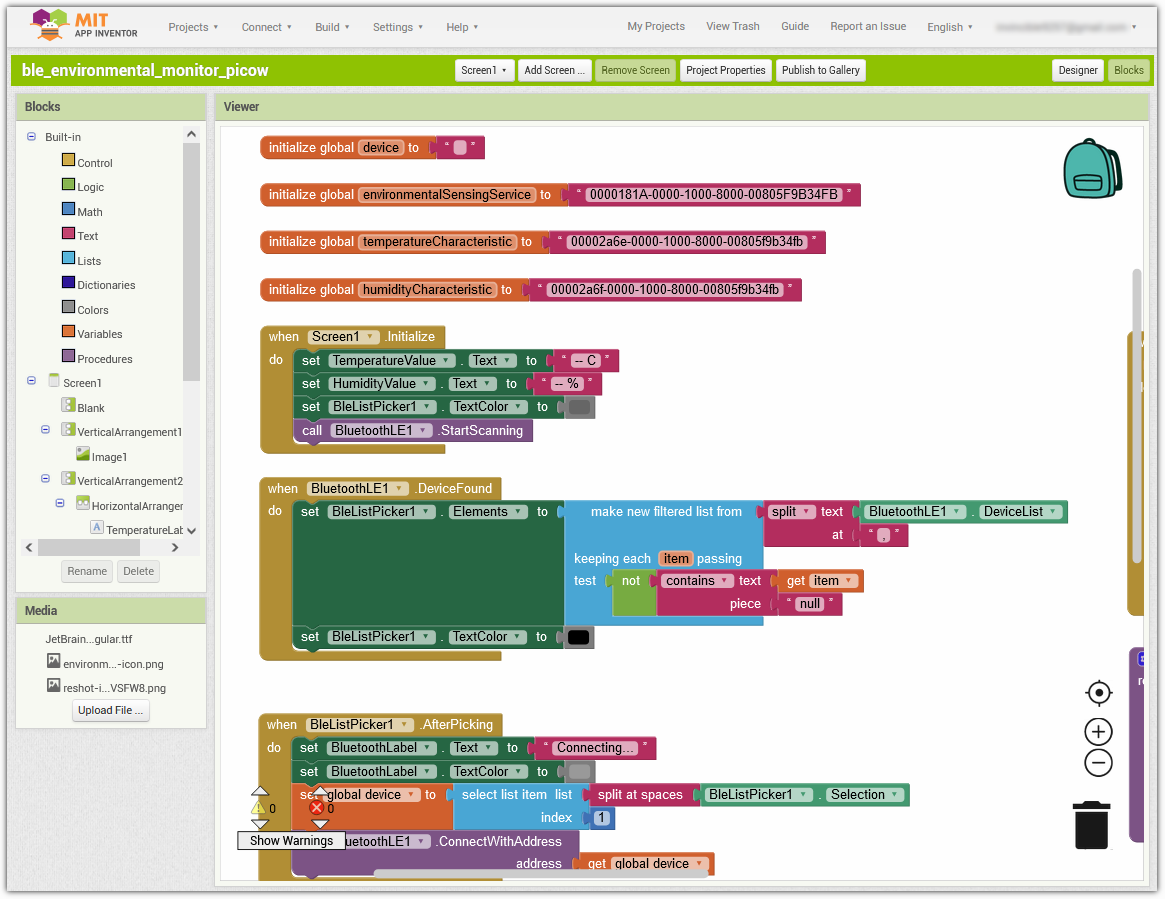
MIT App Inventor has two main sections: Designer and Blocks. You can switch between these two sections in the upper right corner of the page.

The Designer allows you to add buttons, text, screens, and modify the overall aesthetic of your app.

Next, there’s the Blocks section. This section lets you craft custom functionalities for your app, allowing you to program each component on the app’s GUI to achieve desired features.
To install the app on a phone, navigate to the Build tab.

Generate a
.apkfile. After selecting this option, a page will appear allowing you to choose between downloading a.apkfile or scanning a QR code for installation. Follow the installation guide to complete the application installation.Alternatively, download our pre-compiled APK file here:
ble_environmental_monitor.apkIf you wish to publish this app to Google Play or another app marketplace, you can generate a
.aabfile.
3. Run the Code
Open the 8.13-environmental_monitor.py file under the path of pico-2w-kit/micropython/iot/8.13-environmental_monitor, or copy this code into your IDE.
Note
This code depends on the ble_advertising.py file. Make sure to upload it to the Pico board before running the script.
import bluetooth
import random
import struct
import time
import machine
import ubinascii
import dht
from ble_example.ble_advertising import advertising_payload
from micropython import const
from machine import Pin

_IRQ_CENTRAL_CONNECT = const(1)
_IRQ_CENTRAL_DISCONNECT = const(2)
_IRQ_GATTS_INDICATE_DONE = const(20)

_FLAG_READ = const(0x0002)
_FLAG_NOTIFY = const(0x0010)
_FLAG_INDICATE = const(0x0020)

# org.bluetooth.service.environmental_sensing
_ENV_SENSE_UUID = bluetooth.UUID(0x181A)
# org.bluetooth.characteristic.temperature
_TEMP_CHAR = (
    bluetooth.UUID(0x2A6E),
    _FLAG_READ | _FLAG_NOTIFY | _FLAG_INDICATE,
)
_HUM_CHAR = (
    bluetooth.UUID(0x2A6F),
    _FLAG_READ | _FLAG_NOTIFY | _FLAG_INDICATE,
)
_ENV_SENSE_SERVICE = (
    _ENV_SENSE_UUID,
    (_TEMP_CHAR,_HUM_CHAR),
)

# org.bluetooth.characteristic.gap.appearance.xml
_ADV_APPEARANCE_GENERIC_THERMOMETER = const(768)

class BLETempHumidity:
    def __init__(self, ble, name=""):

        self._ble = ble
        self._ble.active(True)
        self._ble.irq(self._irq)

        ((self._temp_handle, self._hum_handle),) = self._ble.gatts_register_services((_ENV_SENSE_SERVICE,))
        self._connections = set()

        # If no name is provided, it will be automatically generated based on the MAC address.
        if len(name) == 0:
            name = 'Pico %s' % ubinascii.hexlify(self._ble.config('mac')[1],':').decode().upper()
        print('Sensor name %s' % name)

        self._payload = advertising_payload(
            name=name, services=[_ENV_SENSE_UUID]
        )
        self._advertise()

    def _irq(self, event, data):
        # Track connections so we can send notifications.
        if event == _IRQ_CENTRAL_CONNECT:
            conn_handle, _, _ = data
            self._connections.add(conn_handle)
        elif event == _IRQ_CENTRAL_DISCONNECT:
            conn_handle, _, _ = data
            self._connections.remove(conn_handle)
            # Start advertising again to allow a new connection.
            self._advertise()
        elif event == _IRQ_GATTS_INDICATE_DONE:
            conn_handle, value_handle, status = data

    def update_values(self, temperature_c, humidity_perc, notify=False, indicate=False):
        # Write the temperature to the temperature characteristic (unit: 0.01°C)
        temp_int = int(temperature_c * 100)
        self._ble.gatts_write(self._temp_handle, struct.pack("<h", temp_int))

        # Write the humidity to the humidity characteristic (unit: 0.01%RH)
        hum_int = int(humidity_perc * 100)
        self._ble.gatts_write(self._hum_handle, struct.pack("<H", hum_int))

        if notify or indicate:
            for conn_handle in self._connections:
                if notify:
                    self._ble.gatts_notify(conn_handle, self._temp_handle)
                    self._ble.gatts_notify(conn_handle, self._hum_handle)
                if indicate:
                    self._ble.gatts_indicate(conn_handle, self._temp_handle)
                    self._ble.gatts_indicate(conn_handle, self._hum_handle)

    def _advertise(self, interval_us=500000):
        self._ble.gap_advertise(interval_us, adv_data=self._payload)

    def is_connected(self):
        return len(self._connections) > 0

def demo():
    sensor = dht.DHT11(machine.Pin(15))
    led = Pin('LED', Pin.OUT)

    ble = bluetooth.BLE()
    temp_hum = BLETempHumidity(ble,"pico2w")

    counter = 0
    while True:

        if temp_hum.is_connected():
            led.on()
        else:
            led.off()

        try:
            if counter % 10 == 0:
                sensor.measure()
                temperature_c = sensor.temperature
                humidity = sensor.humidity

                print("Temp: %.2f C, Hum: %.2f %%" % (temperature_c, humidity))
                temp_hum.update_values(temperature_c, humidity, notify=True, indicate=False)
        except Exception as e:
            print(f"Error: {e}")

        time.sleep_ms(1000)
        counter += 1

if __name__ == "__main__":
    demo()
4. App and Bluetooth Connection
Ensure that the Environmental Monitor BLE app created earlier is installed on your phone.
Enable Bluetooth on your phone.
Open the Environmental Monitor BLE app.
When you open the app for the first time, you will see two consecutive prompts requesting permissions. These permissions are required for Bluetooth functionality.
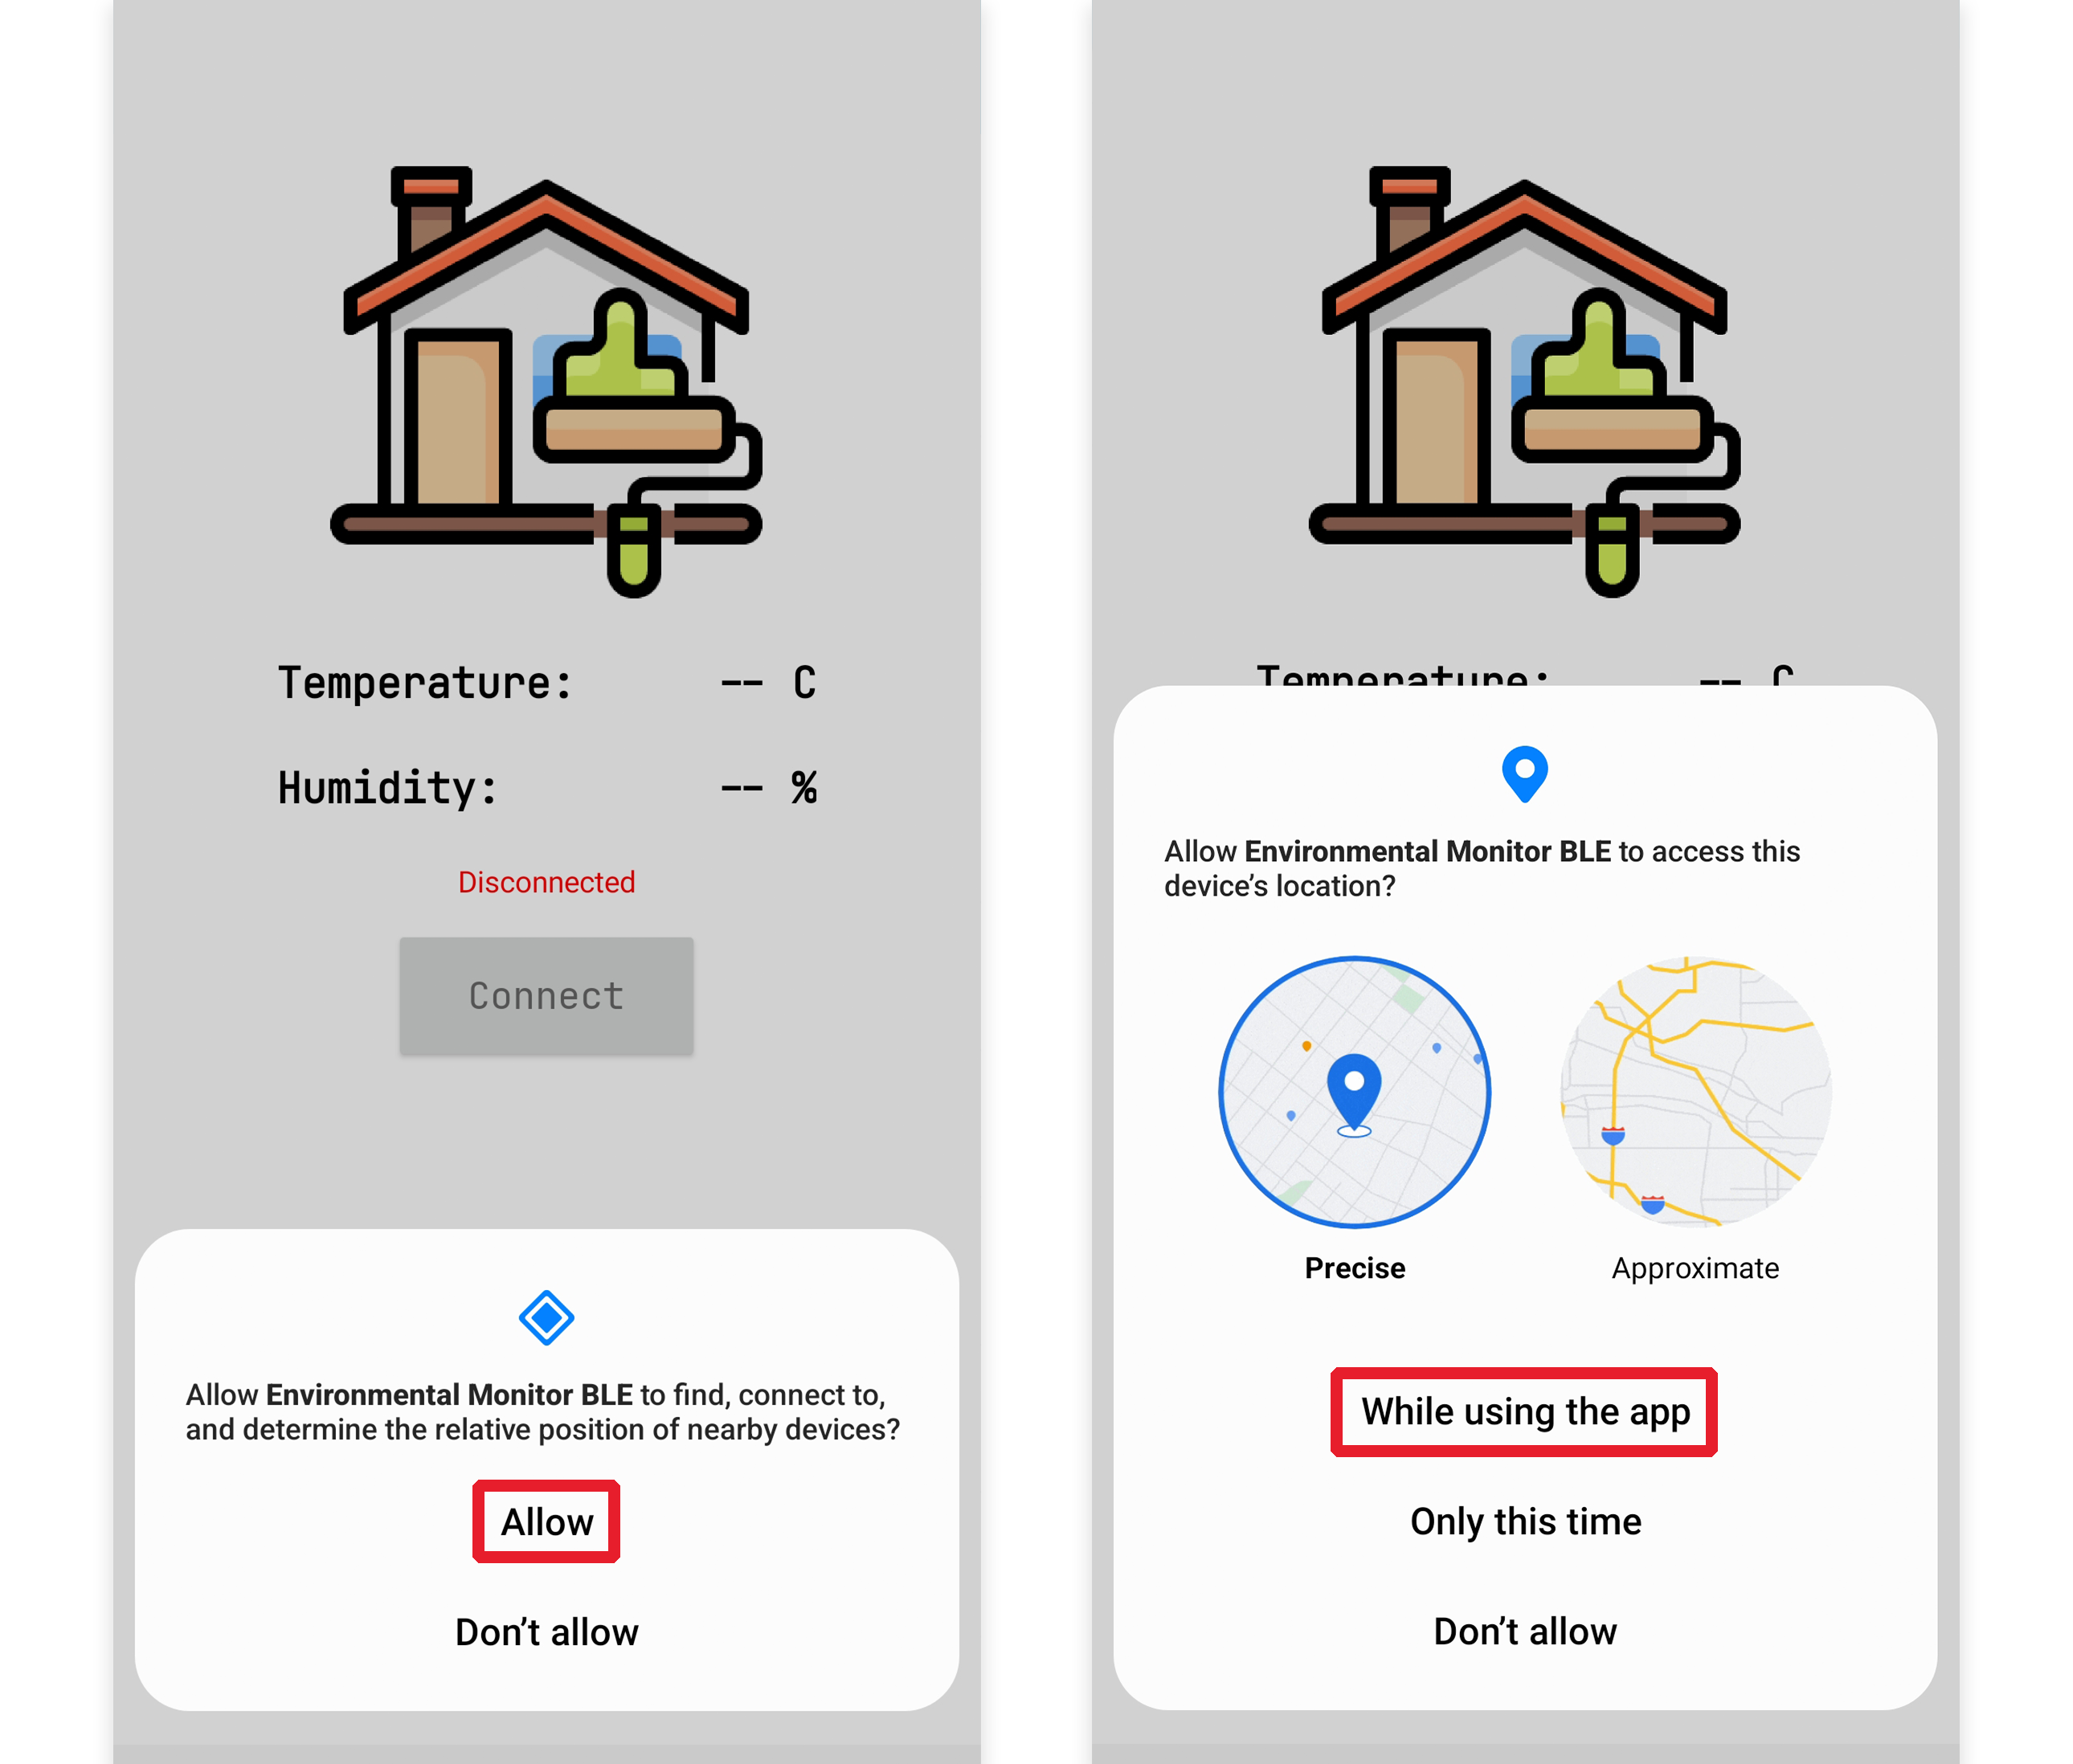
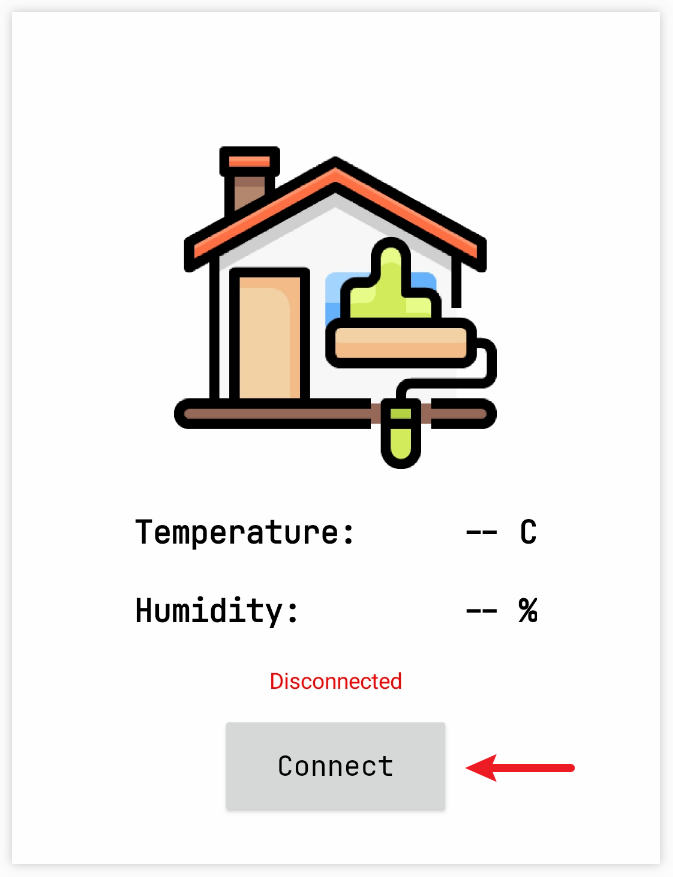
In the APP, click on Connect button to establish a connection between the APP and Pico 2 W via bluetooth.
This page displays a list of all Bluetooth devices. Choose the
xx.xx.xx.xx.xx.xx pico2woption from the list. Each device name is displayed alongside its MAC address.
If no devices appear in the list, try enabling the location feature on your phone. (On some Android versions, the location setting is linked to Bluetooth functionality.)
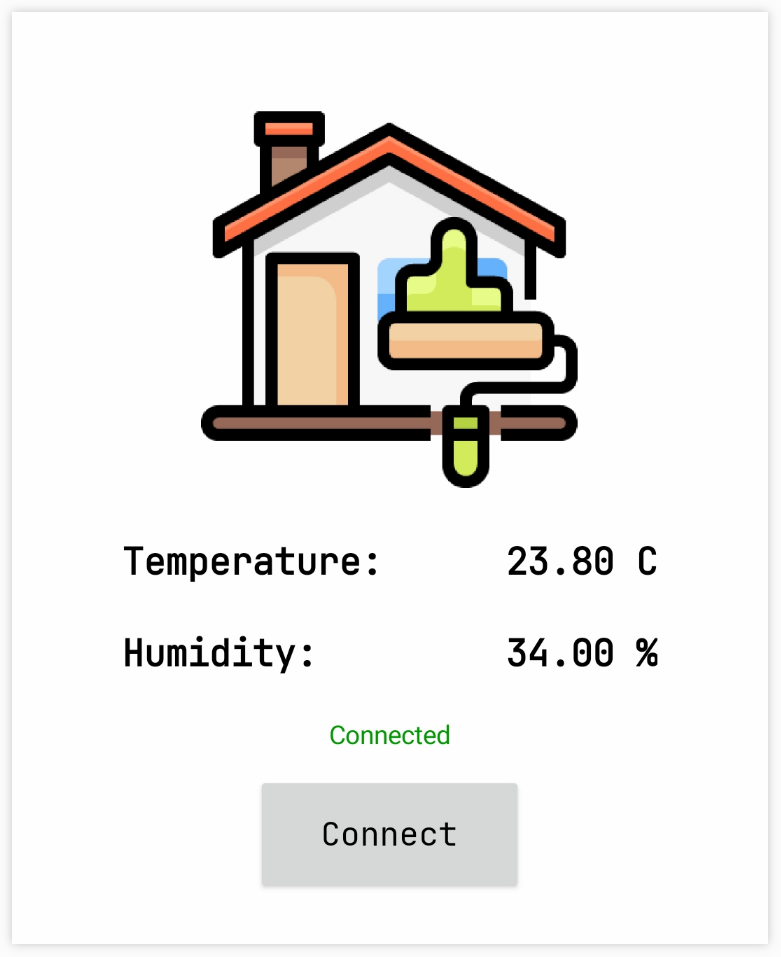
Once connected, you will be redirected to the main screen displaying temperature and humidity readings.