Note
Hello, welcome to the SunFounder Raspberry Pi & Arduino & ESP32 Enthusiasts Community on Facebook! Dive deeper into Raspberry Pi, Arduino, and ESP32 with fellow enthusiasts.
Why Join?
Expert Support: Solve post-sale issues and technical challenges with help from our community and team.
Learn & Share: Exchange tips and tutorials to enhance your skills.
Exclusive Previews: Get early access to new product announcements and sneak peeks.
Special Discounts: Enjoy exclusive discounts on our newest products.
Festive Promotions and Giveaways: Take part in giveaways and holiday promotions.
👉 Ready to explore and create with us? Click [here] and join today!
2.13 Reaction Game
Here we use several buttons, buzzer and LEDs to make a reaction game.Press the referee button to start the game, the buzzer will also keep ringing to prompt the game to continue; press the 2 player buttons quickly respectively; when the referee button is pressed again, the game is over the buzzer stops working. At this point, look at the CONSOLE on Piper Make to see whose hand speed is fast.
Required Components
In this project, we need the following components.
It’s definitely convenient to buy a whole kit, here’s the link:
Name |
ITEMS IN THIS KIT |
LINK |
|---|---|---|
Kepler Kit |
450+ |
You can also buy them separately from the links below.
SN |
COMPONENT |
QUANTITY |
LINK |
|---|---|---|---|
1 |
1 |
||
2 |
Micro USB Cable |
1 |
|
3 |
1 |
||
4 |
Several |
||
5 |
1(S8050) |
||
6 |
6(2-220Ω, 1-1KΩ, 3-10KΩ) |
||
7 |
Active Buzzer |
1 |
|
8 |
3 |
||
9 |
2 |
Wiring

Define 2 buttons as player1 (GP14) and player2 (GP12), both have a pull-up resistor connected. When the buttons are pressed, GP14 and GP12 are each low.
Their indicators are connected to GP15 and GP13, and output high to light them up.
Define a referee button connected to GP10, when the button is pressed, GP10 goes low.
Active buzzer is connected to GP11, when GP11 output high, the buzzer will sound.
Code
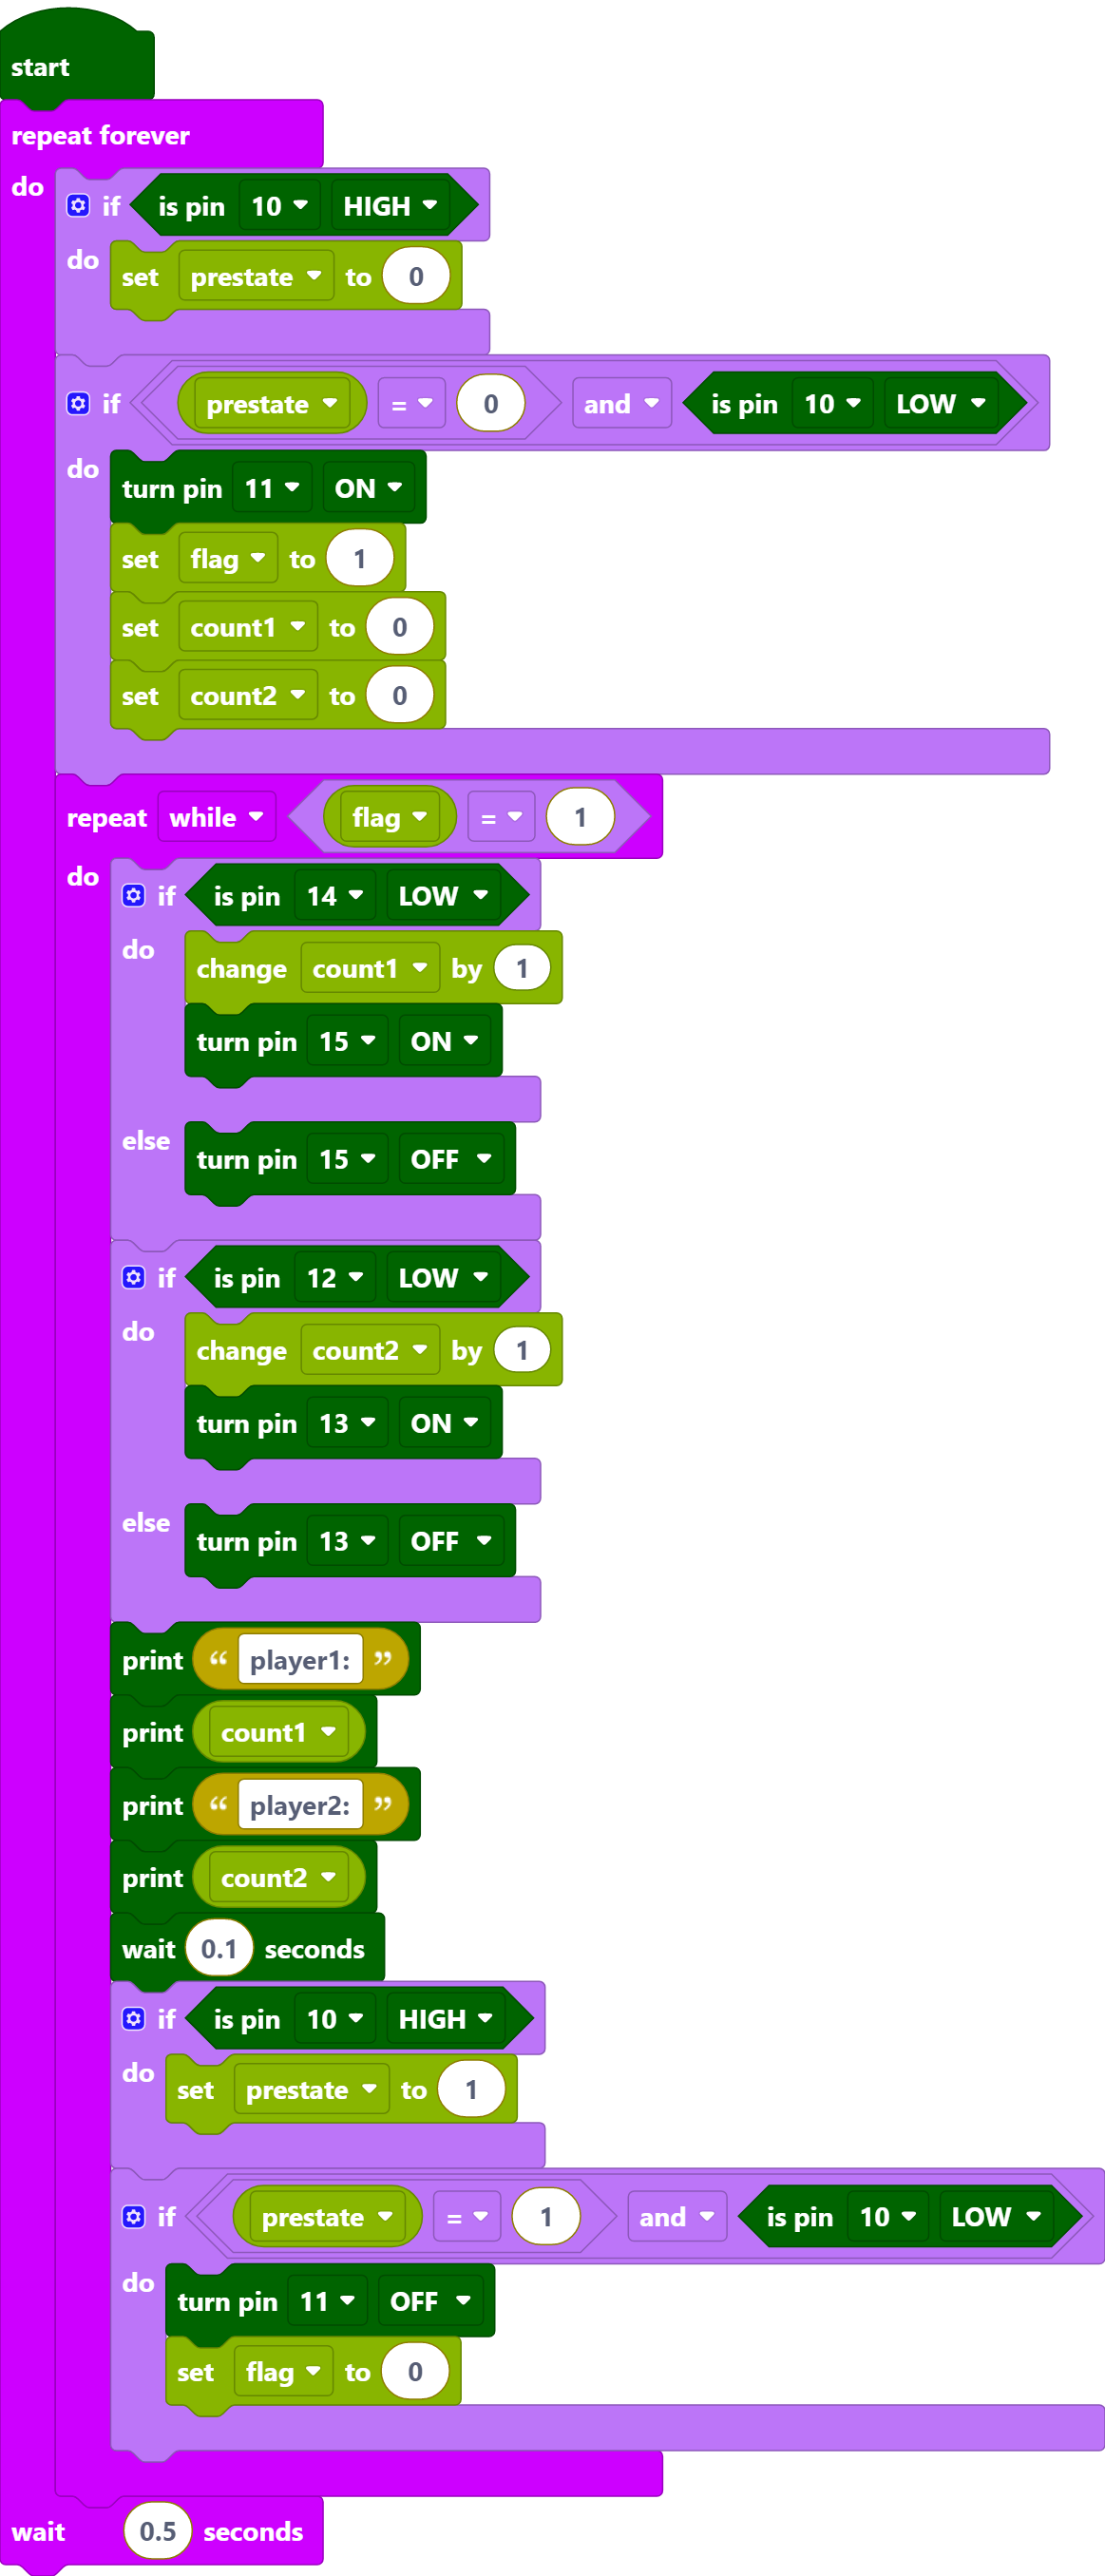
Note
You can refer to the image below to write code by dragging and dropping.
Import
2.13_reaction_game.pngfrom the path ofkepler-kit-main\piper. For detailed tutorials, please refer to Import the Code.
After connecting Pico W, click the Start button and the code starts to run.
Press the referee button and the buzzer starts to sound (continuously), representing the start of the game.
At this point, press the player buttons separately and quickly, and the corresponding LEDs will light up.
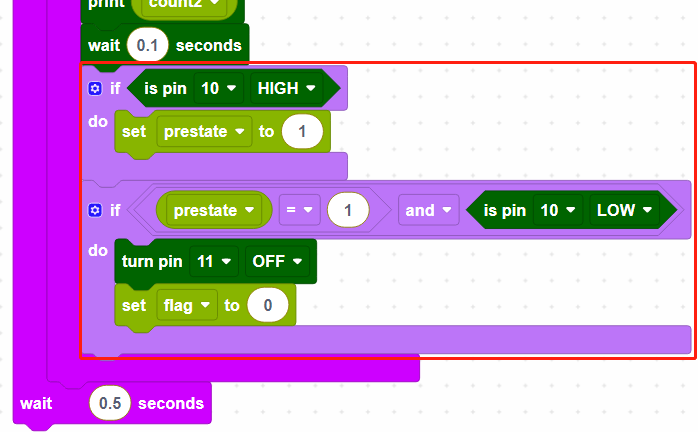
When the referee button is pressed again, the buzzer stops, which means the game is over.
Click CONSOLE at this point to see who presses it more times.
How it Works?
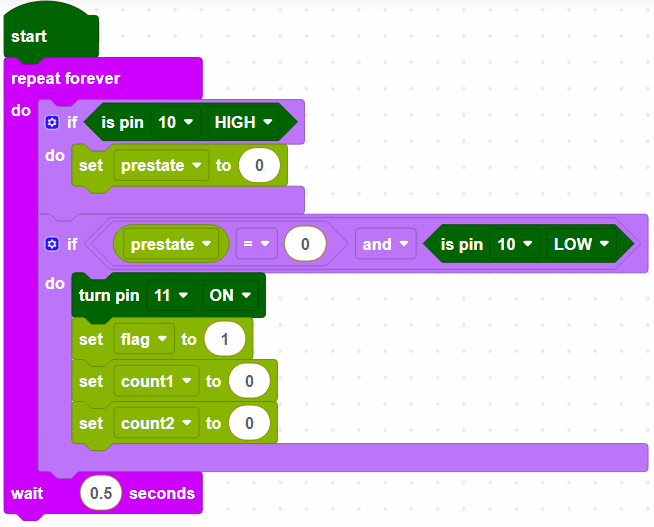
GP10 is the referee button, when the referee button is not pressed it is high, the game has not started yet. When GP10 is low (referee button pressed), the game starts; set GP11 to high (buzzer), create variables and set initial values.
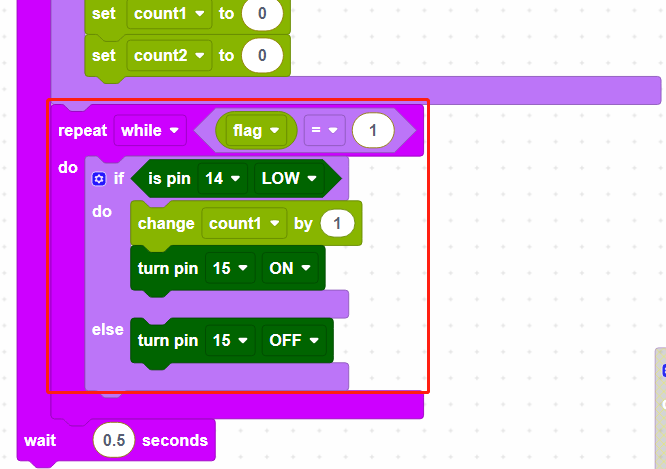
When flag equals to 1 for game start, then read the value of GP14 (player1); if player1 button is pressed, store the number of presses in variable [count1], and make the indicator of GP15 light up.
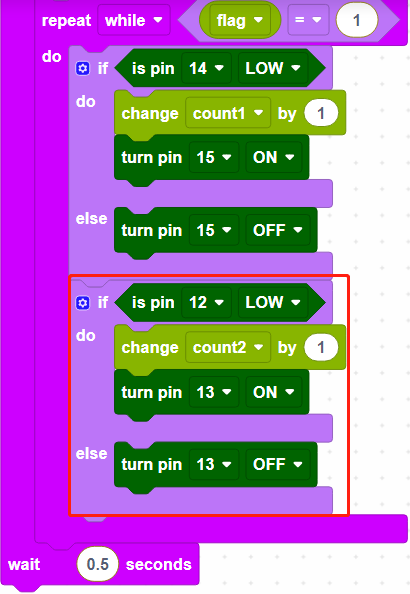
Read the number of presses of GP12(player2) in the same way.
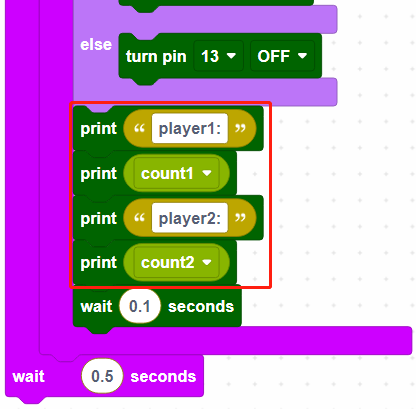
Print the number of presses for player1 and player2 respectively.
When the referee button is pressed again, the buzzer stops working and the game ends.