1.1 Set up the Pico
First, visit Piper Make through the following link:
In the pop-up page, if you don’t need to subscribe for more tutorials, you can just click Let’s Go! or the x button.
Note
If you see a different pop-up window, your browser version is not supported, please update your browser and try again.
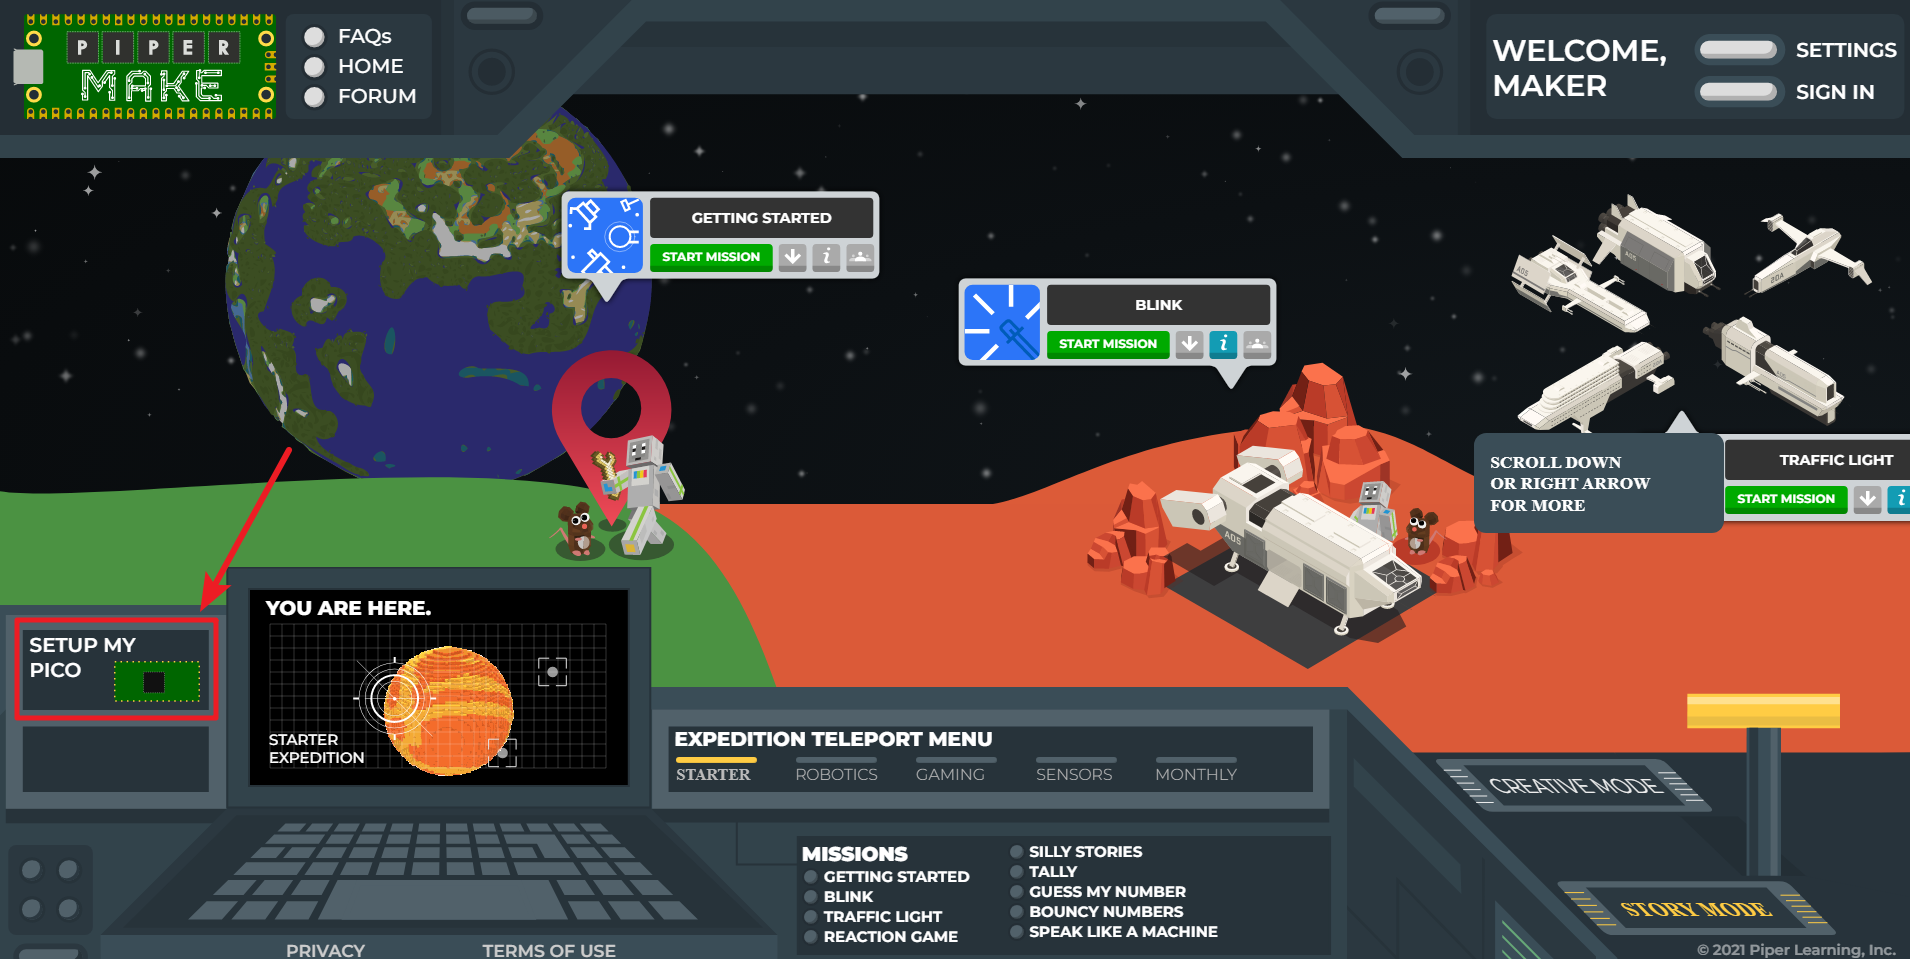
Find the SETUP MY PICO button, click it, and follow the prompts to configure it.

Click Next to start configuring your Pico W, even if you have set it up before, these are the same steps you will use to update your Pico W firmware.

In this step, you need to make sure that your Pico W is unplugged from your computer, as it needs to be plugged in in a specific way in the next step. Make sure your cable can handle power and data, as many micro USB cables only have power.

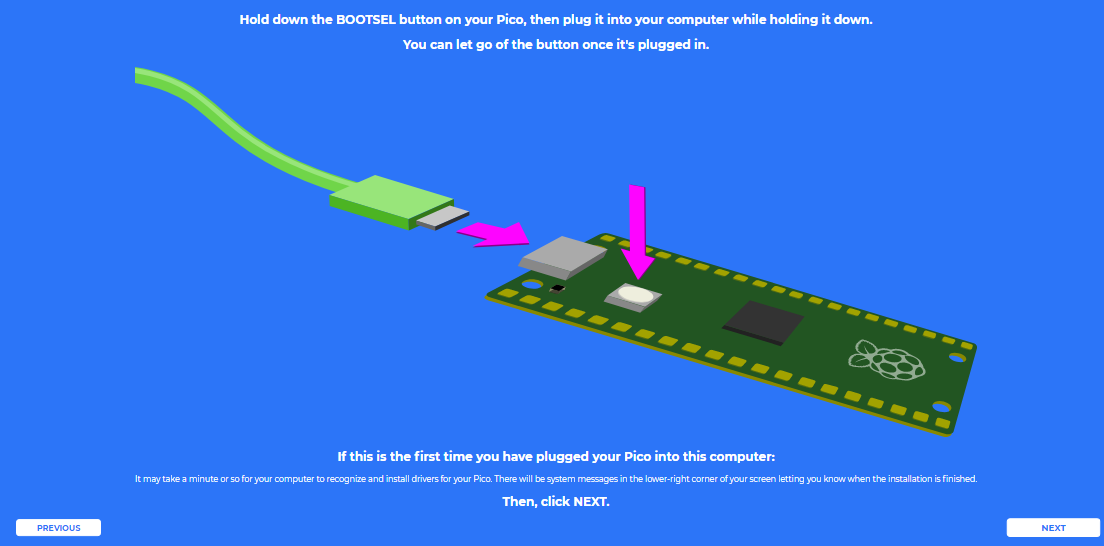
Now, press and hold the RST (white) button on the Pico W and plug the Pico W into your computer. Once plugged in, you can release the button.

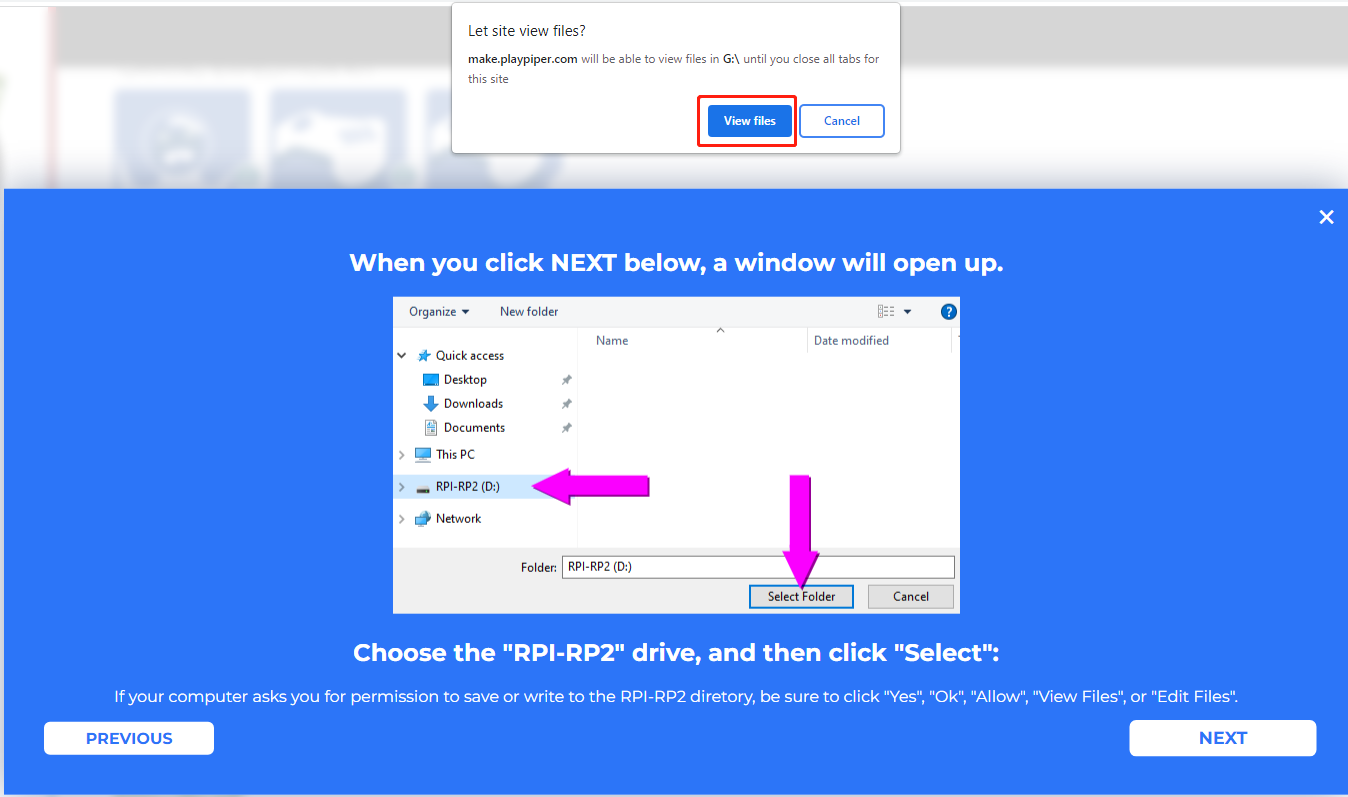
Your Pico W will appear as a USB drive, click Next after that select RPI-RP2 drive.
Note
After select RPI-RP2 drive, there will be a pop up window at the top that you need to allow the web page to view files.

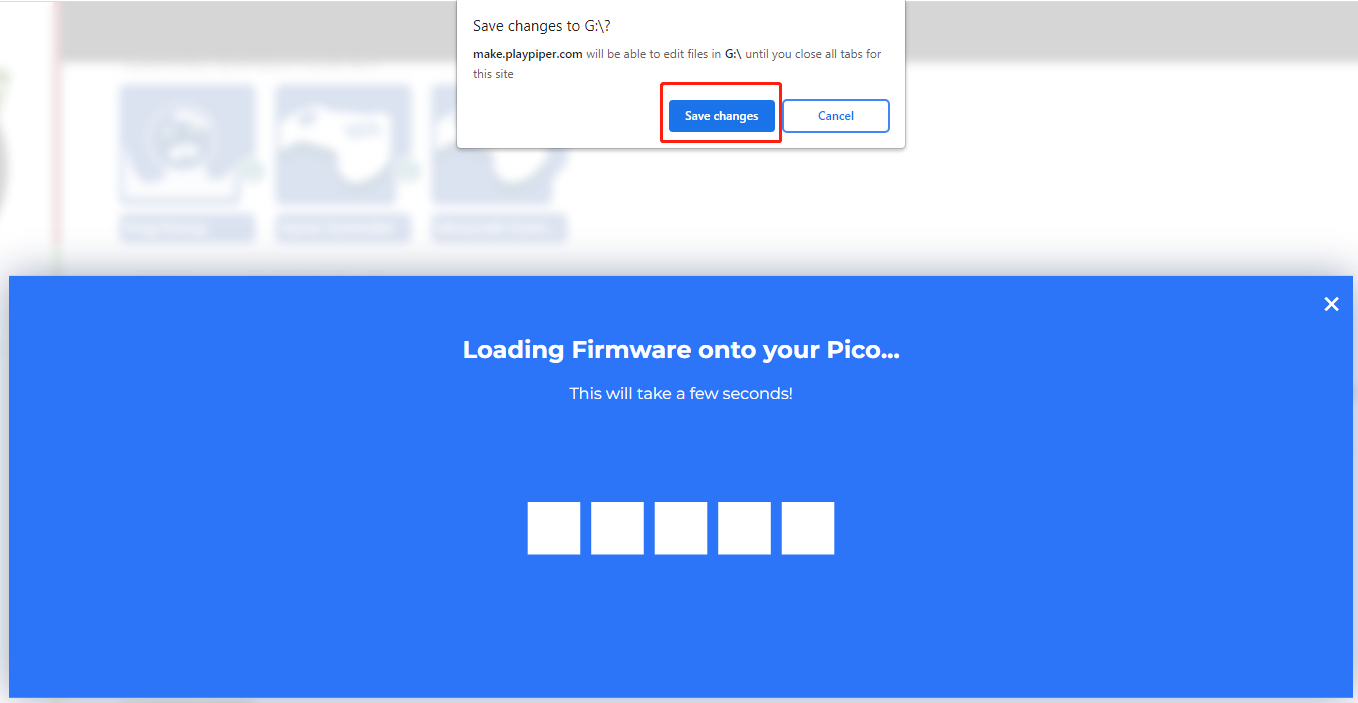
Now Piper Make will load the firmware to your Pico W, again you need to allow save changes to the hard drive where the Pico W is located.

When this prompt appears, it means your Pico W is set up and you can start using it.

